
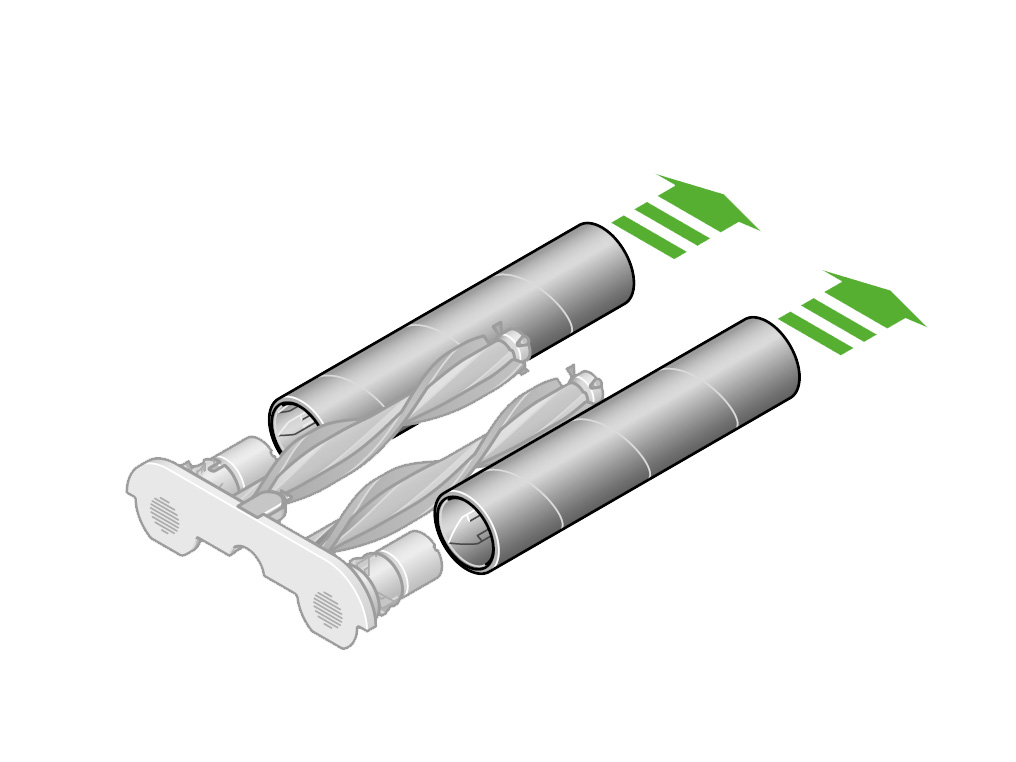
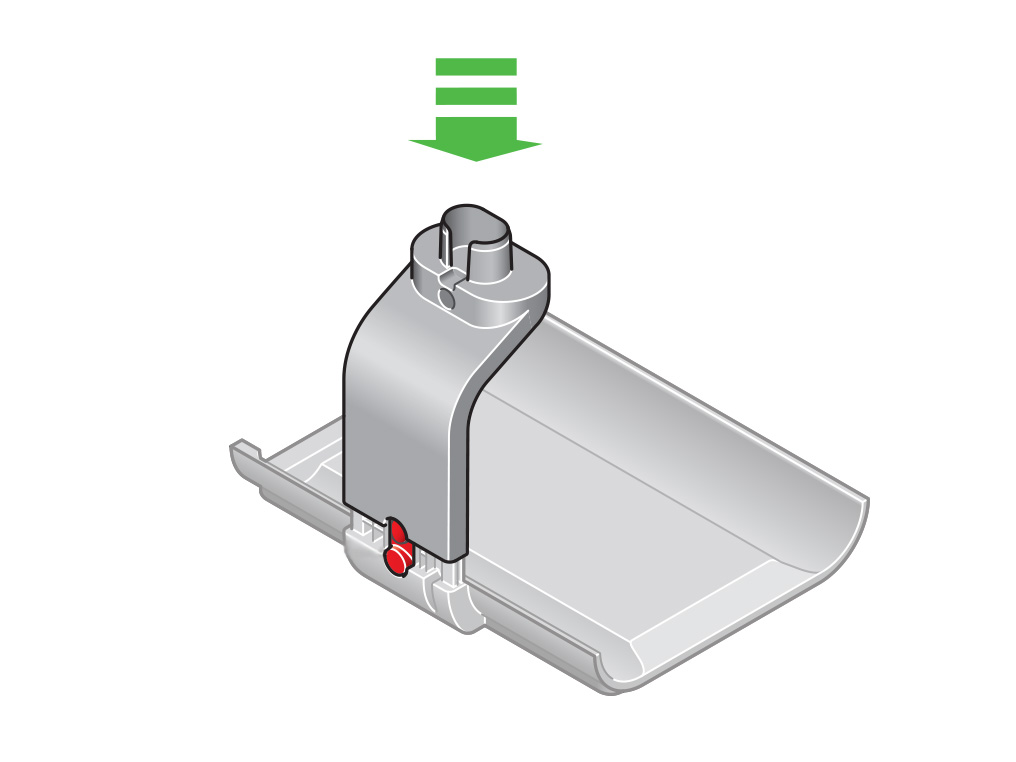
Remove the debris brush bars
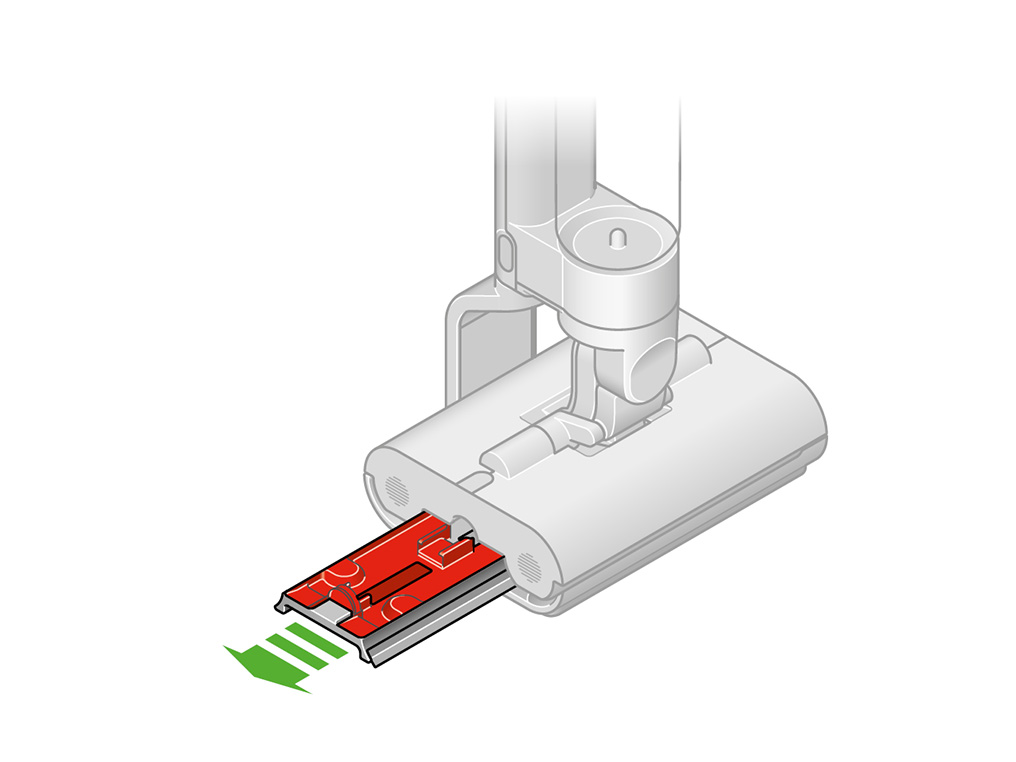
Press the red release catch and slide out the end cap with the rollers and debris brush bars.
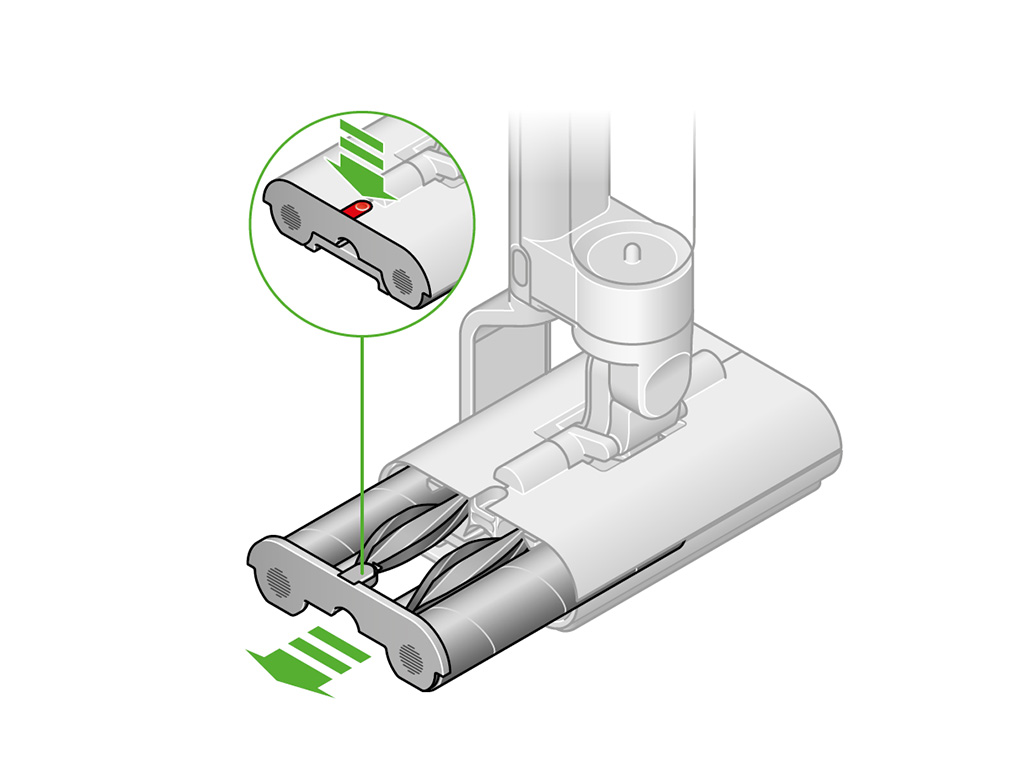
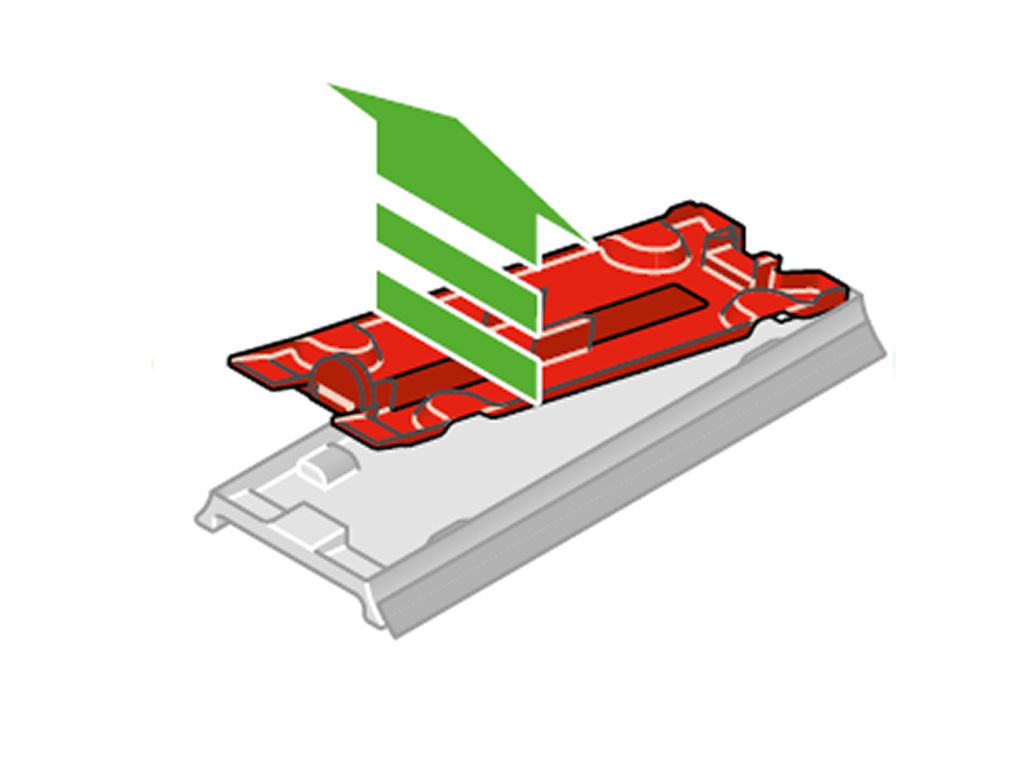
Rotate and remove the debris brush bars from the end cap.

Remove debris
Use scissors to cut away any hair wrapped around the debris brush bars.

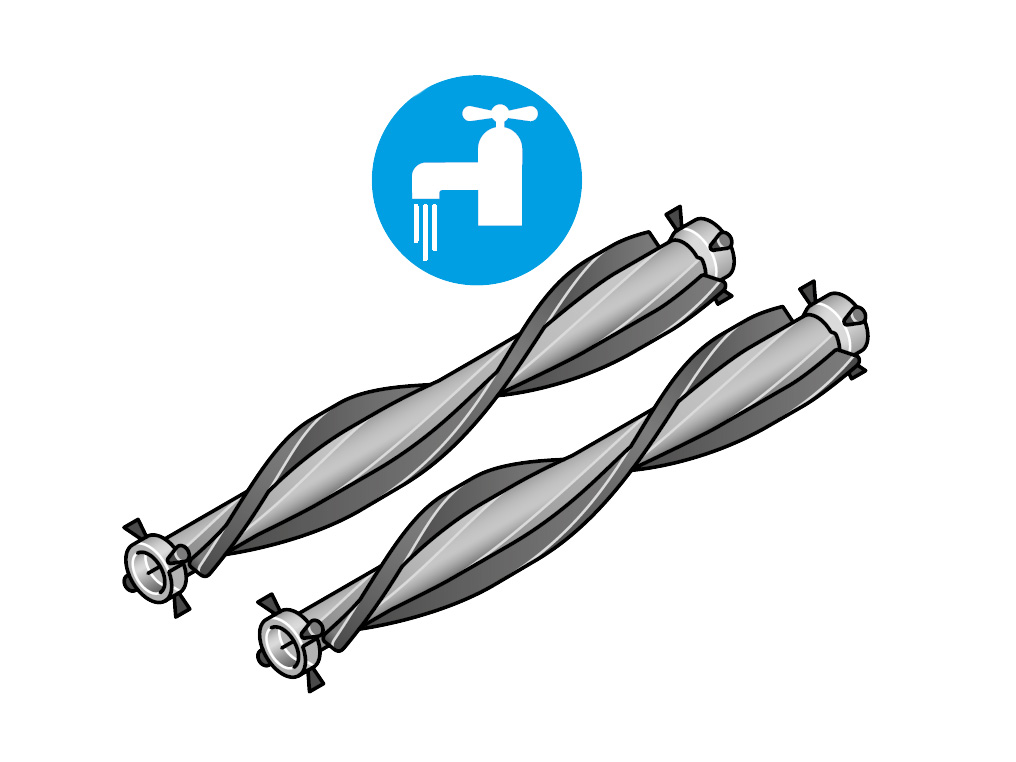
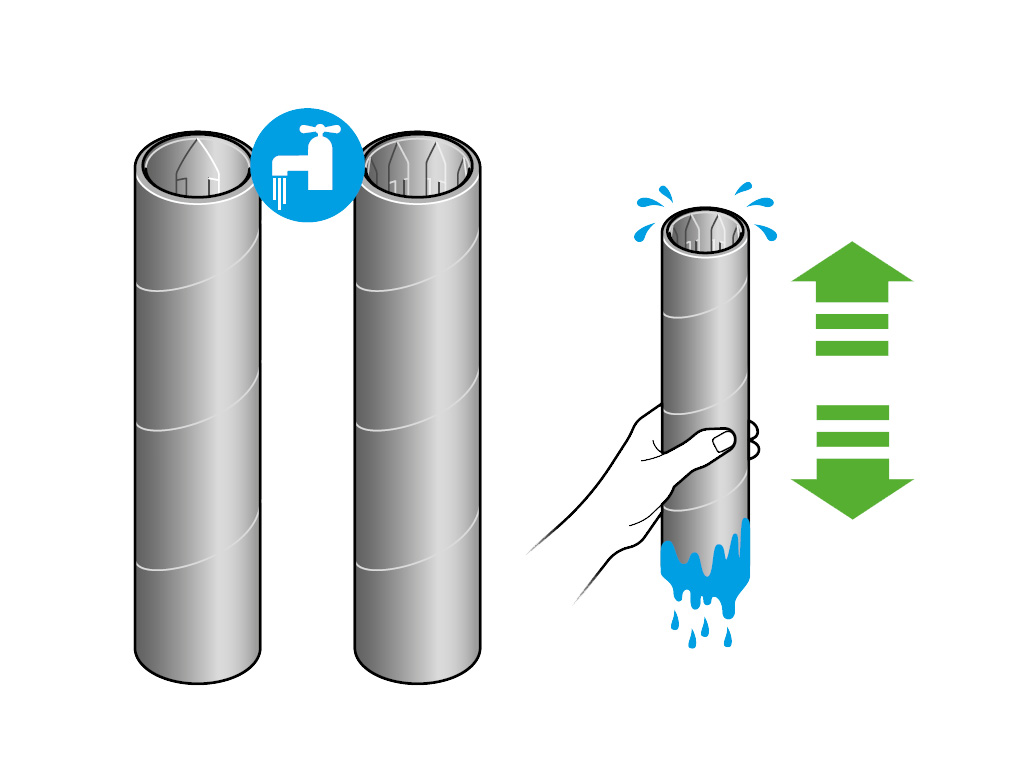
Wash the debris brush bars
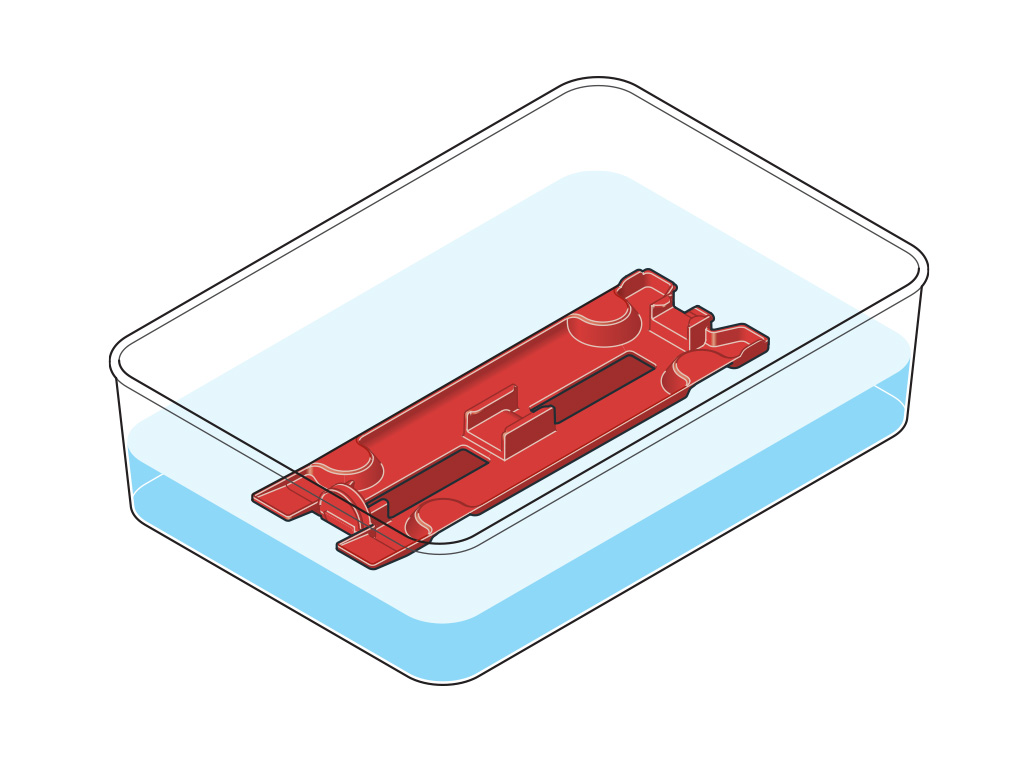
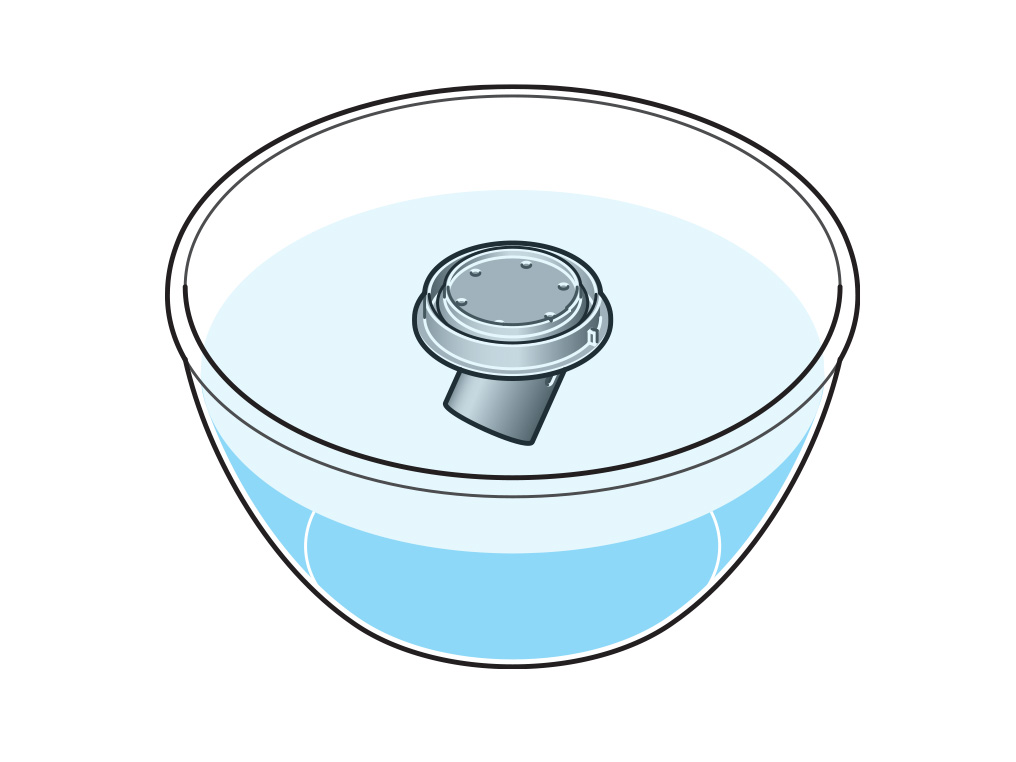
Wash the debris brush bar in a sink, using a cloth, warm water and detergent.
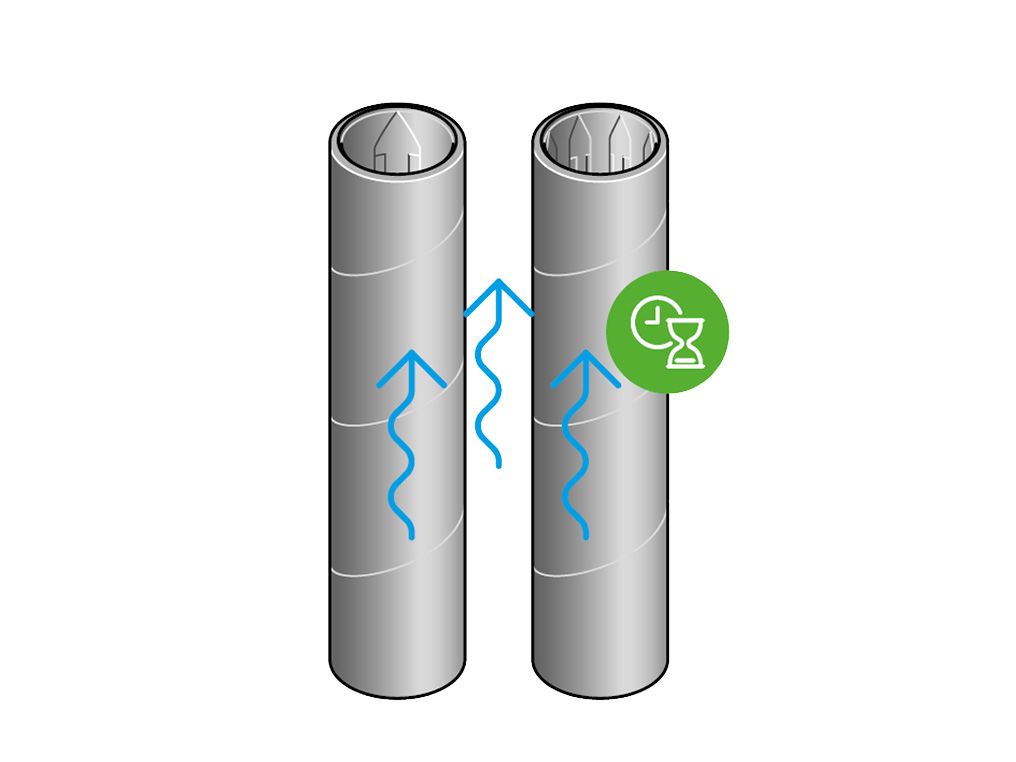
Leave the debris brush bars to dry.
Wipe the underside of the cleaner head with a damp cloth and detergent.

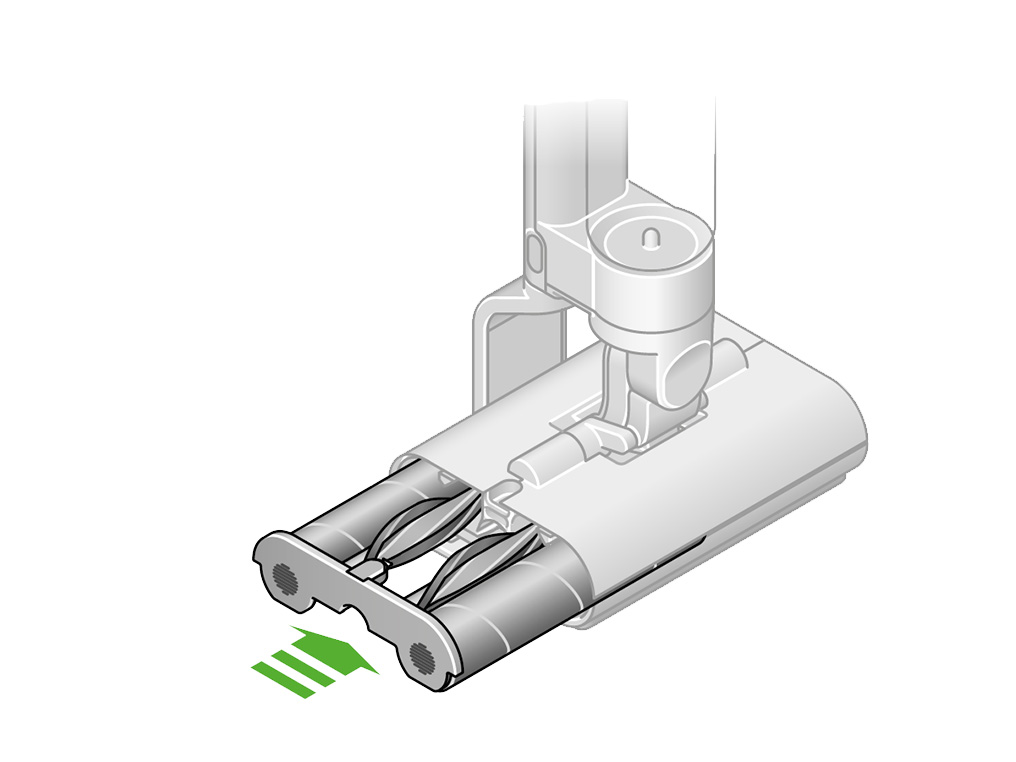
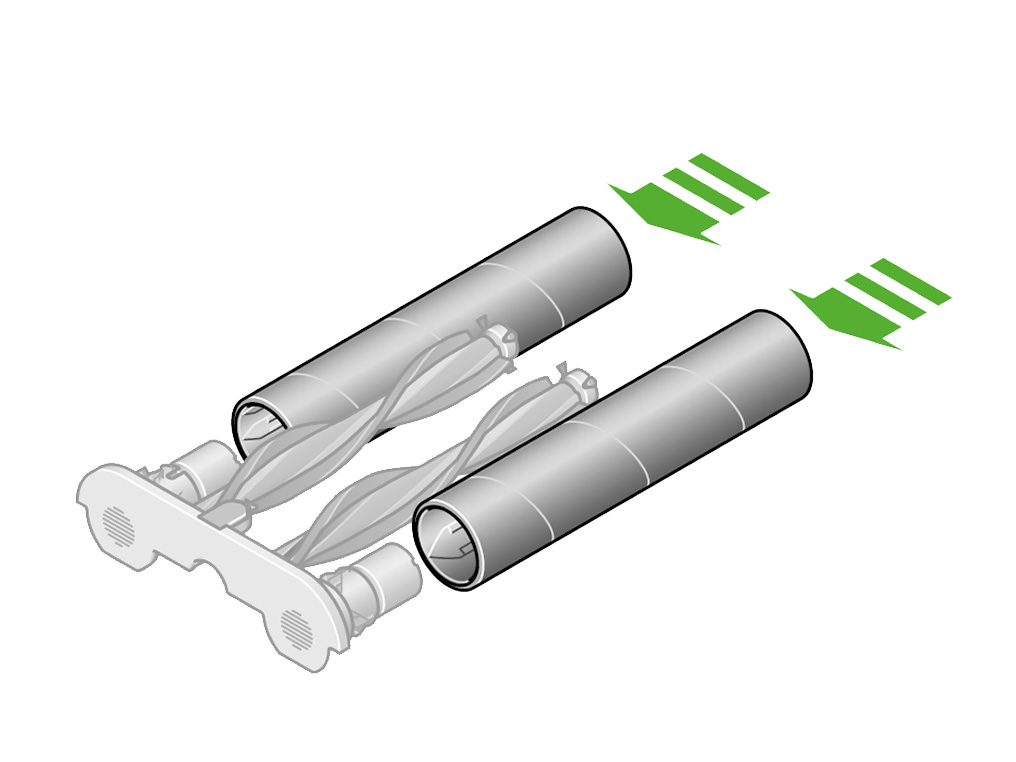
Reattach the debris brush bars
Reattach the debris brush bars to the end cap.
Slide the debris brush bars and end cap back into the cleaner head until the end cap clicks.
Only use cleaning solutions and formulations recommended by DYSON. Do not use bleach or undiluted solution.
Please select the appropriate option


Low battery
Fully charge the machine.
The machine can be charged by either attaching the battery to the machine or by charging the battery separately.
Please follow the next step
Please ensure the battery is charged to 100% after every use.
Charge the machine
Place the machine on charge for up to 4.5 hours.
The blue LED will flash on and off during charging.

When the battery is charged, the LED will light for 5 seconds, then go out.

The screen will show the battery as fully charged.

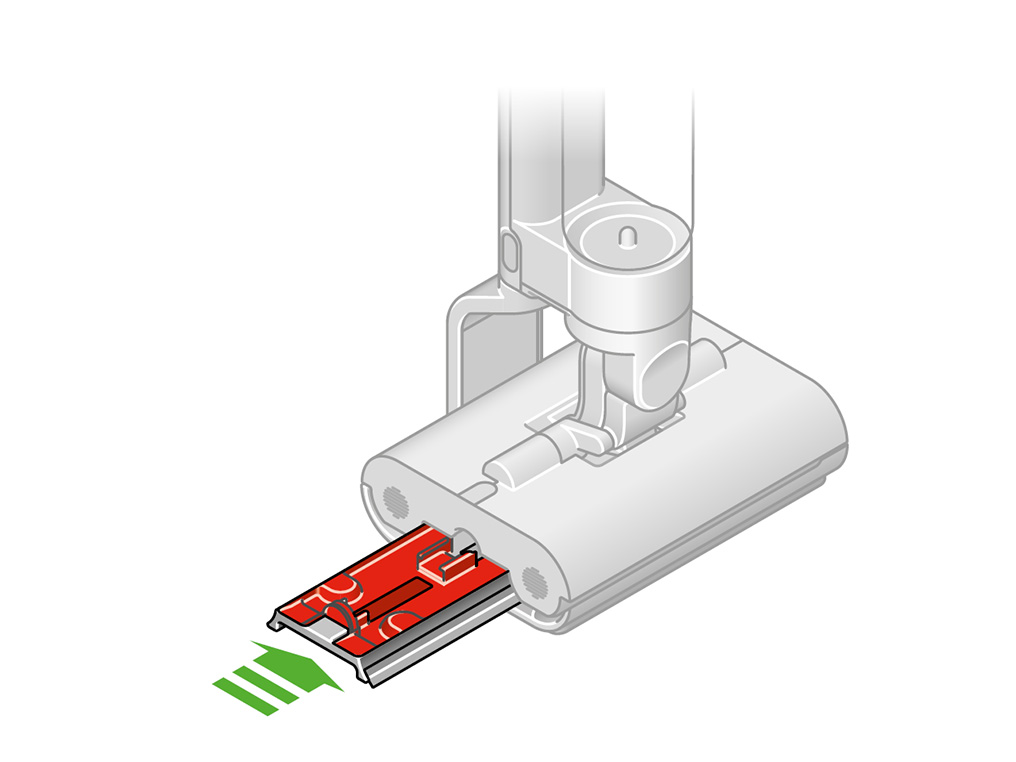
Check the cleaner head
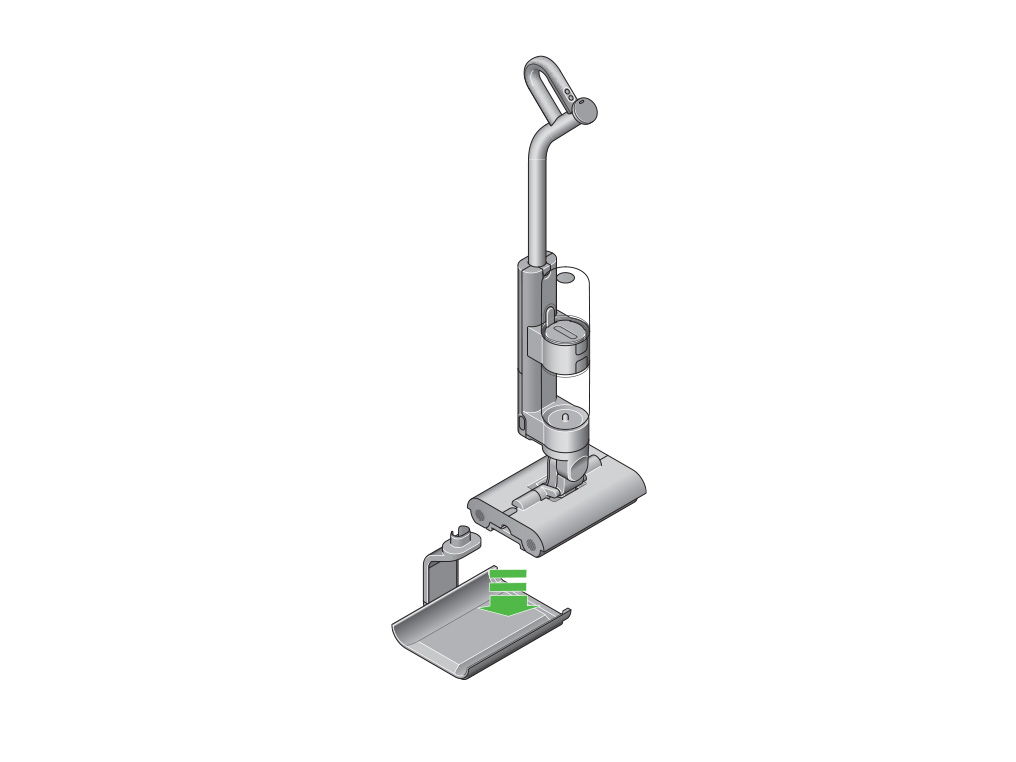
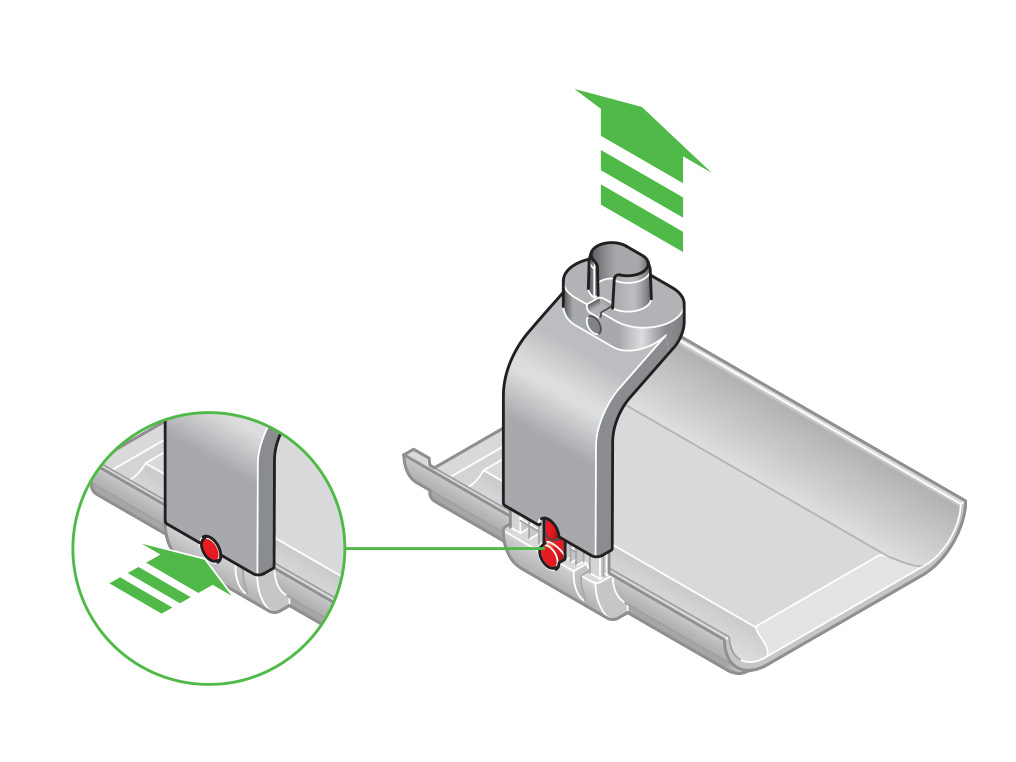
Slide the tray out from the cleaner head.
Empty the contents of the tray into a bin.
Gently tap the tray over the bin to remove any excess debris.
Press and lift the mesh off of the tray.
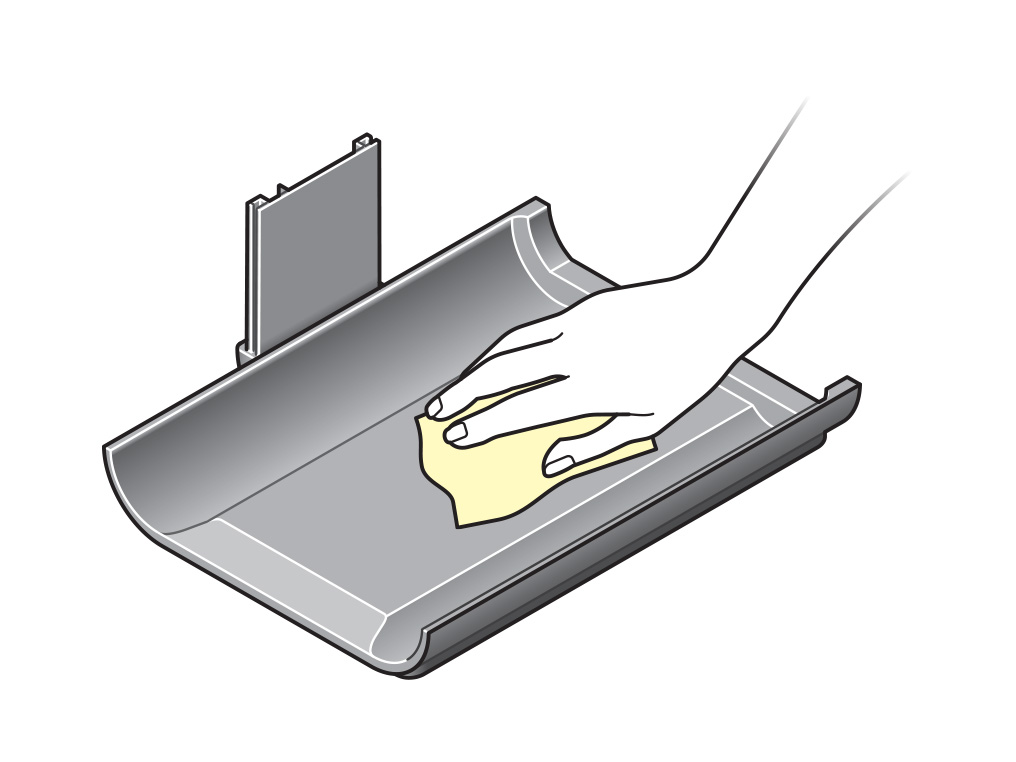
Wash the tray and the mesh with clean warm water and wipe to remove remaining dirt and debris.
Clean the rollers
Press the red release catch and pull the rollers out of the cleaner head.
Remove the rollers and the debris brushbars from the end cap.
Carefully cut away any hair from the debris brushbars using scissors.
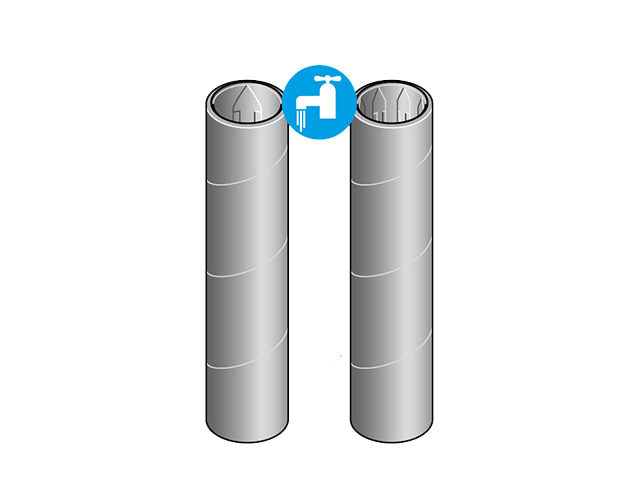
Wash the rollers and debris brushbars with clean warm water.
Squeeze the rollers to remove any excess water.
Dry the rollers vertically in a well ventilated and dry environment for a minimum of 24 hours until completely dry.
Wipe the underside of the cleanerhead with a damp cloth.
Please select the appropriate option
Reassemble the cleaner head
Slide the rollers and the debris brush bars back onto the end cap.
Slide the brush bars and end cap back into the cleaner head.
Reattach the mesh to the tray.
Slide the tray back into the cleaner head.
Switch on and run the machine.
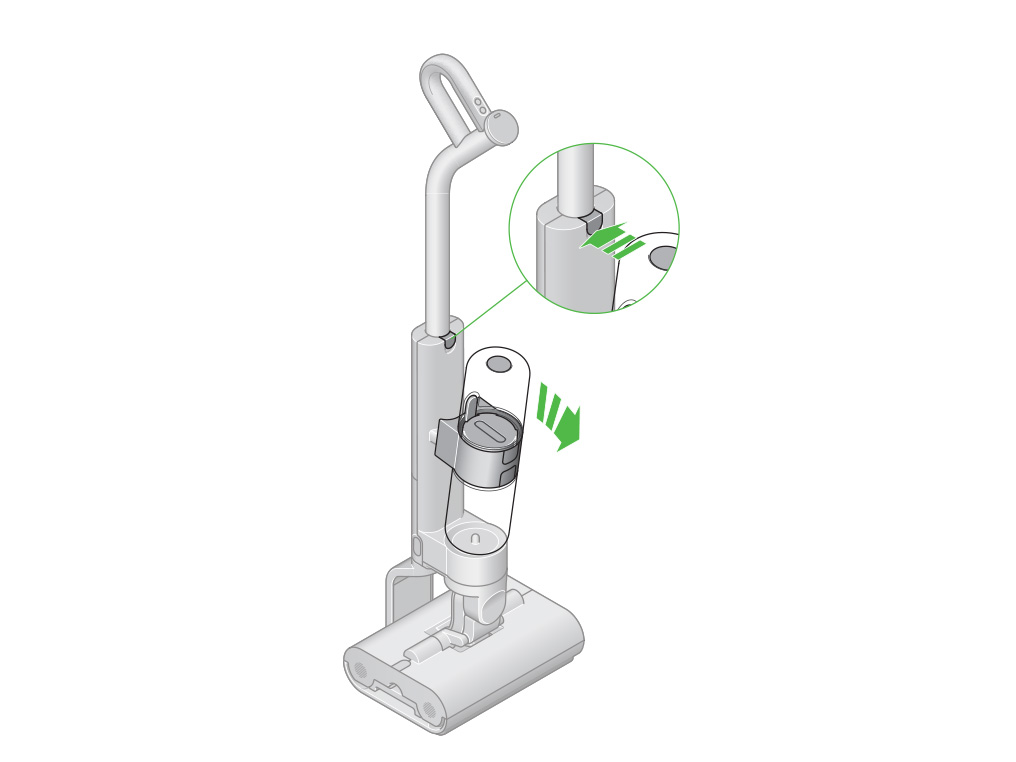
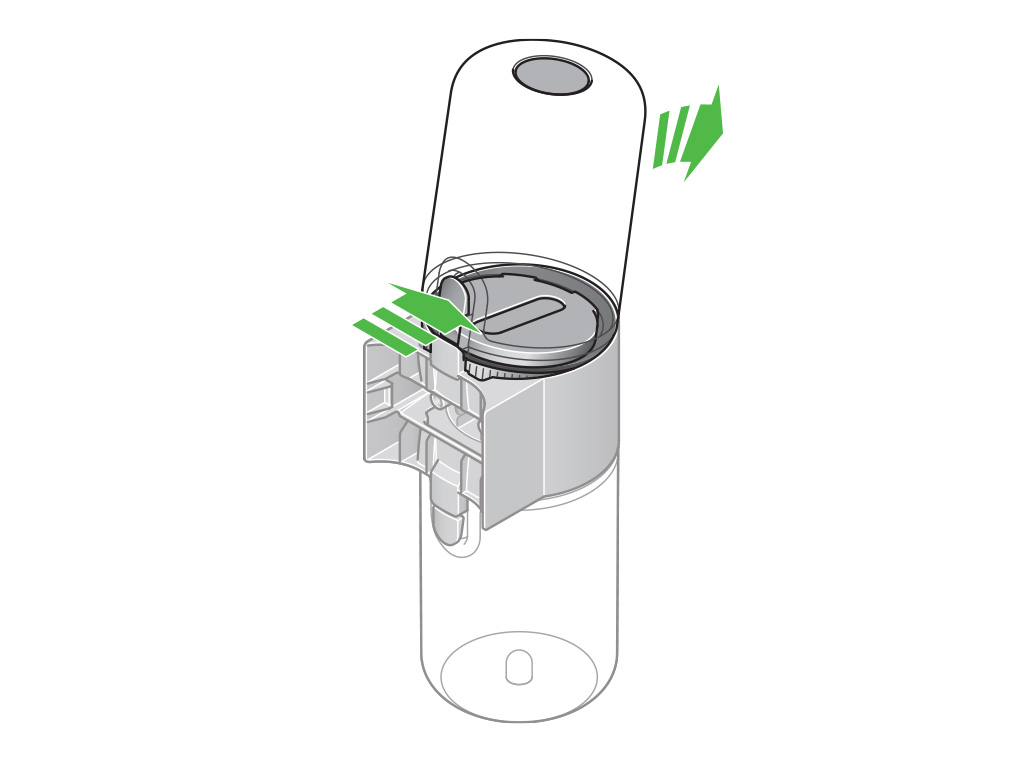
Remove the dirty water tank
Press the red release catch and remove the tanks from the machine.
Press the red release catch and remove the dirty water tank from the tank collar.
Empty the Dirty water tank
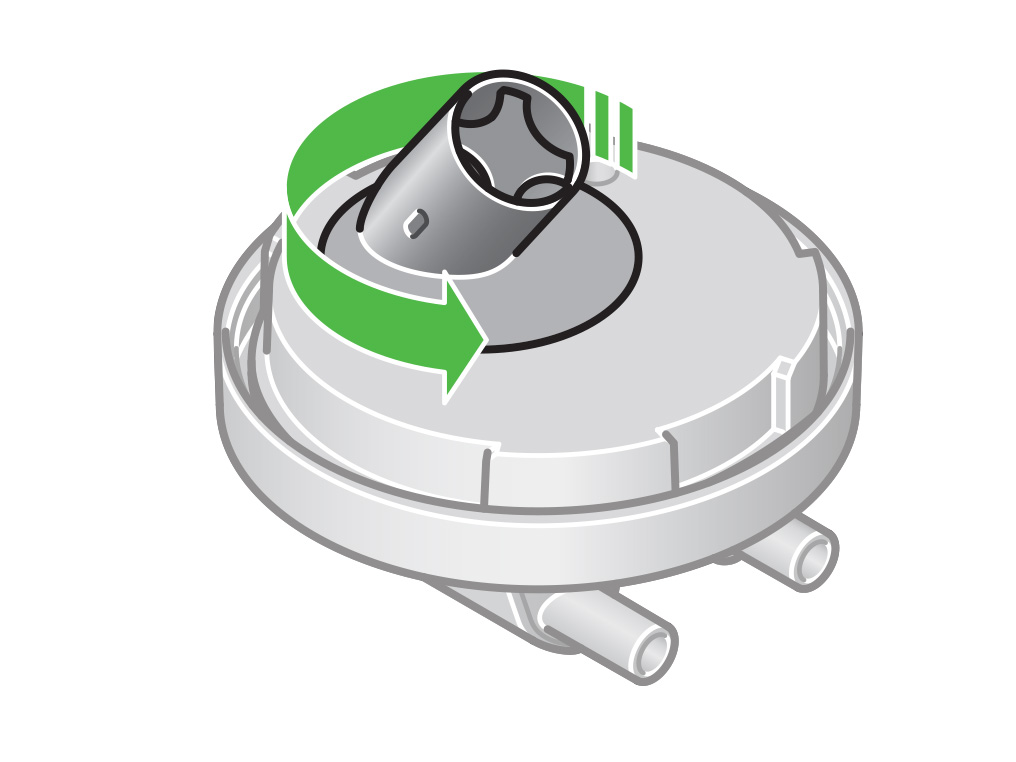
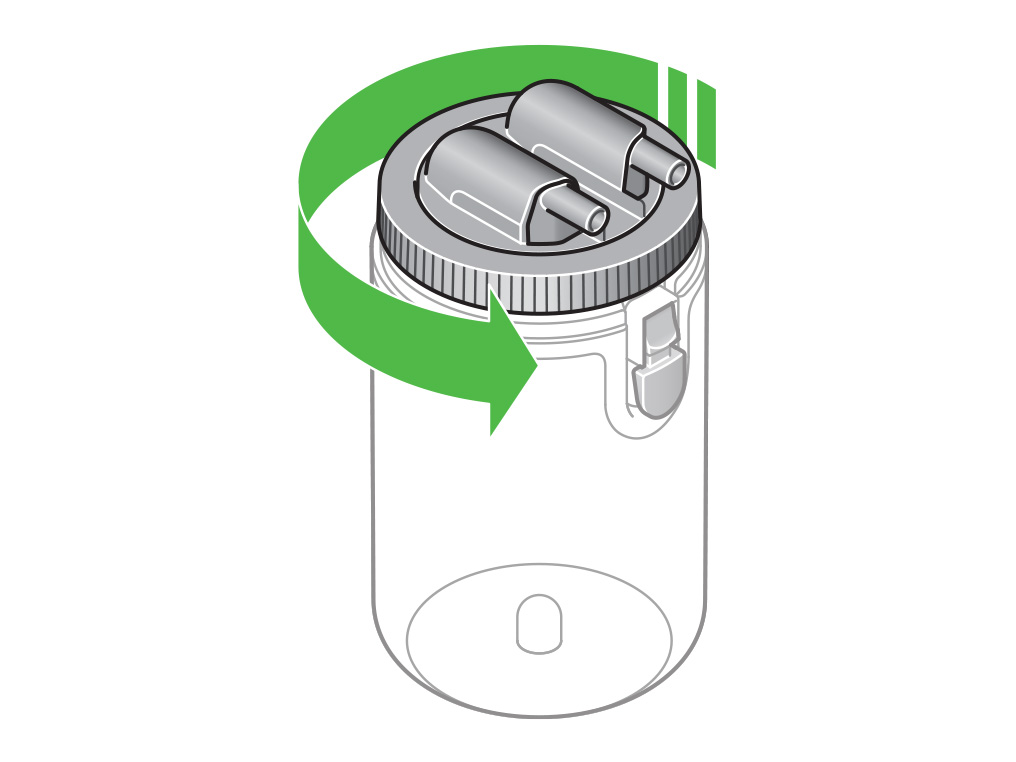
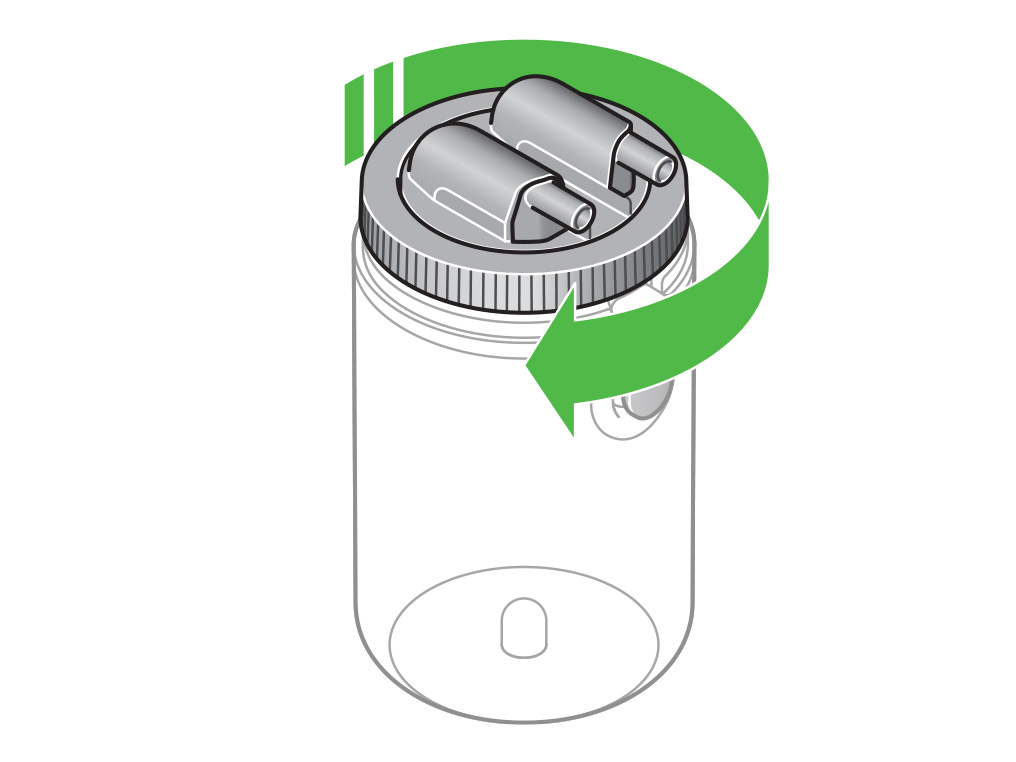
Turn the lid anti-clockwise to open the dirty water tank and empty the dirty water into the sink.

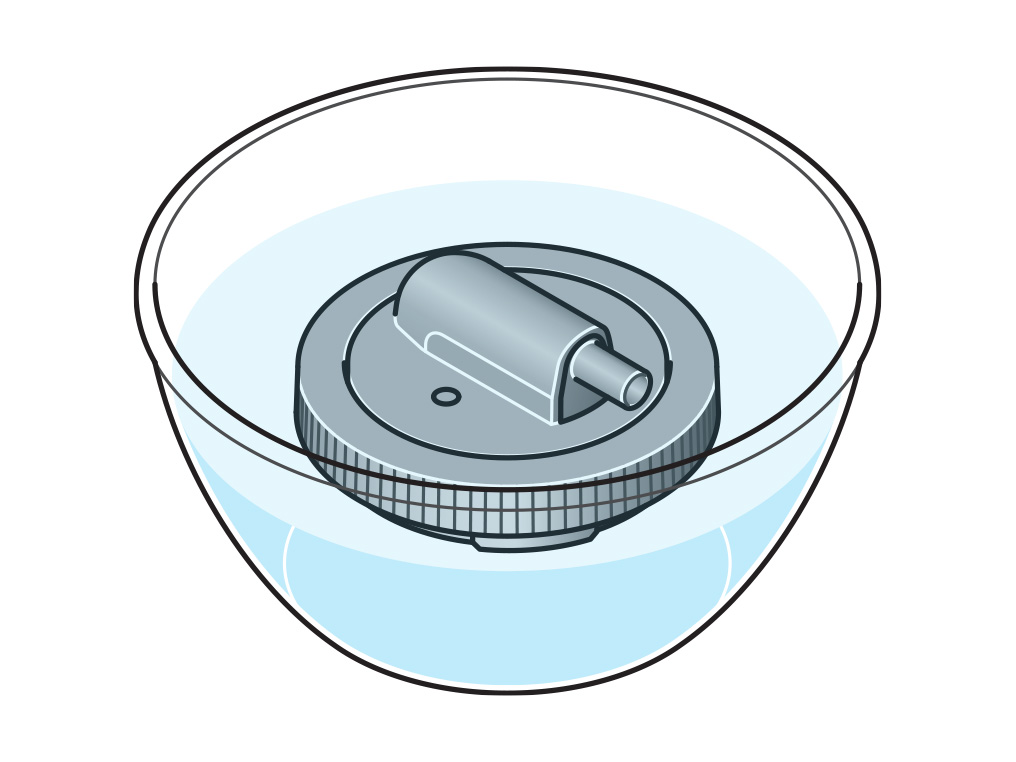
Turn the float anti-clockwise and remove it from the dirty water tank lid.
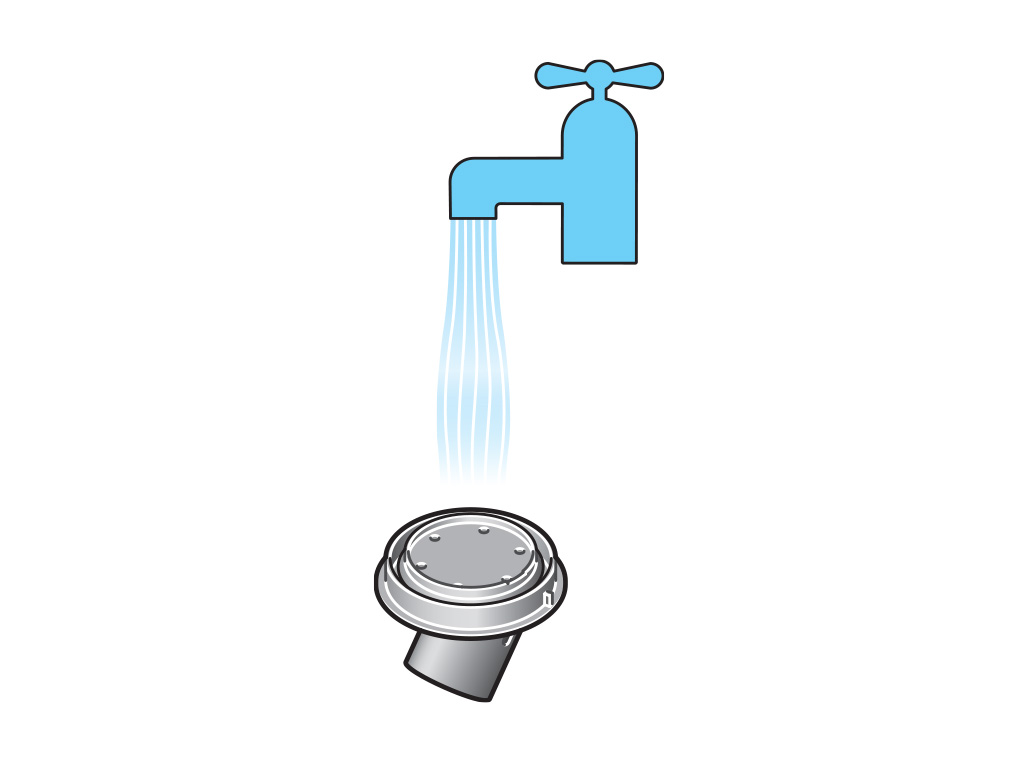
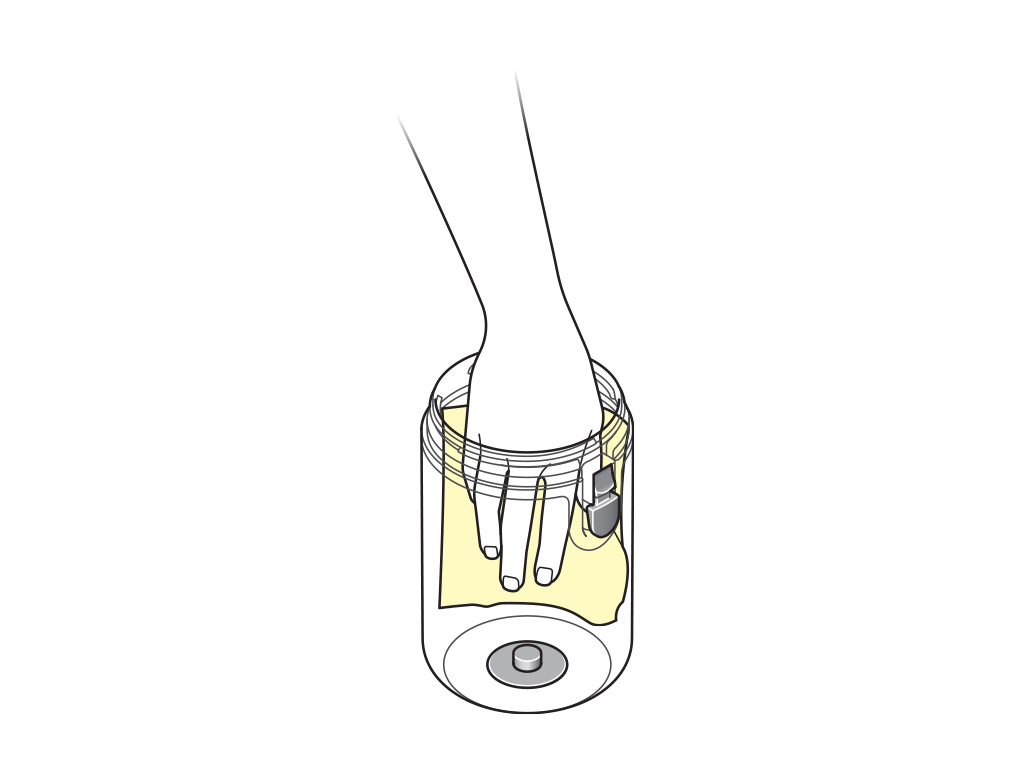
Wash the float using warm water, detergent and a cloth.
Run clean water onto the lid to remove debris from the filter.
Reassemble the dirty water tank
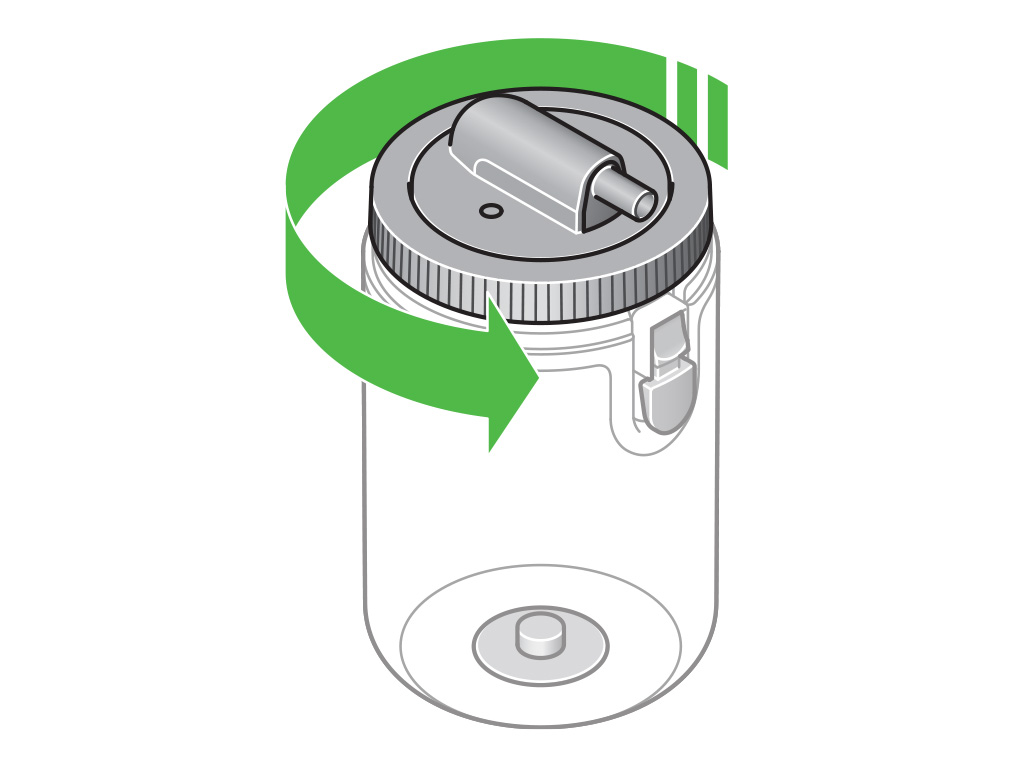
Reattach the float to the dirty water tank lid and turn clockwise to secure.
Securely screw the lid back onto the tank by twisting it clockwise and reattach the tank to the tank collar, and then the machine.

Charge the machine
Connect the charger by either by placing the machine in the dock, or by charging the battery separately.
The blue LED will flash on and off during charging.

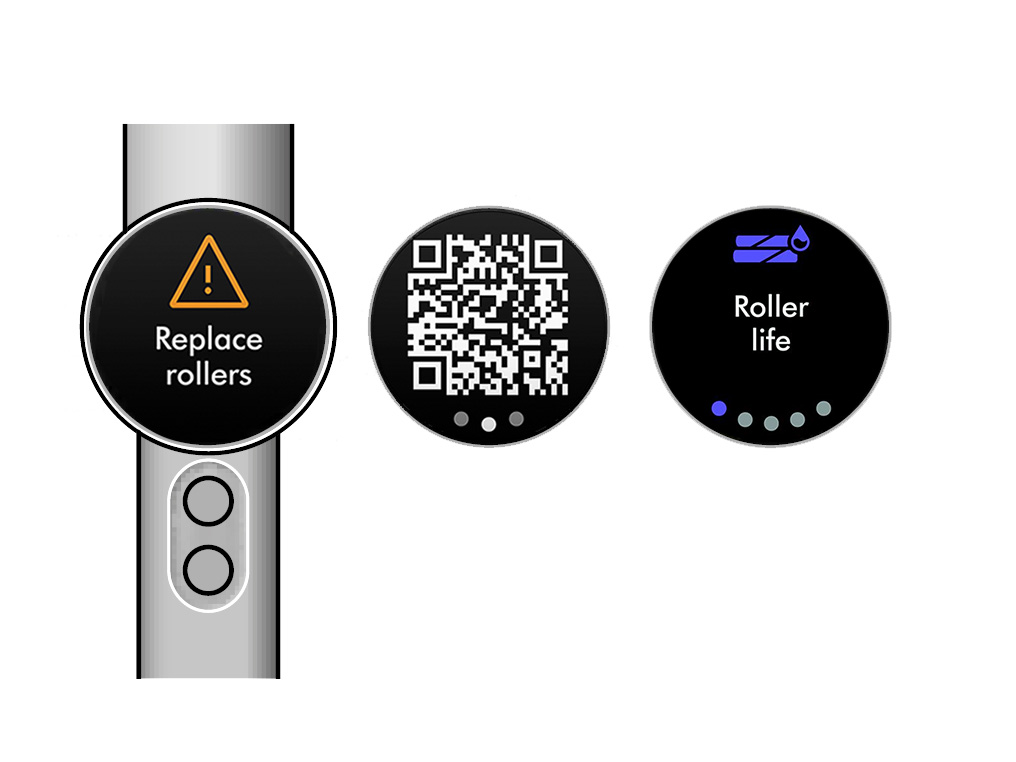
When the rollers need replacing, an alert will appear on the screen.
Please select the appropriate option
Remove the rollers
Press the red release catch and pull the rollers out of the cleaner head.
Remove the rollers from the end cap and dispose of them in accordance with local regulations.
Fit the replacement rollers on the end cap and slide the rollers and end cap back into the machine.
Reset the roller life by following the instructions on the UI screen.
Check the cleaner head
Slide the tray out from the cleaner head.
Empty the contents of the tray into a bin.
Gently tap the tray over the bin to remove any excess debris.
Press and lift the mesh off of the tray.
Wash the tray and the mesh with clean warm water and wipe to remove remaining dirt and debris.
Clean the rollers
Press the red release catch and pull the rollers out of the cleaner head.
Remove the rollers and the debris brushbars from the end cap.
Carefully cut away any hair from the debris brushbars using scissors.
Wash the rollers and debris brushbars with clean warm water.
Squeeze the rollers to remove any excess water.
Dry the rollers vertically in a well ventilated and dry environment for a minimum of 24 hours until completely dry.
Wipe the underside of the cleanerhead with a damp cloth.
Please select the appropriate option
Check the cleaner head
Slide the tray out from the cleaner head.
Empty the contents of the tray into a bin.
Gently tap the tray over the bin to remove any excess debris.
Press and lift the mesh off of the tray.
Wash the tray and the mesh with clean warm water and wipe to remove remaining dirt and debris.
Clean the rollers
Press the red release catch and pull the rollers out of the cleaner head.
Remove the rollers and the debris brushbars from the end cap.
Carefully cut away any hair from the debris brushbars using scissors.
Wash the rollers and debris brushbars with clean warm water.
Squeeze the rollers to remove any excess water.
Dry the rollers vertically in a well ventilated and dry environment for a minimum of 24 hours until completely dry.
Wipe the underside of the cleanerhead with a damp cloth.
Fill the clean water tank
Press the red release catch and remove the tanks from the machine. Press the blue release catch and remove the clean water tank from the tank collar.
Open the clean water tank by twisting the lid anti-clockwise and fill with clean water to the MAX line on the side of the tank.
Please note: Not all clean water tanks will have the MAX line on the side. Fill to the under-edge line.

Securely screw the lid back onto the tank by twisting it clockwise and reattach the tank to the tank collar, and then the machine.
Allow the rollers to fully hydrate
On first use, the new rollers will take approximately 5 minutes to reach full and even hydration.
Check the cleaner head
Slide the tray out from the cleaner head.
Empty the contents of the tray into a bin.
Gently tap the tray over the bin to remove any excess debris.
Press and lift the mesh off of the tray.
Wash the tray and the mesh with clean warm water and wipe to remove remaining dirt and debris.
Clean the rollers
Press the red release catch and pull the rollers out of the cleaner head.
Remove the rollers and the debris brushbars from the end cap.
Carefully cut away any hair from the debris brushbars using scissors.
Wash the rollers and debris brushbars with clean warm water.
Squeeze the rollers to remove any excess water.
Dry the rollers vertically in a well ventilated and dry environment for a minimum of 24 hours until completely dry.
Wipe the underside of the cleanerhead with a damp cloth.
Hydration mode
Your machine has three different hydration modes:
- Low
- Med
- High
If the rollers are too dry, try increasing the hydration mode.
Max mode
Additionally, you can activate Max mode by holding down the Max mode button on the machine. This will deliver a burst of water to the rollers.
Max mode will be de-activated when the Max mode button is released, and the machine will return to the last used hydration mode.
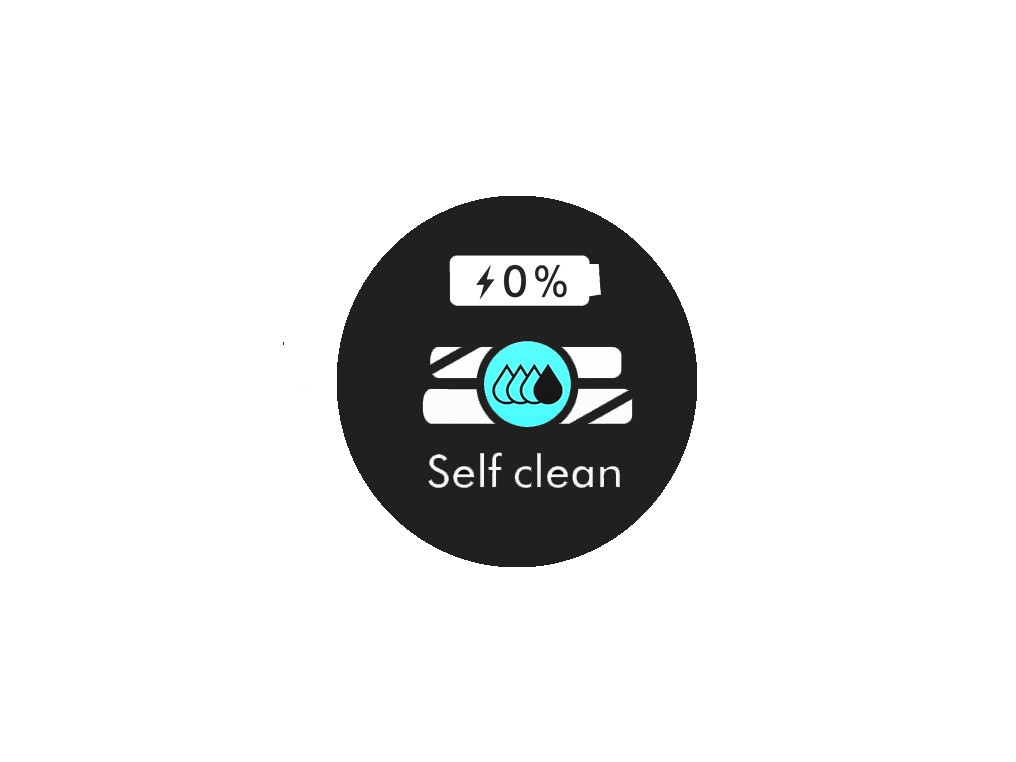
Self clean
If the rollers remain dry, there may be an obstruction within the machine.
Complete the following steps to run a self clean cycle:
Press the red release catch and remove the tanks from the machine.
Press the blue release catch and remove the clean water tank from the tank collar.
Open the clean water tank by twisting the lid anti-clockwise.
Fill with clean water to the MAX line on the side of the tank and 20 ml of Dyson 01 hard floor solution.
Please note: Not all clean water tanks will have the MAX line on the side. Fill to the under-edge line.
Securely screw the lid back onto the tank by twisting it clockwise and reattach the tank to the tank collar.
Press the red release catch and remove the dirty water tank from the tank collar.
Twist the lid anti-clockwise to remove and empty the dirty water into the sink.
Securely screw the lid back onto the tank by twisting it clockwise and reattach the tank to the tank collar, and then the machine.
Plug the machine into the dock and press the mode button to activate the self clean cycle.
Auto priming
When the machine is first switched on, there will be a burst of water to prime the rollers.
The hydration mode will then return to the last selected level.
Hydration mode
Your machine has three different hydration modes:
- Low
- Med
- High
If the rollers are too wet, try decreasing the hydration mode.
Self clean cycle
Press the red release catch and remove the tanks from the machine.
Press the blue release catch and remove the clean water tank from the tank collar.
Open the clean water tank by twisting the lid anti-clockwise.
Fill with clean water to the MAX line on the side of the tank and 20 ml of Dyson 01 hard floor solution.
Please note: Not all clean water tanks will have the MAX line on the side. Fill to the under-edge line.
Securely screw the lid back onto the tank by twisting it clockwise and reattach the tank to the tank collar.
Press the red release catch and remove the dirty water tank from the tank collar.
Twist the lid anti-clockwise to remove and empty the dirty water into the sink.
Securely screw the lid back onto the tank by twisting it clockwise and reattach the tank to the tank collar, and then the machine.
Plug the machine into the dock and press the mode button to activate the self clean cycle.
Empty the dirty water tank
Press the red release catch and remove the tanks from the machine.

Press the red release catch and remove the dirty water tank from the tank collar.
Twist the lid anti-clockwise to remove and empty the dirty water into the sink.
Remove the float from the dirty water tank lid by twisting it anti clockwise.
Wash the float using warm water, detergent and a cloth. Run clean water onto the lid to remove debris from the filter.

Reattach the float to the dirty water tank lid and turn clockwise to secure.

Securely screw the lid back onto the tank by twisting it clockwise and reattach the tank to the tank collar, and then the machine.

Charge the machine
This indicates the machine needs charging. Place the machine on charge for up to 4.5 hours.
The blue LED will flash on and off during charging.
When the battery is charged, the LED will light for 5 seconds, then go out.
The screen will show the battery as fully charged.
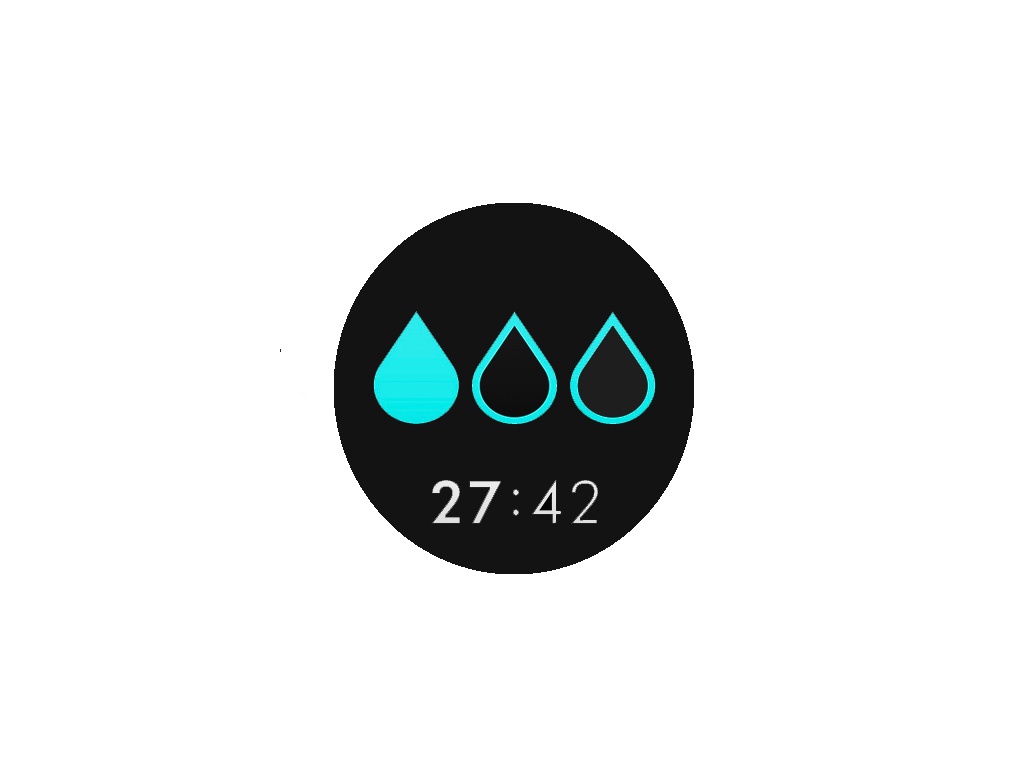
Run time
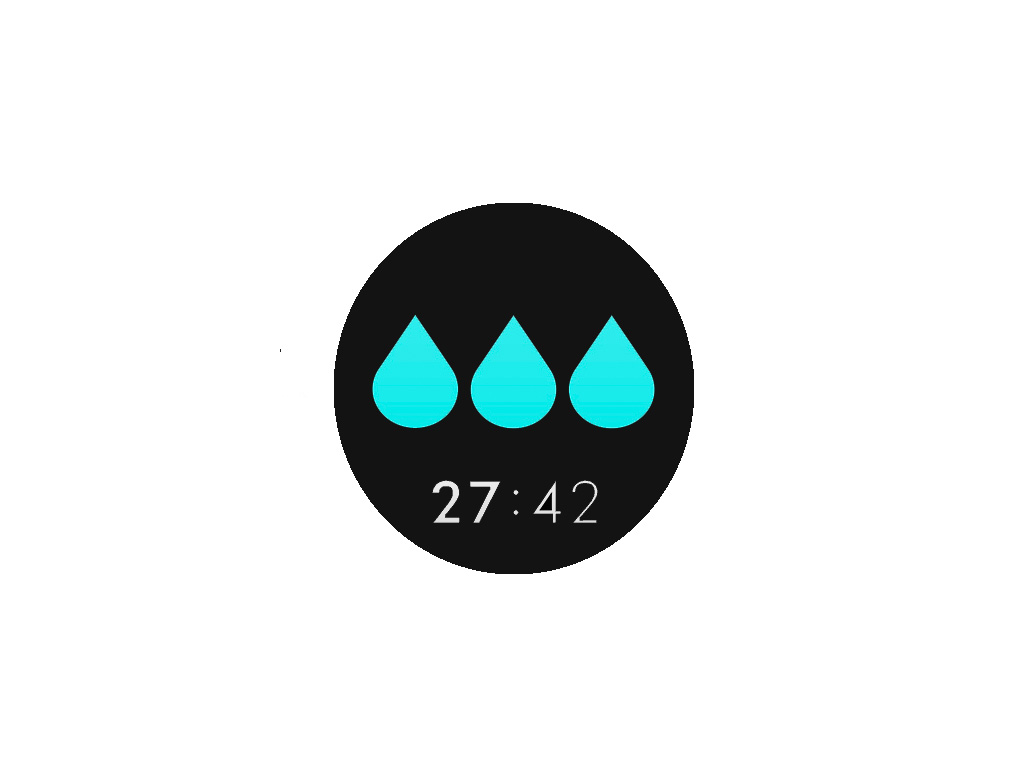
The LCD screen constantly displays the machine's remaining run time underneath the water droplet icon so you'll always know how much cleaning time you have left.
Your machine runs on a click-in battery with up to 35 minutes of run time.
Please check if your machine is under guarantee or purchase replacement parts below - your part will then be delivered to you. Your machine comes with complimentary parts when covered under your guarantee policy. To check if yours is still under guarantee, visit MyDyson
Please select the appropriate option
Dock
Please check if your machine is under guarantee or purchase replacement parts below - your part will then be delivered to you. Your machine comes with complimentary parts when covered under your guarantee policy. To check if yours is still under guarantee, visit MyDyson
Please select the appropriate option
Please check if your machine is under guarantee or purchase replacement parts below - your part will then be delivered to you. Your machine comes with complimentary parts when covered under your guarantee policy. To check if yours is still under guarantee, visit MyDyson
Please follow the next step
Please check if your machine is under guarantee or purchase replacement parts below - your part will then be delivered to you. Your machine comes with complimentary parts when covered under your guarantee policy. To check if yours is still under guarantee, visit MyDyson
Please select the appropriate option
Please check if your machine is under guarantee or purchase replacement parts below - your part will then be delivered to you. Your machine comes with complimentary parts when covered under your guarantee policy. To check if yours is still under guarantee, visit MyDyson
Please select the appropriate option
Regular maintenance
We recommend running the self clean cycle after each use to maintain the machine.
A damp or musty smell may indicate that machine needs to be cleaned.
When cleaning your machine, please ensure all parts are completely dry before reassembling.
If the UI is showing a Replace rollers alert, you may need to replace the rollers.
Please select the appropriate option
Excess water
Our technology is using a hydration system to wet the rollers. Uneven wetness on floor is anticipated due to multiple factors.
Ensure the cleaner head & debris tray have been assembled correctly. To remove the excess leftover water, push the rollers back and forth over the spillage until the surface with the excess water is dry.
Auto priming
When the machine is first switched on, there will be a burst of water to prime the rollers.
The hydration mode will then return to the last selected level.
Hydration mode
Your machine has three different hydration modes:
- Low
- Med
- High
If the rollers are too wet, try decreasing the hydration mode.
Self clean
Complete the following steps to run a self clean cycle:
Press the red release catch and remove the tanks from the machine.
Press the blue release catch and remove the clean water tank from the tank collar.
Open the clean water tank by twisting the lid anti-clockwise.
Fill with clean water to the MAX line on the side of the tank and 20 ml of Dyson 01 hard floor solution.
Please note: Not all clean water tanks will have the MAX line on the side. Fill to the under-edge line.
Securely screw the lid back onto the tank by twisting it clockwise and reattach the tank to the tank collar.
Press the red release catch and remove the dirty water tank from the tank collar.
Twist the lid anti-clockwise to remove and empty the dirty water into the sink.
Securely screw the lid back onto the tank by twisting it clockwise and reattach the tank to the tank collar, and then the machine.

Plug the machine into the dock and press the mode button to activate the self clean cycle.
Charging your battery
It's important to fully charge all click-in batteries as soon as you open the box, and after every clean. The battery and monitoring system's algorithm 'learns' over time, and fully charging your batteries helps it to more accurately calculate and display remaining run time.
You can charge your battery on or off your machine, in or outside of the dock.

The blue LED will flash on and off during charging.
When the battery is charged the LED will light for 5 seconds, then go out.
The screen will show the battery as fully charged.
The machine can take up to 4.5 hours to fully charge.
Looking after your batteries
If you own an additional click-in battery, we recommend fully charging it soon after purchase, and alternating and charging all click-in batteries regularly to prolong battery health.
Remove the clean water tank
Press the red release catch and remove the tanks from the machine.
Press the blue release catch and remove the clean water tank from the tank collar.
Open the clean water tank by twisting the lid anti-clockwise.
Fill with clean water to the MAX line on the side of the tank and 20 ml of Dyson 01 hard floor solution.
Please note: Not all clean water tanks will have the MAX line on the side. Fill to the under-edge line.
Securely screw the lid back onto the tank by twisting it clockwise.
Reattach the tank to the tank collar, and then the machine.
Remove the dirty water tank
Press the red release catch and remove the tanks from the machine.
Press the red release catch and remove the dirty water tank from the tank collar.
Empty the Dirty water tank
Turn the lid anti-clockwise to open the dirty water tank.
Empty the dirty water into the sink.
Reassemble the dirty water tank
Securely screw the lid back onto the tank by twisting it clockwise.
Reattach the tank to the tank collar, and then the machine.
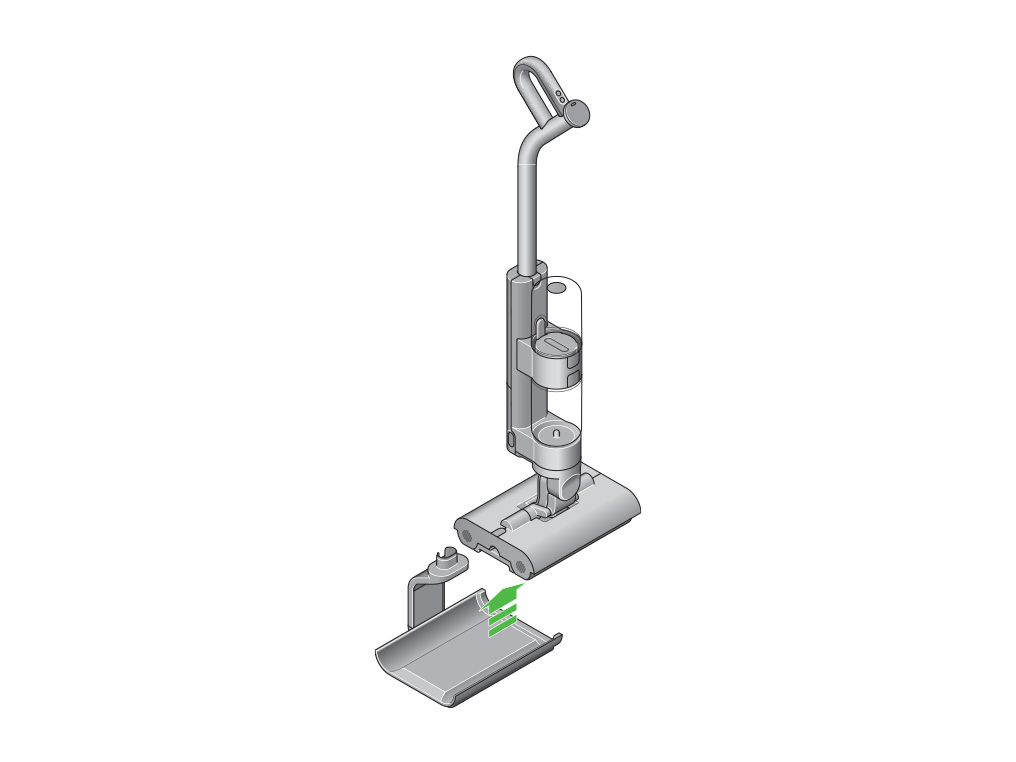
Remove the tray
Press the tray removal button and slide the tray out of the cleaner head.
Empty the tray
Take the tray to a bin and dispose of the solid debris.
Tap the tray on the side of the bin to dislodge any remaining debris.
Re-assamble the tray
Slide the tray back into the cleaner head.
Remove the clean water tank
Press the red release catch and remove the tanks from the machine.
Press the blue release catch and remove the clean water tank from the tank collar.
Fill the clean water tank
Open the clean water tank by twisting the lid anti-clockwise.
Fill with clean water to the MAX line on the side of the tank.
Please note: Not all clean water tanks will have the MAX line on the side. Fill to the under-edge line.
Securely screw the lid back onto the tank by twisting it clockwise.
Reattach the tank to the tank collar, and then the machine.
Alerts
When your dirty water tank is full, you will be prompted with the alert: Empty dirty water tank.
Settings menu
Control the settings on your machine using the mode button.
To enter the settings menu, press and hold the mode button until the menu screen appears. Tap to scroll through the options available.

Changing language
To change the language on your screen, press and hold the mode button until the language list appears. Release the button.

Tap the mode button to scroll through the language list to your preferred language.
Press and hold the mode button until the countdown ends to set your language.

To cancel your selection, release the mode button during the countdown.
A green tick will appear on the screen to show your language selection is complete.

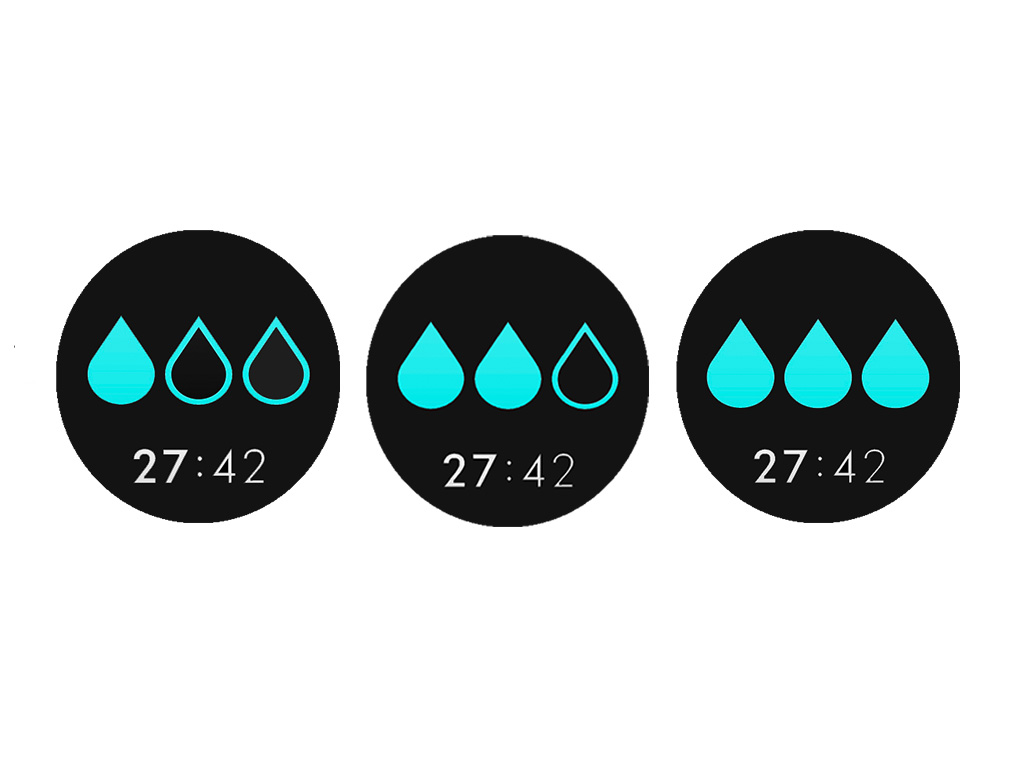
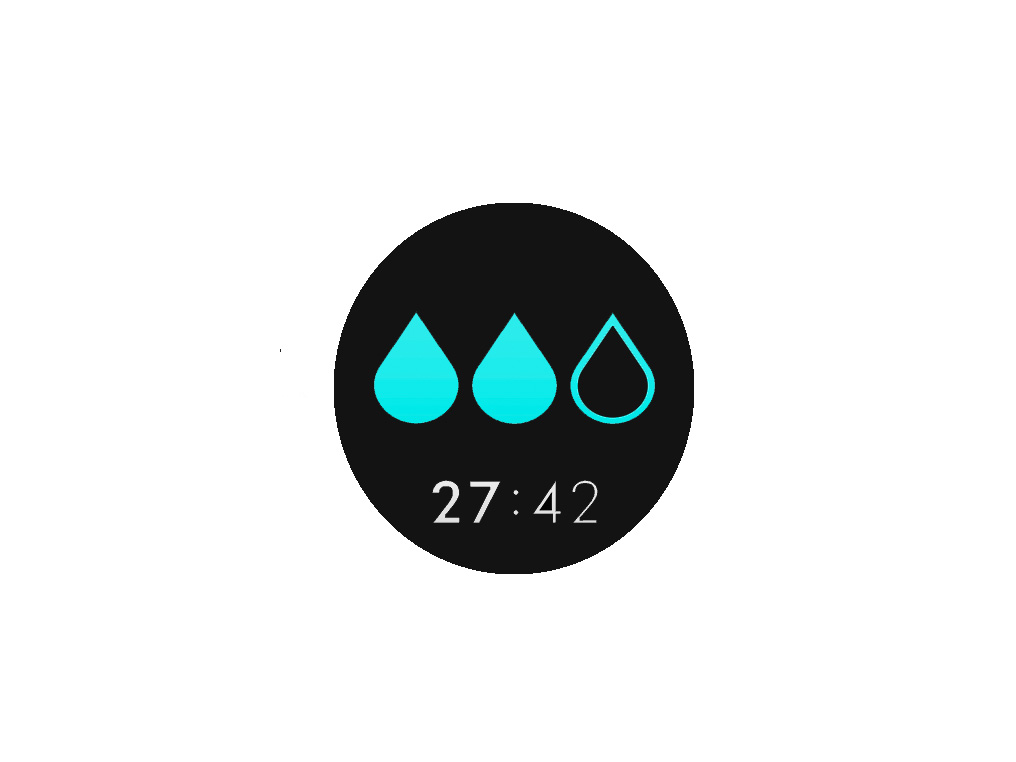
Cleaning modes
The machine has three cleaning modes to choose from to suit the task.
Press the mode button to cycle through and select and a cleaning mode, and then press the power button to start.
Water droplet icons indicate hydration modes: 1, 2 and 3.
Level 1
For debris, hair and light spills.
Level 2
For mealtime mess, spills and wet footprints.
Level 3
For sticky spills, muddy boot marks and dried-on stains.
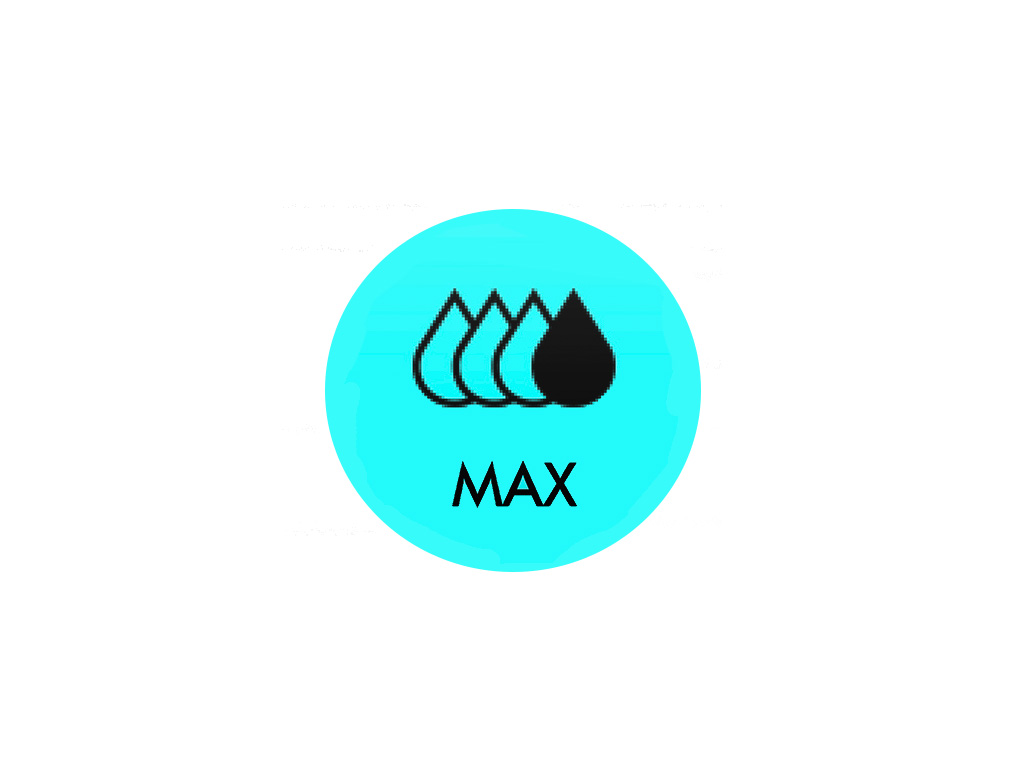
MAX
For an extra boost of water for stubborn stains, press and hold the MAX button.
Replacement rollers
We recommend replacing the rollers after approximately six months, based on 25 hours of total use.
The machine will alert you when they need to be changed and display a QR code for ordering replacements.
Run time
The LCD screen constantly displays the machine's remaining run time underneath the water droplet icon so you'll always know how much cleaning time you have left.
Your machine runs on a click-in battery with up to 35 minutes of run time.
First time use
Please follow the steps in the video.
Find the text version of the step-by-step guide instead, under "Is there anything else we can help you with?"
It's important to fully charge all click-in batteries as soon as you open the box, and after every clean. The battery and monitoring system's algorithm 'learns' over time, and fully charging your batteries helps them to more accurately calculate and display remaining run time.

Is there anything else we can help you with?
Register your machine
Register your machine with MyDyson by scanning the QR code within your machine's box. Alternatively, visit Dyson machine registration at dyson.com/register. Follow the instructions on this page to register.

Assemble your machine
Assemble your machine by taking all of the parts out of their cardboard packaging. Click the handle into the main body of the machine.

Assemble the dock
Assemble the dock by sliding the two pieces together until they click into place.

Push the charging pin into the hole in the back of the dock and plug the charger in. Place the machine on the dock.
Select your language
Press and hold the mode button access the menu.
Tap to scroll through the language list to your preferred language. Press and hold the button until the countdown ends to set your language.

Fill the clean water tank
Press the red release catch and remove the tanks from the machine. Press the blue release catch and remove the clean water tank from the tank collar.
Open the clean water tank by twisting the lid anti-clockwise and fill with clean water to the MAX line on the side of the tank and 20 ml of Dyson 01 hard floor solution.
Securely screw the lid back onto the tank by twisting it clockwise and reattach the tank to the tank collar, and then the machine.

Please note: Not all clean water tanks will have the MAX line on the side. Fill to the under-edge line.
Choosing your cleaning mode
You can switch between three hydration levels using the mode button.

Allow the rollers to fully hydrate
On first use, the new rollers will take approximately 5 minutes to reach full and even hydration.
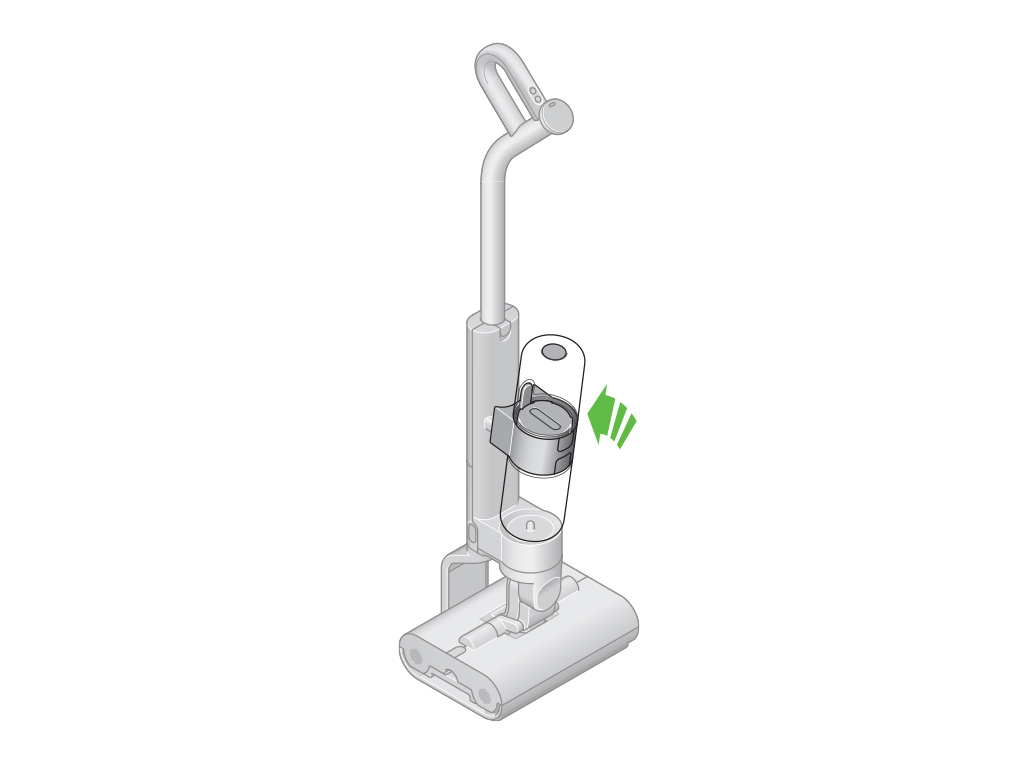
Finishing your clean
Return the machine to its dock to charge.
Remove the debris tray
Press the tray removal button and slide the tray out of the cleaner head.
Empty the tray
Take the tray to a bin and dispose of the solid debris.
Tap the tray on the side of the bin to dislodge any remaining debris.
Remove and wash the tray
Rinse the tray in a sink.
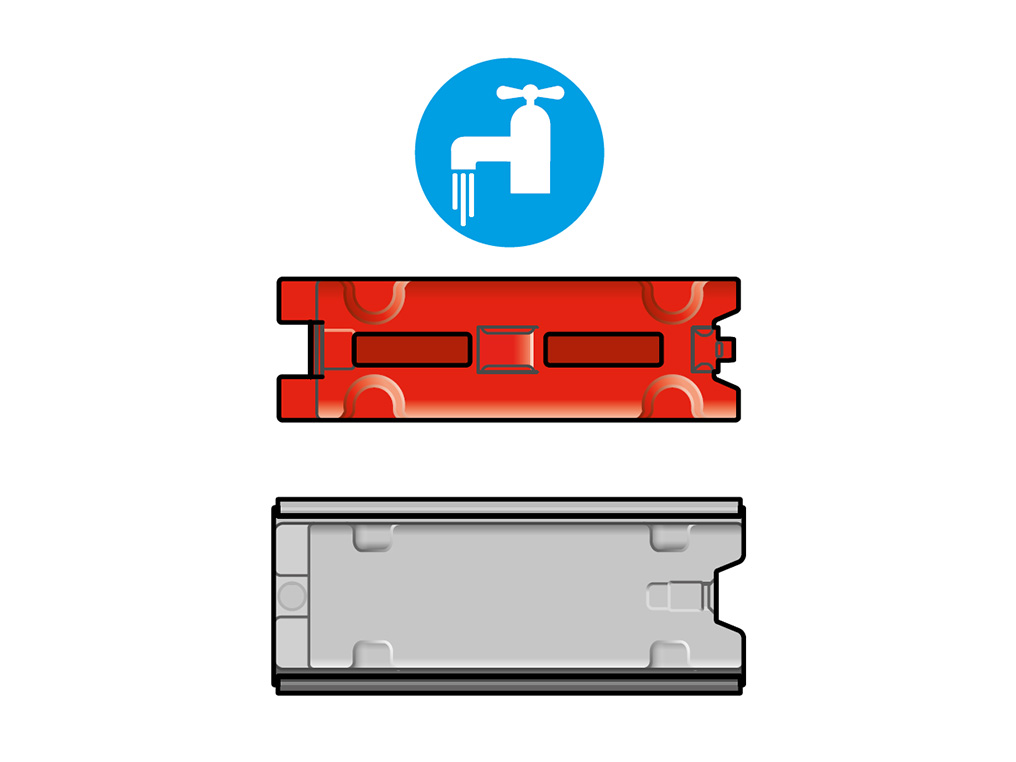
Remove the red filter material and wash with a cloth in warm water and detergent to remove any remaining dirt.
Soak the filter every six months
We recommend cleaning the filter inside the debris tray every six
months to remove limescale.
Soak the mesh in citric acid or vinegar for one hour to remove limescale build up.
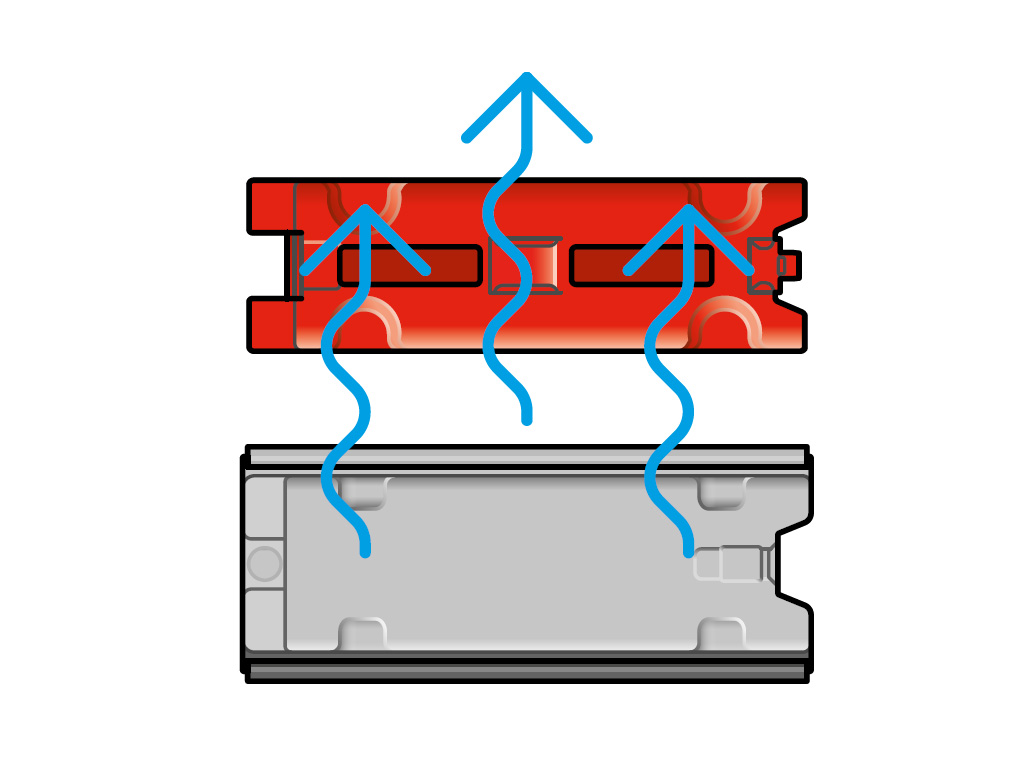
Dry the trays
Ensure the trays are completely dry.
Reassemble
Reassemble the tray and slide it back into the cleaner head.
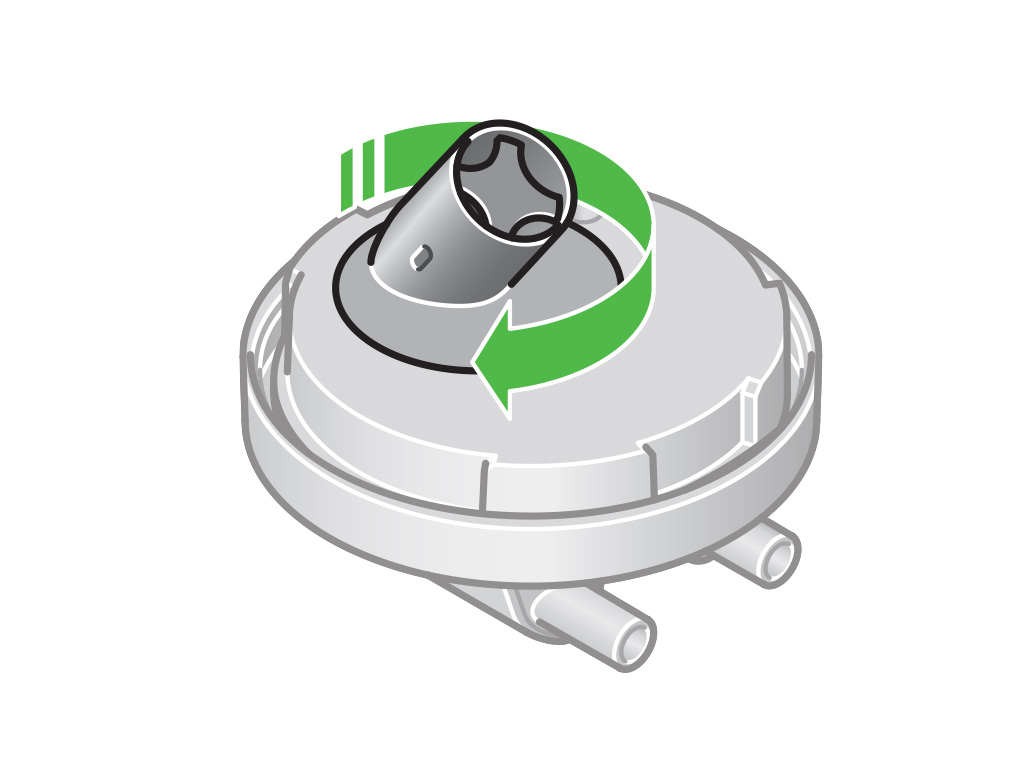
Remove the rollers
Press the red release catch and slide out the end cap with the rollers and debris brush bars.
Remove the rollers from the end cap.
Wash the rollers
Wash the rollers in a sink, using warm water and detergent.
Leave the rollers to dry
Squeeze the rollers to remove excess water.
Leave the rollers stood upright to dry for 24-48 hours under direct sunlight.
Reattach the rollers
Slide the rollers back into the end cap.
Slide the rollers and debris brush bars into the cleaner head until the end cap clicks.
Remove the clean water tank
Press the red release catch and remove the tanks from the machine.
Press the blue release catch and remove the clean water tank from the tank collar.
Open the clean water tank
Open the clean water tank by twisting the lid anti-clockwise and dispose of any remaining water.
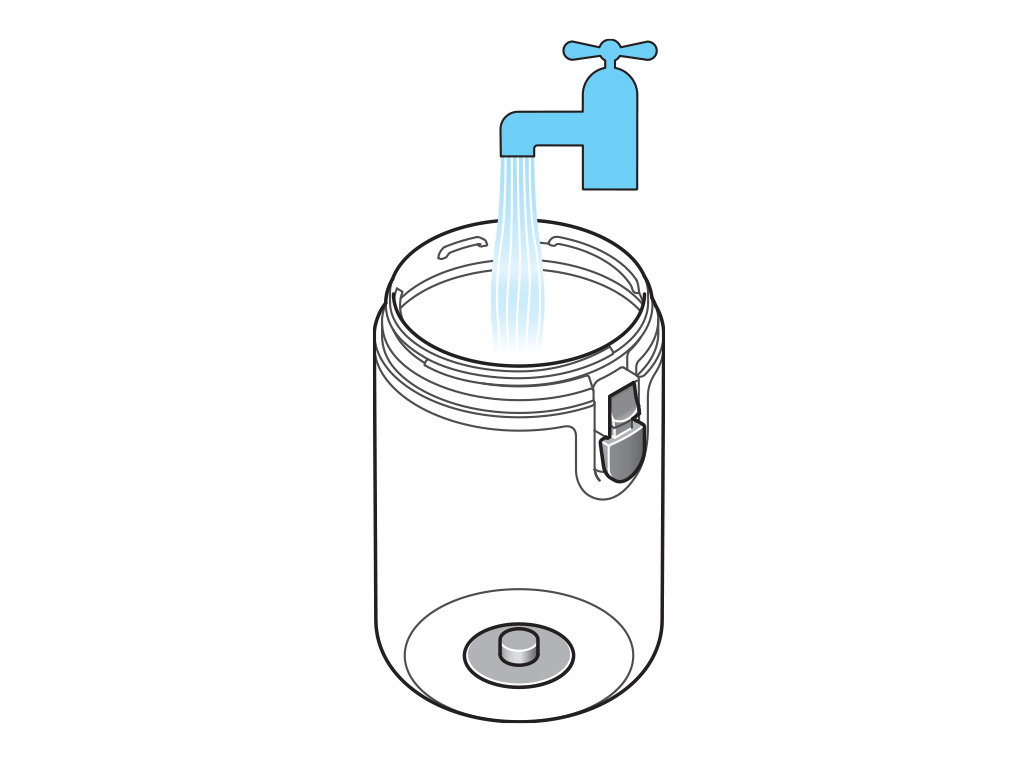
Clean the clean water tank
Wash the clean water tank using warm water, detergent and a cloth.
Soak filter every six months
We recommend cleaning the filter in the clean water tank, every six months, to remove limescale.
Soak the lid in citric acid or vinegar for one hour to remove limescale build up.
Replace the clean water tank
Securely screw the lid back onto the tank by twisting it clockwise.
Reattach the tank to the tank collar, and then the machine.
Remove the dirty water tank
Press the red release catch and remove the tanks from the machine.
Turn the lid anti-clockwise to open the dirty water tank.
Press the red release catch and remove the dirty water tank from the tank collar.
Empty the Dirty water tank
Empty the dirty water into the sink.
Clean the dirty water tank
Wash the dirty water tank using warm water, detergent and a cloth.
Remove the float
Turn the float anti-clockwise and remove it from the dirty water
tank lid.
Clean the float
Wash the float using warm water, detergent and a cloth.
Run clean water onto the lid to remove debris from the filter.
Soak the float mesh every six months
We recommend cleaning the mesh on the float, every six months, to remove limescale.
To access the filter mesh, open the lid float a quarter turn. Soak the float in citric acid or vinegar for one hour to remove limescale build up.
Replace the float
Reattach the float to the dirty water tank lid and turn clockwise to secure.
Reassemble the dirty water tank
Securely screw the lid back onto the tank by twisting it clockwise.
Reattach the tank to the tank collar, and then the machine.
Remove the machine from the dock
Life the machine off of the dock.
Press the release button on the rear of the dock and lift off the charging post.
Clean the dock tray
Make sure the charger is disconnected from the mains before cleaning.
Wipe over the dock with warm water, detergent and a cloth.
Replace the dock tray
Slide the charging post back into the dock until it clicks into place.
Replace the machine on the dock.
Remove the debris brush bars
Press the red release catch and slide out the end cap with the rollers and debris brush bars.
Remove the used debris brush bars from the end cap and dispose of them.
Fit the new debris brush bars onto the end cap.
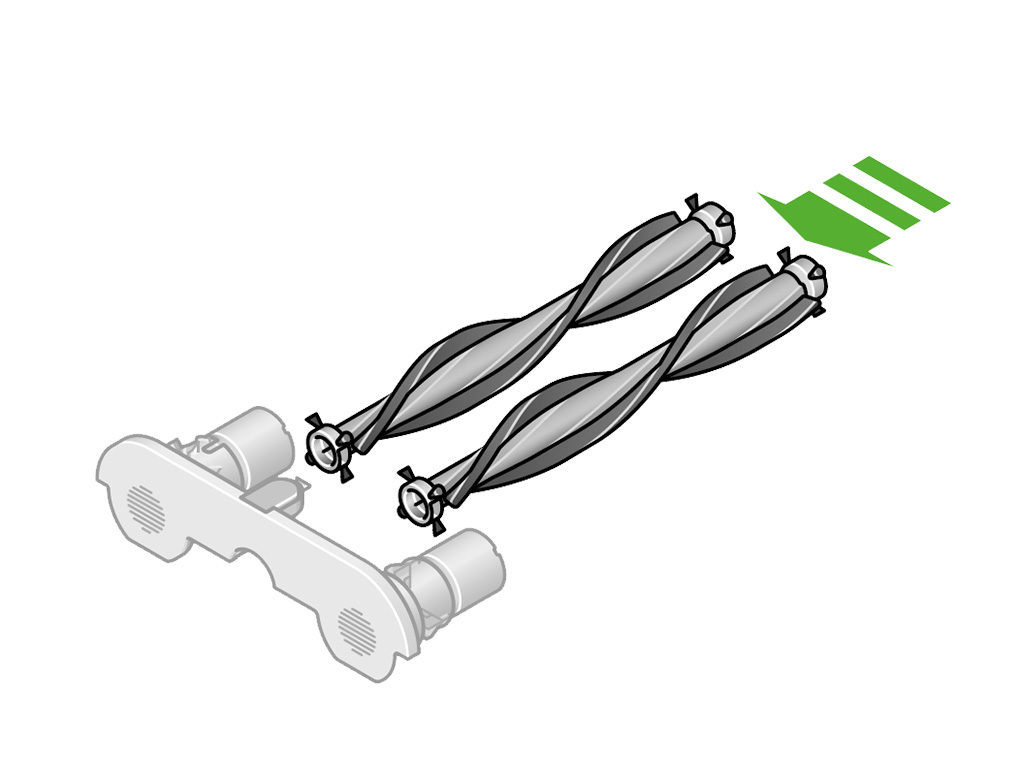
Slide the rollers and debris brush bars back into the cleaner head until the end cap clicks.
Remove the rollers
Press the red release catch and slide out the end cap with the rollers and debris brush bars.
Remove the used rollers from the end cap and dispose of them.
Fit the new rollers onto the end cap.
Attach the new rollers
Slide the rollers and debris brush bars back into the cleaner head until the end cap clicks.
Check the lifespan of your rollers
The rollers have a lifespan of 25 hours.
The machine will alert you when they need to be changed and display a QR code for ordering replacements.
Self clean
Complete the following steps to run a self clean cycle:
Press the red release catch and remove the tanks from the machine.
Press the blue release catch and remove the clean water tank from the tank collar.
Open the clean water tank by twisting the lid anti-clockwise.
Fill with clean water to the MAX line on the side of the tank and 20 ml of Dyson 01 hard floor solution.
Please note: Not all clean water tanks will have the MAX line on the side. Fill to the under-edge line.
Securely screw the lid back onto the tank by twisting it clockwise and reattach the tank to the tank collar.
Press the red release catch and remove the dirty water tank from the tank collar.
Twist the lid anti-clockwise to remove.
Empty the dirty water into the sink.
Securely screw the lid back onto the tank by twisting it clockwise.
Reattach the tank to the tank collar, and then the machine.
Plug the machine into the dock and press the mode button to activate the self clean cycle.
The machine will self clean its entire system, for 140 seconds, leaving it refreshed and ready for your next clean.
Please note that whilst the self-cleaning cycle is running, it's common for the machine to vibrate whilst in the stantionary position.


Further help
Dyson WashG1™ (Matte Black/Ultra Blue)