Unless prompted to do so, do not press the trigger when checking any part of the machine. Operating the machine while it is partially dismantled could result in personal injury.
Please select the appropriate option


Amber light
An amber light will show or flash if the machine is operating outside of its normal working temperature and the machine may stop working.
An amber light may also show when charging, this light will go out once the machine is fully charged.
Before using the machine, ensure it is back to its operating temperature 3°C/37°F and 40°C/104°F.
Please select the appropriate option
Test the machine
Pull the trigger and count the number of red flashes.
How many times did the light flash?
Check the floor tool
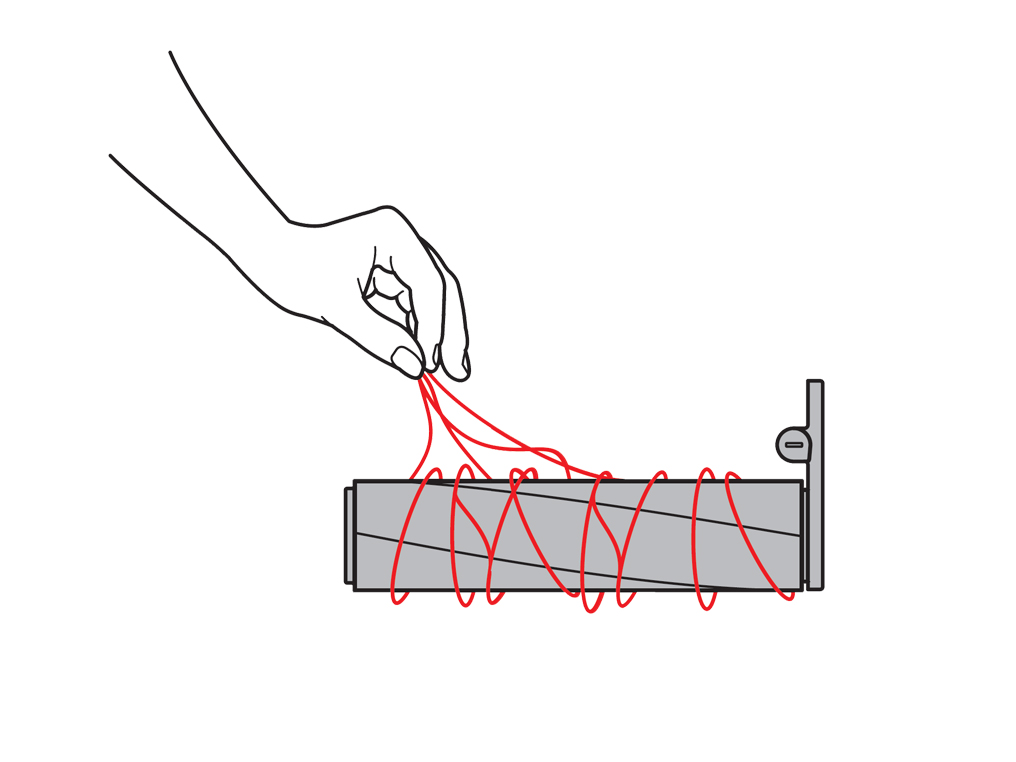
If the machine is not performing as well as it used to this is typically caused by a partial or full blockage within the openings of the machine.
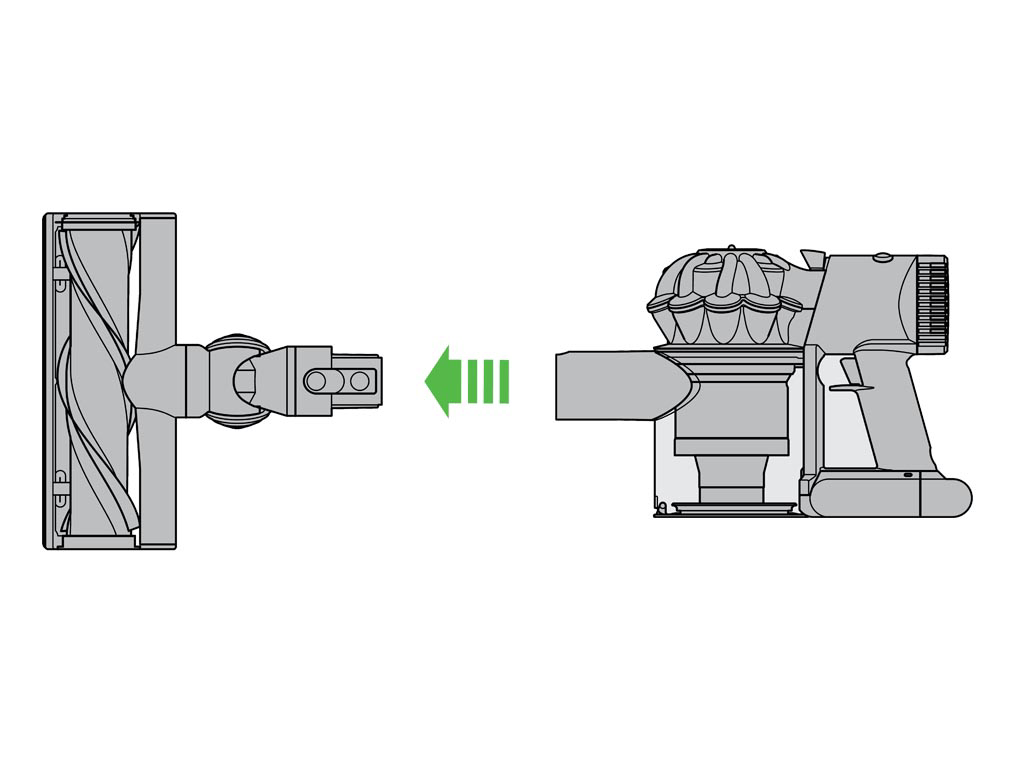
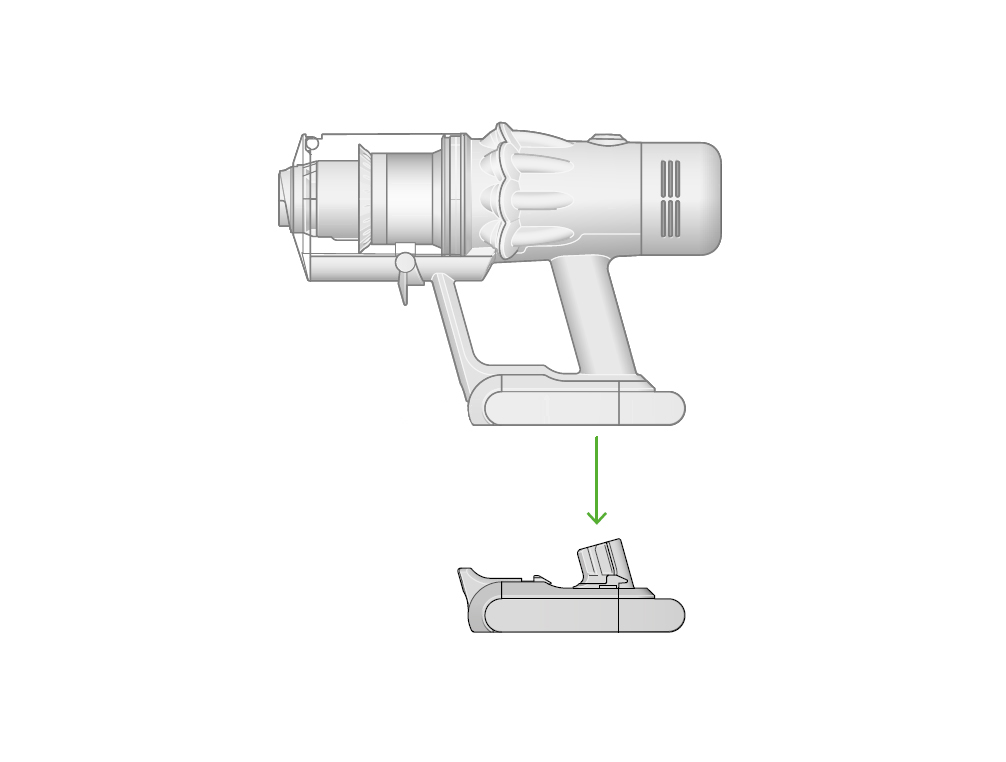
Remove the Cleaner head from the Wand, and remove the Wand from the machine.
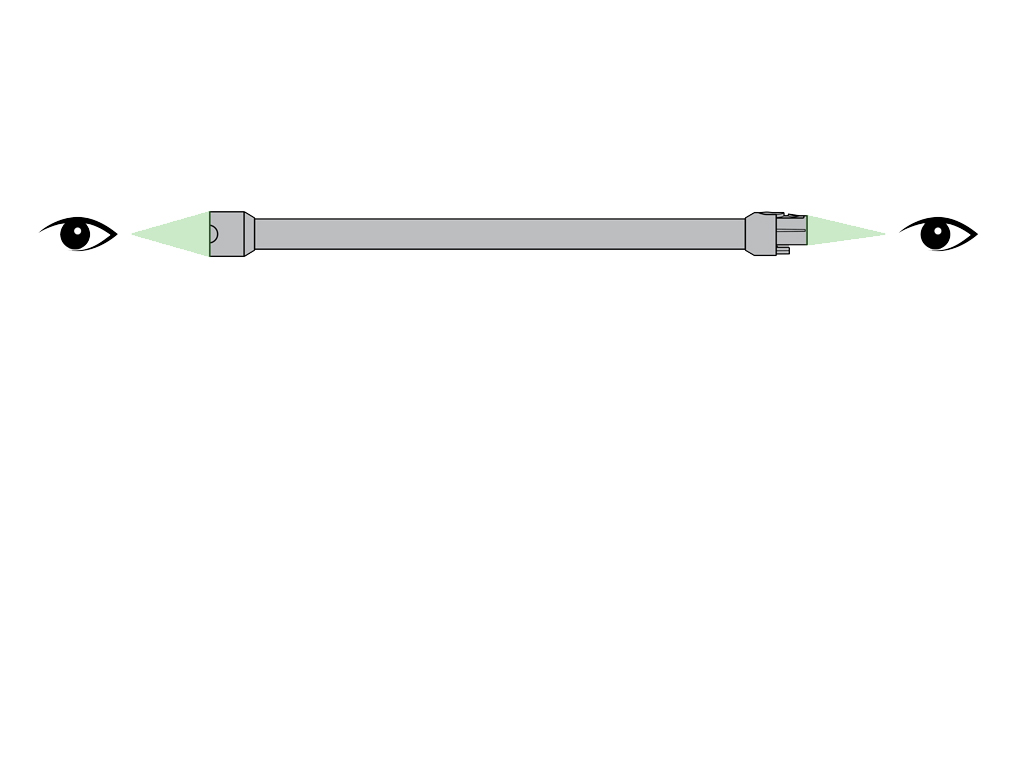
Check both ends of the Wand for blockages and remove as necessary.
Refit the Cleaner head onto the Wand and connect the Wand back onto the machine.
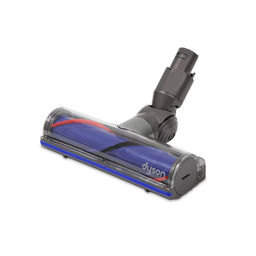
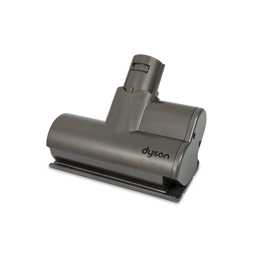
Which floor tool are you using?
Check the floor tool
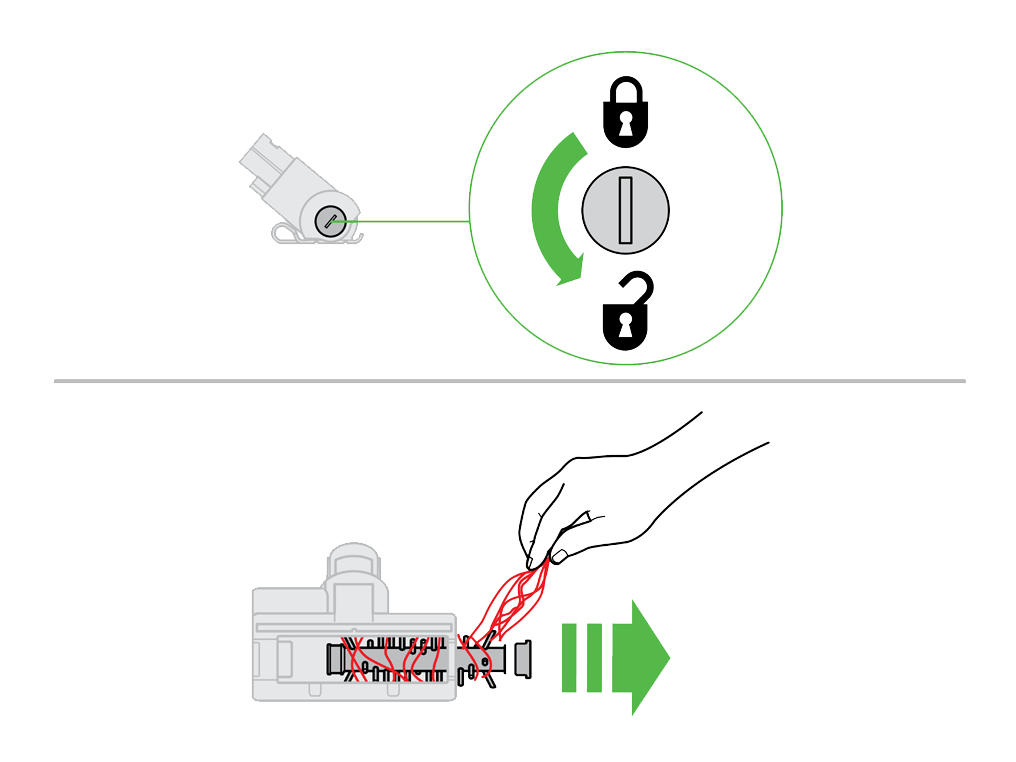
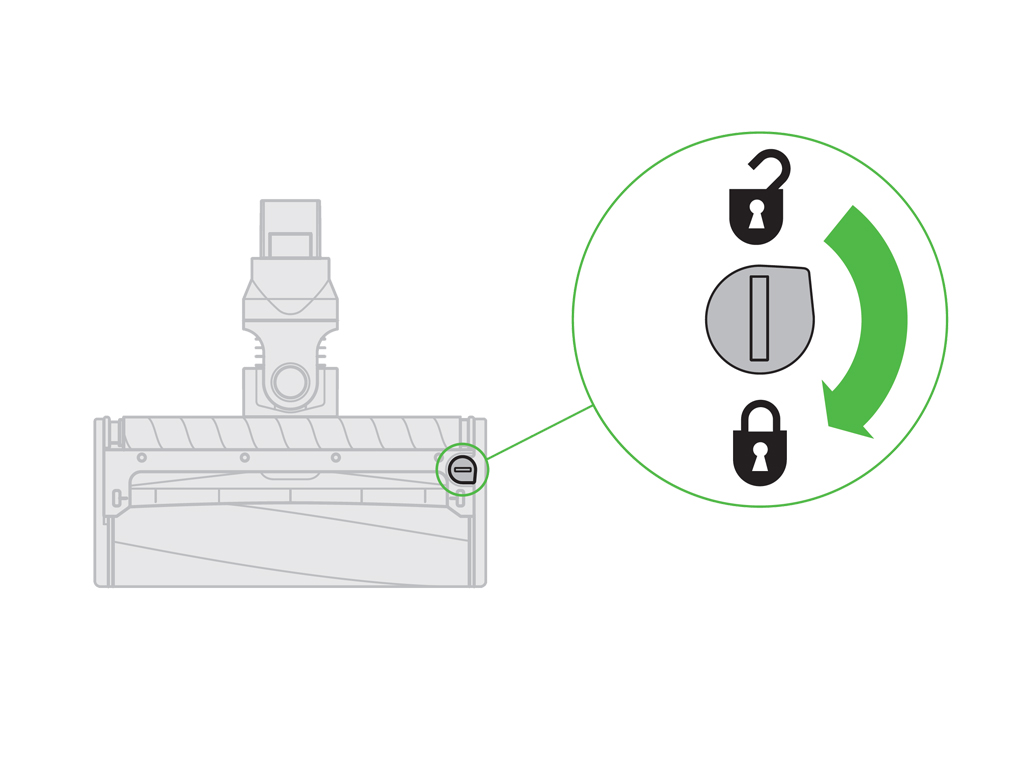
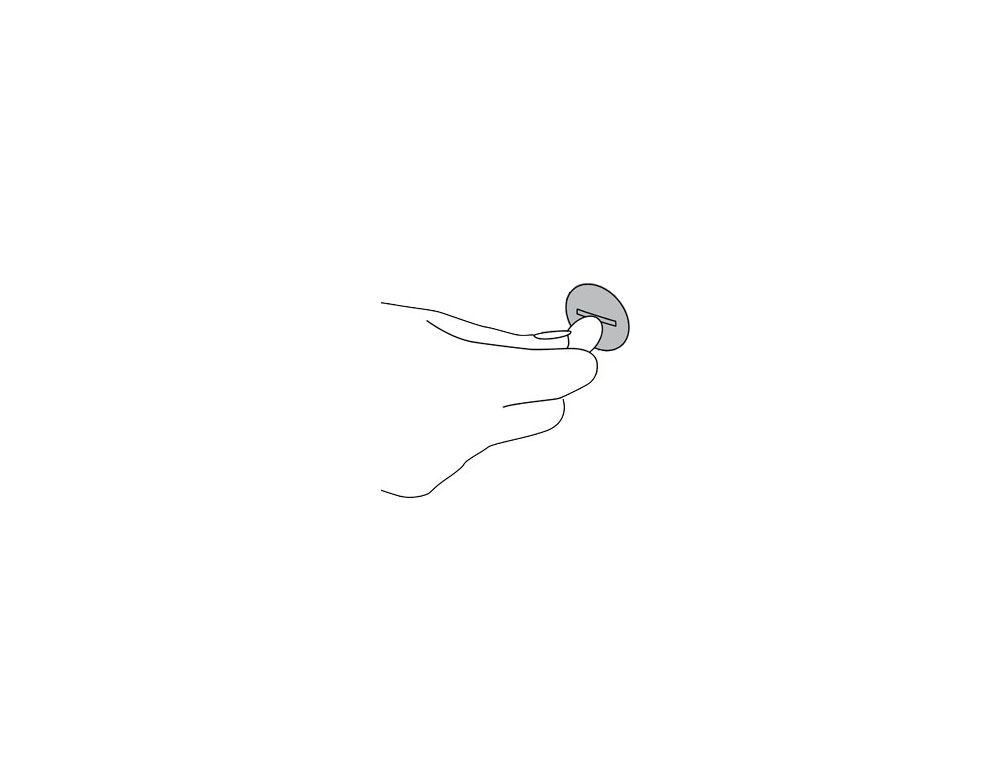
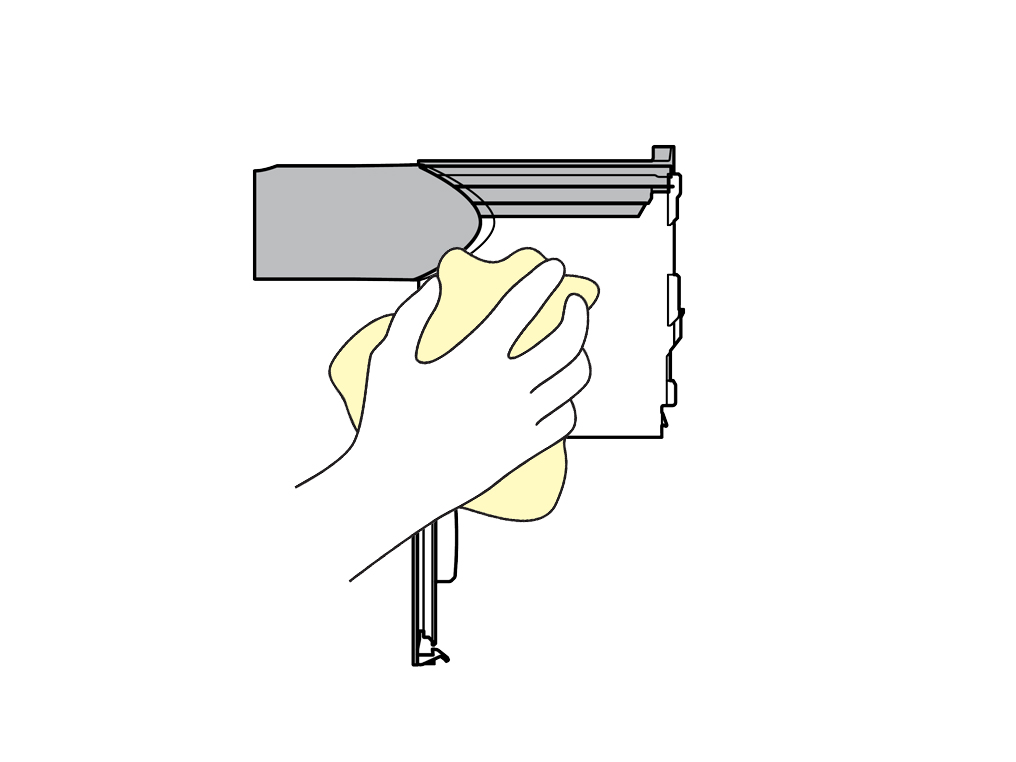
On the side of the Direct drive cleaner head, locate the end cap. Using a coin, turn the end cap anticlockwise a quarter of the way to remove it.
Note: There should be a small padlock icon along with directional arrows to help you unlock the end cap.

Remove the Brush bar from the Cleaner head and clear away any hair or fibres.
Check the neck of the Cleaner head (where the Cleaner head connects to the Wand) for any blockages. Ensure there is no build up of dust or debris in the small crevice between where the Brush bar sits and the neck of the Cleaner head.

With the Brush bar clear from any debris, refit it back into the Cleaner head and securely fasten the end cap.
Place the Cleaner head onto the bin and test the machine.

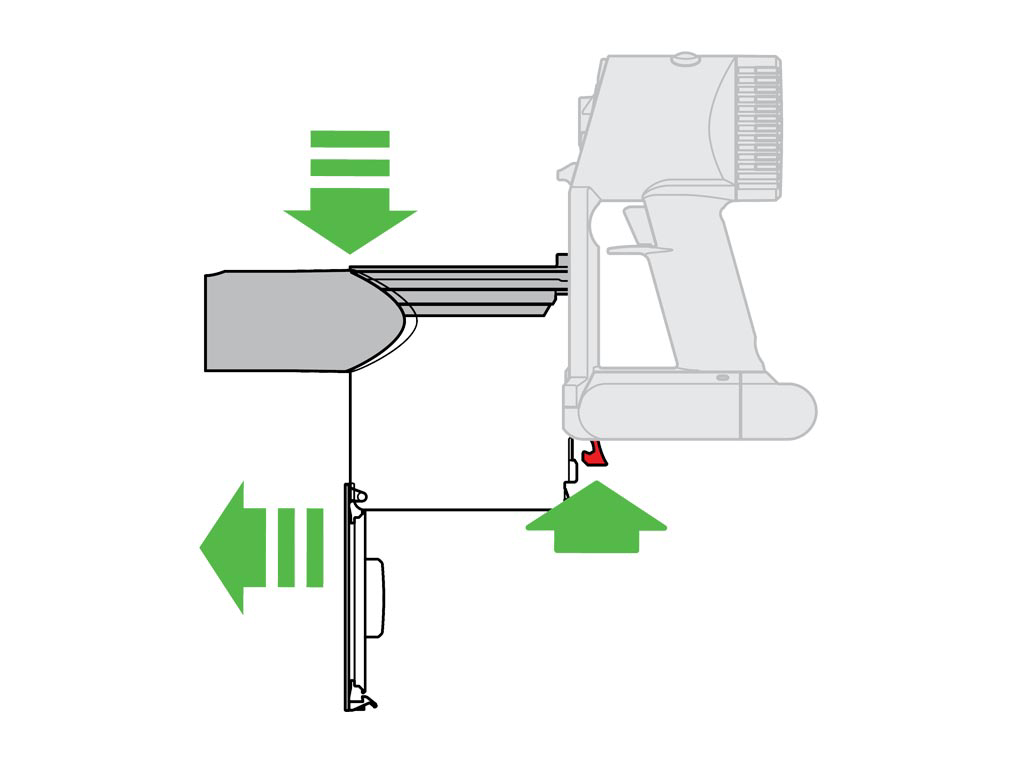
Remove the bin
Pull the cyclone release catch upwards until the bin base opens.

Press the red catch once the bin base is open to release the bin.
Check the bin inlet
Check the bin inlet ensuring that it moves freely. Fluff or fibres jamming the hinge can cause the flap to close resulting in low suction and a pulsating noise.
Gently tap the side of the cyclone over a bin. This will remove any fine dust clogged up in the cyclone.
Using the Combination tool, brush away any dust around the shroud of the cyclone.
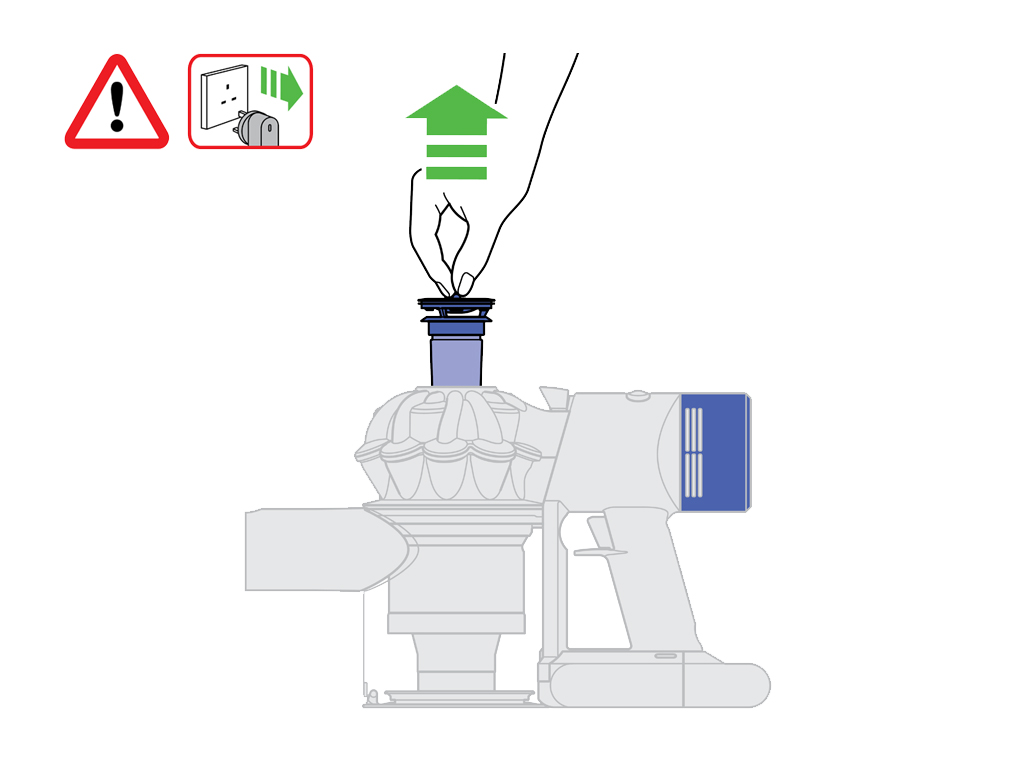
Once cleared of any dust, press and hold the trigger for 10 seconds.
Reassemble and test the machine.
Washing the filter
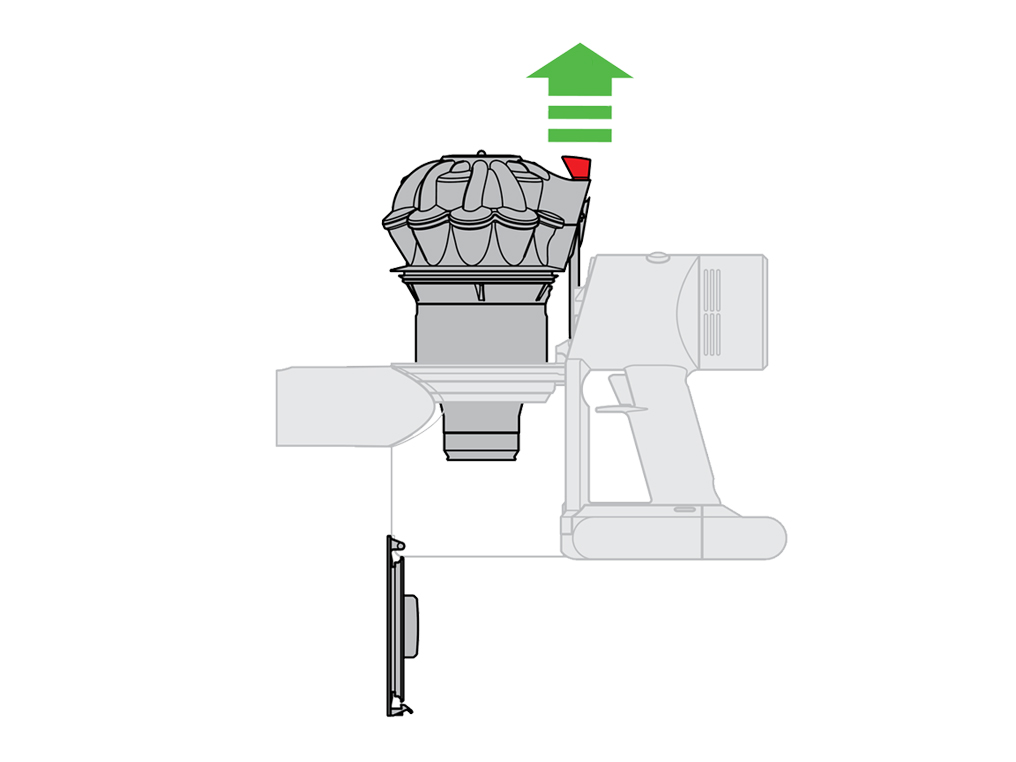
To remove the filter, lift it out of the top of the machine.

With cold water only, run water over the outside of the filter until the water runs clear.
Turn the filter upside down and shake to remove any excess debris.
Squeeze and twist the filter with both hands to make sure the excess water is removed.

Lay the filter on its side to dry. Leave to dry completely for a minimum of 24 hours.
Do not put the filter in a dishwasher, washing machine, tumble dryer, oven, microwave or near a naked flame.

To refit the filter, place the dry filter back into the top of the machine. Ensure it is fitted properly.

Clear the floor tool
On the side of the Mini motorised head, locate the end cap. Using a coin, turn the end cap anticlockwise a quarter of the way to remove it.
Note: There should be a small padlock icon along with directional arrows to help you unlock the end cap.
Remove the Brush bar from the Cleaner head and clear away any hair or fibres.
Check the neck of the Cleaner head (where the Cleaner head connects to the Wand) for any blockages. Ensure there is no build up of dust or debris in the small crevice between where the Brush bar sits and the neck of the Cleaner head.
With the Brush bar clear from any debris, refit it back into the Cleaner head and securely fasten the end cap.
Place the Cleaner head onto the bin and test the machine.
Remove the bin
Pull the cyclone release catch upwards until the bin base opens.
Press the red catch once the bin base is open to release the bin.
Check the bin inlet
Check the bin inlet ensuring that it moves freely. Fluff or fibres jamming the hinge can cause the flap to close resulting in low suction and a pulsating noise.
Gently tap the side of the cyclone over a bin. This will remove any fine dust clogged up in the cyclone.
Using the Combination tool, brush away any dust around the shroud of the cyclone.
Once cleared of any dust, press and hold the trigger for 10 seconds.
Reassemble and test the machine.
Washing the filter
To remove the filter, lift it out of the top of the machine.

With cold water only, run water over the outside of the filter until the water runs clear.
Turn the filter upside down and shake to remove any excess debris.
Squeeze and twist the filter with both hands to make sure the excess water is removed.

Lay the filter on its side to dry. Leave to dry completely for a minimum of 24 hours.
Do not put the filter in a dishwasher, washing machine, tumble dryer, oven, microwave or near a naked flame.

To refit the filter, place the dry filter back into the top of the machine. Ensure it is fitted properly.

Open the bin
Pull the cyclone release catch upwards until the bin base opens.
Remove the bin
Press the red catch underneath the bin once the bin base is open to release it from the machine.
Check the bin inlet
Check the bin inlet ensuring that it moves freely. Fluff or fibres jamming the hinge can cause the flap to close resulting in low suction and a pulsating noise.
Gently tap the side of the cyclone over a bin. This will remove any fine dust clogged up in the cyclone.
Using the Combination tool, brush away any dust around the shroud of the cyclone.
Once cleared of any dust, press and hold the trigger for 10 seconds.
Remove the filter
Pull the filter out of the top of the cyclone.

Press and hold the trigger for 10 seconds.
If your machine has a post-filter, please remove it from the machine.
If your machine doesn't have a post-filter please select 'Yes'.
Remove the post-filter
To unlock the post-filter, rotate it anti-clockwise until the two solid black dots line up.

Washing the filters
To remove the pre-filter, lift it out of the top of the machine.
To unlock the post-filter, rotate it anti-clockwise until the two solid black dots line up.
With cold water only, run water over the outside of the filters until the water runs clear.

Turn the filter upside down and shake to remove any excess debris.
Squeeze and twist the pre-filter with both hands to make sure the excess water is removed, then tap and shake the post-filter to expel all debris.
Leave the filter to dry with the open end facing up for as long as possible.
Ensure the filter is completely touch dry prior to refitting.
WARNING: Do not put the filter in a dishwasher, washing machine, tumble dryer, oven, microwave, or near a naked flame.

To refit the filter, place the dry filter back into the top of the machine. Ensure it is fitted properly.

Rotate the post-filter clockwise until it locks in place and the solid black dot lines up with the empty circle.
Washing the filter
To remove the filter, lift it out of the top of the machine.
With cold water only, run water over the outside of the filter until the water runs clear.
Turn the filter upside down and shake to remove any excess debris.
Squeeze and twist the filter with both hands to make sure the excess water is removed.
Lay the filter on its side to dry. Leave to dry completely for a minimum of 24 hours.
Do not put the filter in a dishwasher, washing machine, tumble dryer, oven, microwave or near a naked flame.
To refit the filter, place the dry filter back into the top of the machine. Ensure it is fitted properly.
Check the floor tool
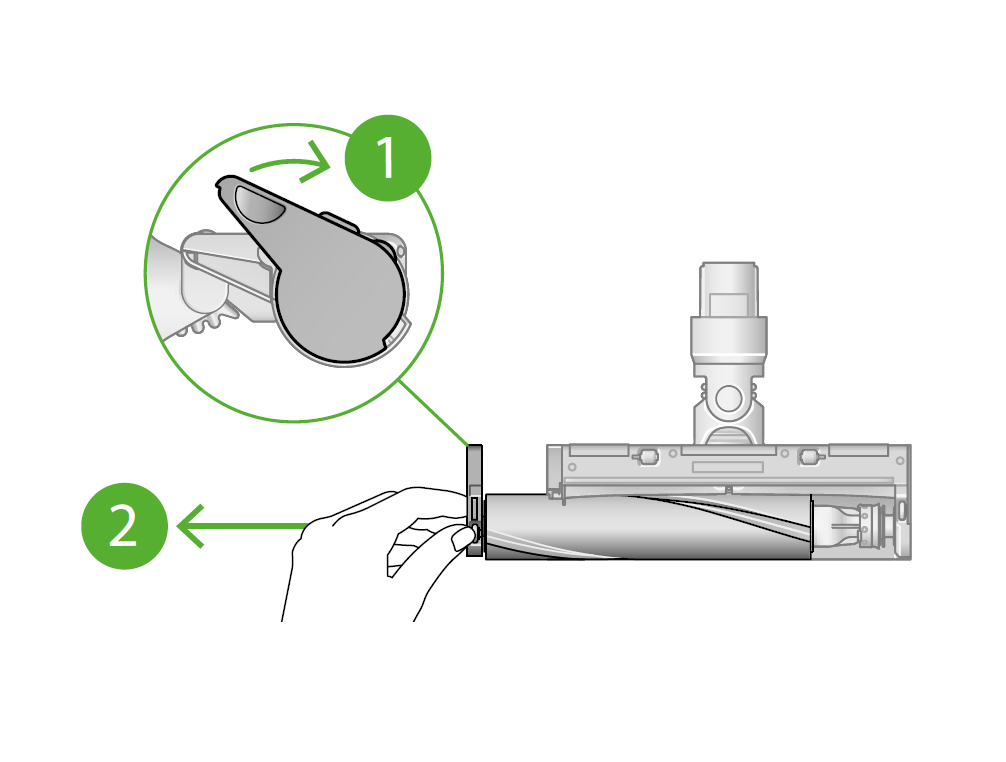
Under the Cleaner head by the Soft roller, locate the fastener. Using a coin, turn the fastener anticlockwise a quarter of the way to remove the end cap.
Note: There should be a small padlock icon along with directional arrows to help you unlock the end cap.
Remove the Brush bar from the Cleaner head and clear away any hair or fibres.
Check the neck of the Cleaner head (where the Cleaner head connects to the Wand) for any blockages. Ensure there is no build up of dust or debris in the small crevice between where the Brush bar sits and the neck of the Cleaner head.
With the Brush bar clear from any debris, refit it back into the Cleaner head and securely fasten the end cap.
Place the Cleaner head onto the bin and test the machine.
Remove the bin
Pull the cyclone release catch upwards until the bin base opens.
Press the red catch once the bin base is open to release the bin.
Check the bin inlet
Check the bin inlet ensuring that it moves freely. Fluff or fibres jamming the hinge can cause the flap to close resulting in low suction and a pulsating noise.
Gently tap the side of the cyclone over a bin. This will remove any fine dust clogged up in the cyclone.
Using the Combination tool, brush away any dust around the shroud of the cyclone.
Once cleared of any dust, press and hold the trigger for 10 seconds.
Reassemble and test the machine.
Washing the filter
To remove the filter, lift it out of the top of the machine.
With cold water only, run water over the outside of the filter until the water runs clear.
Turn the filter upside down and shake to remove any excess debris.
Squeeze and twist the filter with both hands to make sure the excess water is removed.
Lay the filter on its side to dry. Leave to dry completely for a minimum of 24 hours.
Do not put the filter in a dishwasher, washing machine, tumble dryer, oven, microwave or near a naked flame.
To refit the filter, place the dry filter back into the top of the machine. Ensure it is fitted properly.
Remove the tools
Remove all tools and accessories from the machine.

Press and hold the trigger for 10 seconds.
Use video call to solve issue
If the owner is happy to do so, please launch a techsee video call and click “Log video call” before following the steps below. If you are a Salesforce user, please launch the TechSee video call directly from Salesforce.
Clear the floor tool
On the side of the Direct drive cleaner head, locate the end cap. Using a coin, turn the end cap anticlockwise a quarter of the way to remove it.
Note: There should be a small padlock icon along with directional arrows to help you unlock the end cap.
Remove the Brush bar from the Cleaner head and clear away any hair or fibres.
Check the neck of the Cleaner head (where the Cleaner head connects to the Wand) for any blockages. Ensure there is no build up of dust or debris in the small crevice between where the Brush bar sits and the neck of the Cleaner head.
With the Brush bar clear from any debris, refit it back into the Cleaner head and securely fasten the end cap.
Place the Cleaner head onto the bin and test the machine.
Clear the floor tool
On the side of the Cleaner head, locate the end cap. Using a coin, turn the end cap anticlockwise a quarter of the way to remove it.
Note: There should be a small padlock icon along with directional arrows to help you unlock the end cap.

Remove the Brush bar from the Cleaner head and clear away any hair or fibres.
Check the neck of the Cleaner head (where the Cleaner head connects to the Wand) for any blockages. Ensure there is no build up of dust or debris in the small crevice between where the Brush bar sits and the neck of the Cleaner head.

With the Brush bar clear from any debris, refit it back into the Cleaner head and securely fasten the end cap.
Place the Cleaner head onto the bin and test the machine.
Check the floor tool
Under the Cleaner head by the Soft roller, locate the fastener. Using a coin, turn the fastener anticlockwise a quarter of the way to remove the end cap.
Note: There should be a small padlock icon along with directional arrows to help you unlock the end cap.

Remove the Brush bar from the Cleaner head and clear away any hair or fibres.
Check the neck of the Cleaner head (where the Cleaner head connects to the Wand) for any blockages. Ensure there is no build up of dust or debris in the small crevice between where the Brush bar sits and the neck of the Cleaner head.

With the Brush bar clear from any debris, refit it back into the Cleaner head and securely fasten the end cap.
Place the Cleaner head onto the bin and test the machine.

Check the machine
A high pitch whistle could indicate a seal is damaged or the machine is blocked.
If the noise occurs without the Wand and Cleaner head, it is likely to be caused by either the bin or cyclone.
Which tool are you using?
Check the machine
To ensure the correct checks are carried out, we will need to determine if this is a pick up issue or if the machine is pulsating.
The machine is designed to pulsate. This is an audible feature that indicates a problem, as well as preventing damage to the motor. This is usually caused by a restriction in airflow or a blockage within the machine.
Please ensure the bin is empty before continuing with any checks.
Remove all tools and accessories from the machine e.g. Wand, Cleaner head, Crevice tool etc.
Check both ends of the Wand for blockages and remove as necessary.
Press and hold the trigger for 10 seconds.
Remove the filter
Pull the filter out of the top of the cyclone.
Press and hold the trigger for 10 seconds.
Open the bin
Pull the cyclone release catch upwards until the bin base opens.
Remove the bin
Press the red catch once the bin base is open to release the bin.
Check the bin inlet
Check the bin inlet ensuring that it moves freely. Fluff or fibres jamming the hinge can cause the flap to close resulting in low suction and a pulsating noise.
Gently tap the side of the cyclone over a bin. This will remove any fine dust clogged up in the cyclone.
Using the Combination tool, brush away any dust around the shroud of the cyclone.
Once cleared of any dust, press and hold the trigger for 10 seconds.
Which floor tool are you using?
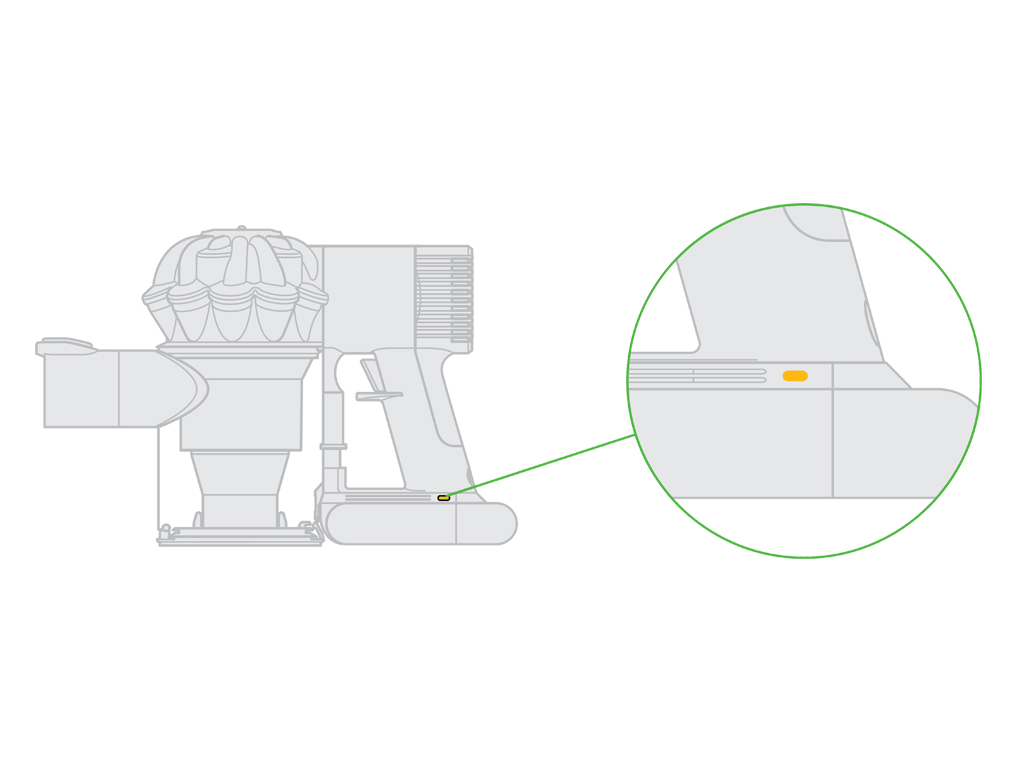
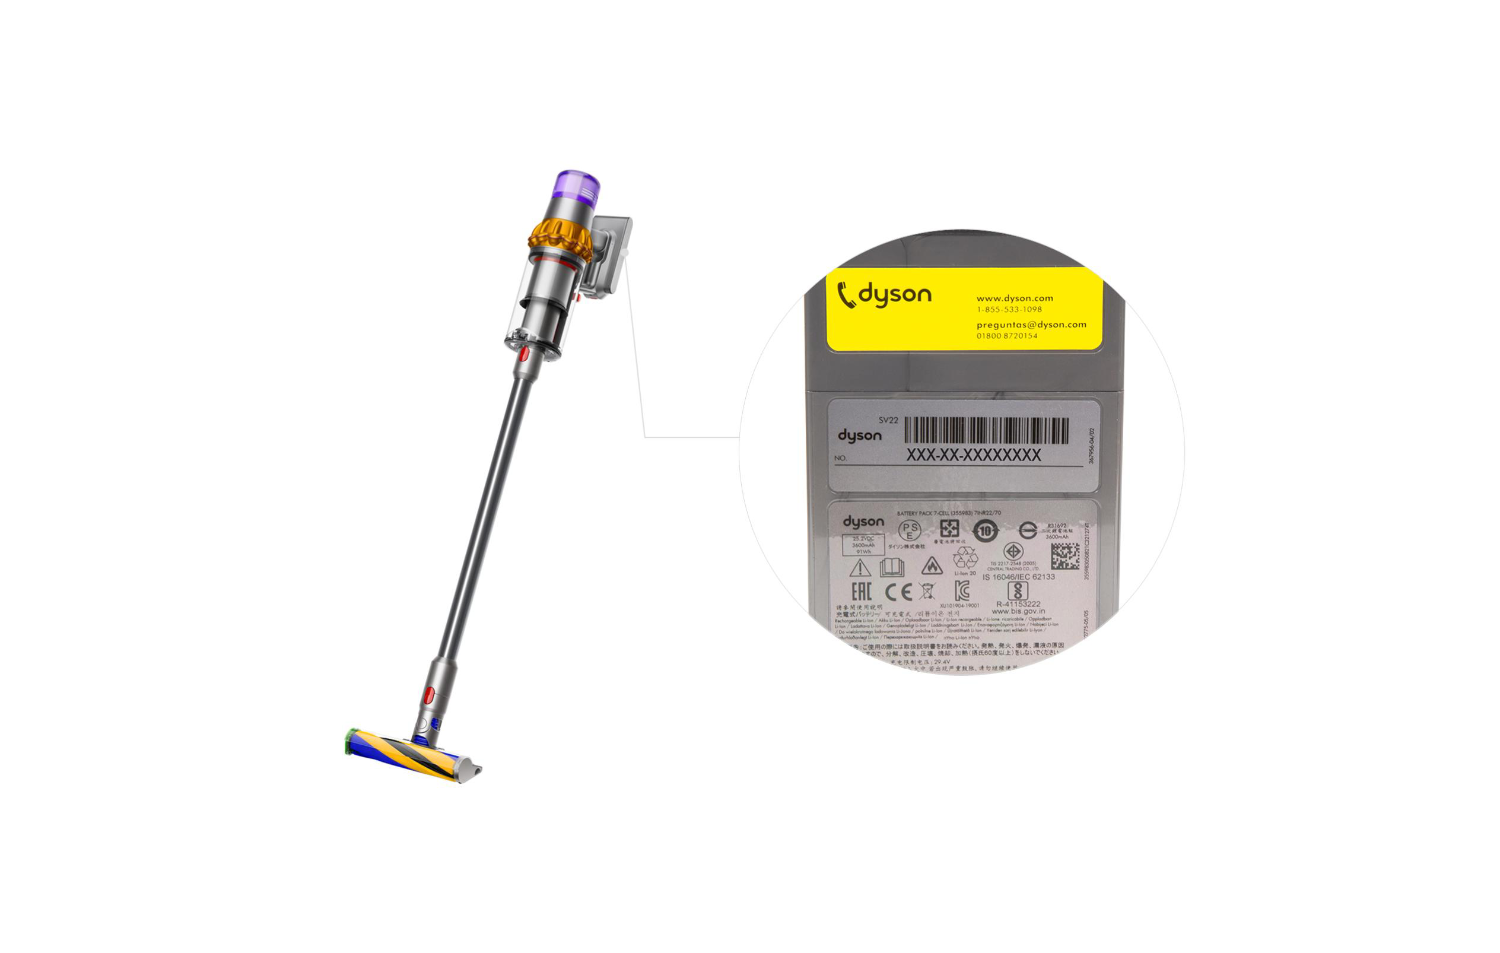
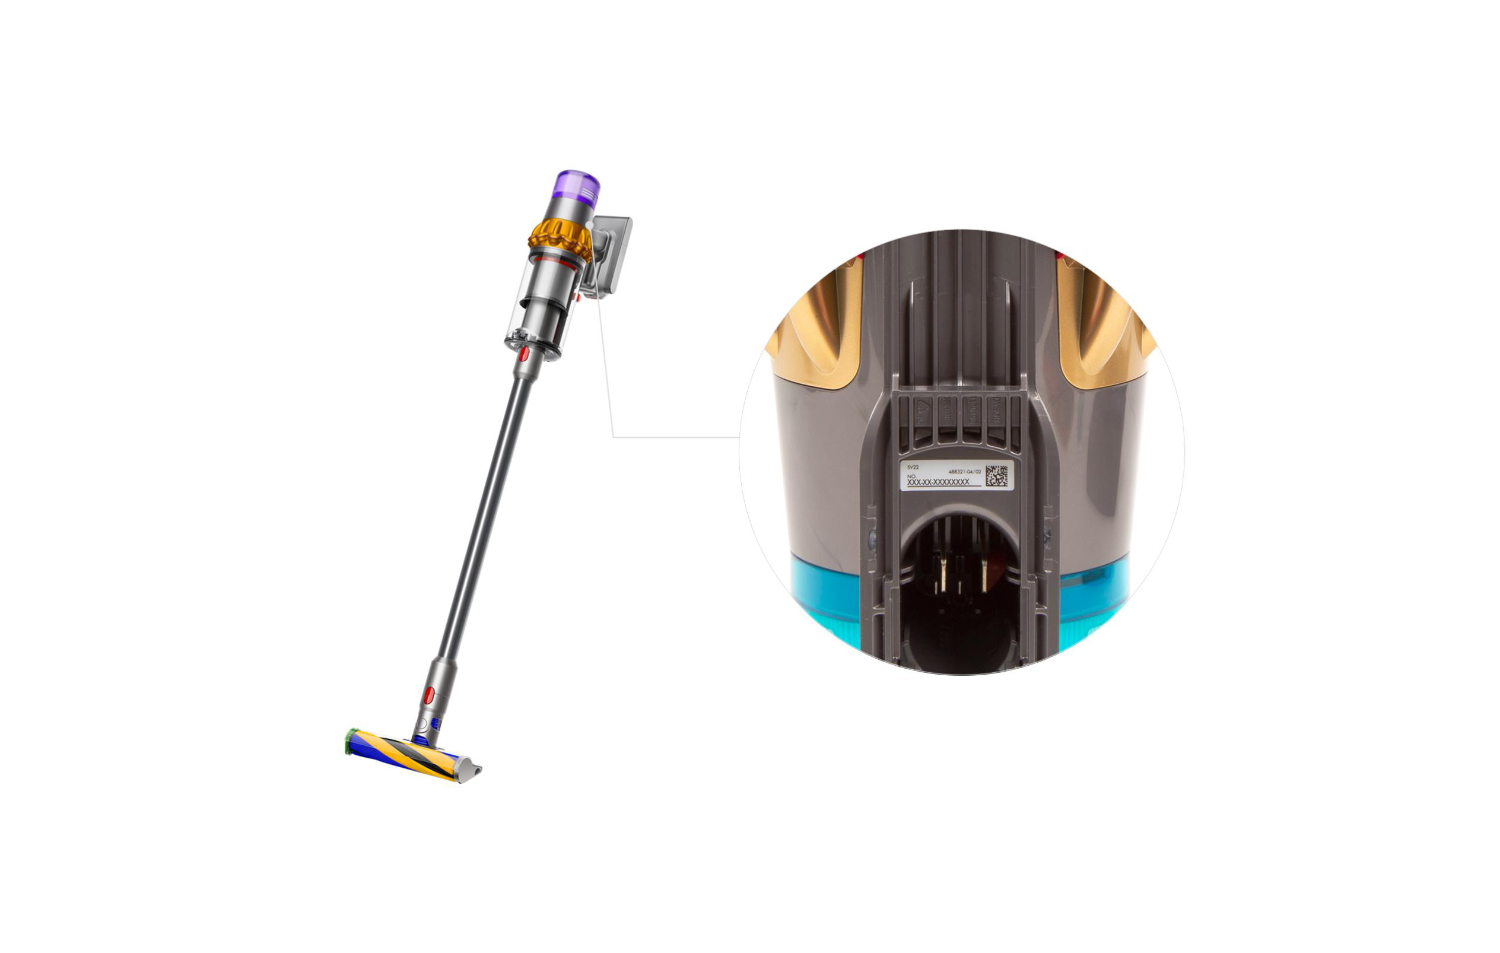
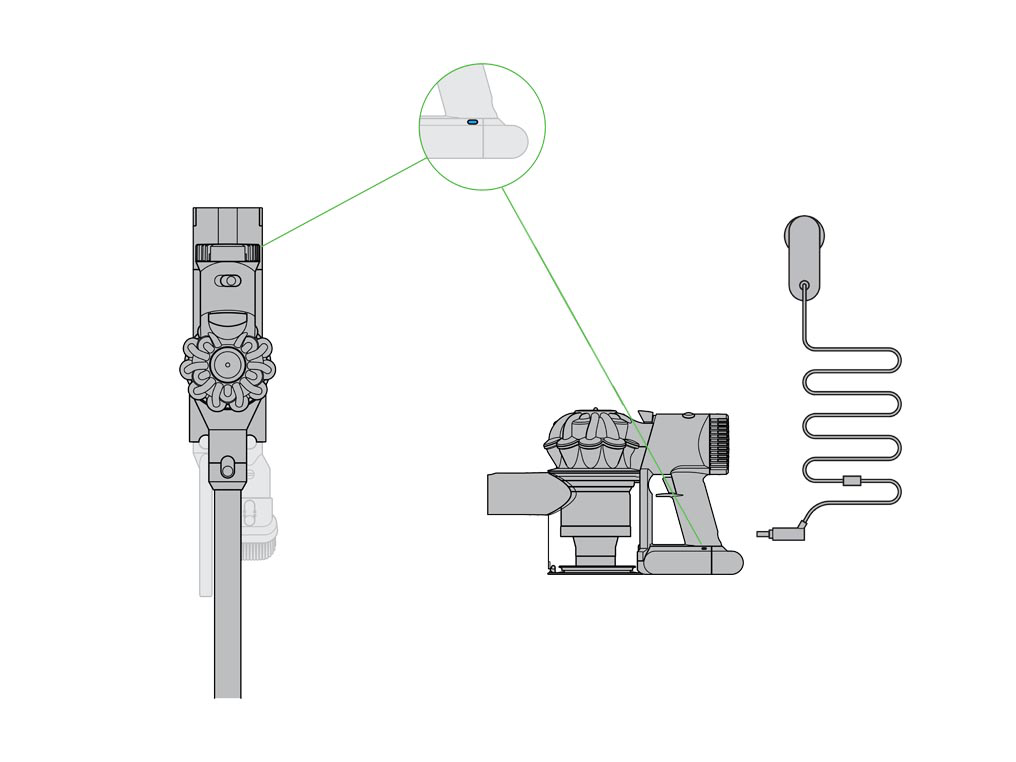
The serial number can be located in three places.
Behind the clear bin
Find the serial number behind the clear bin as shown on the image.
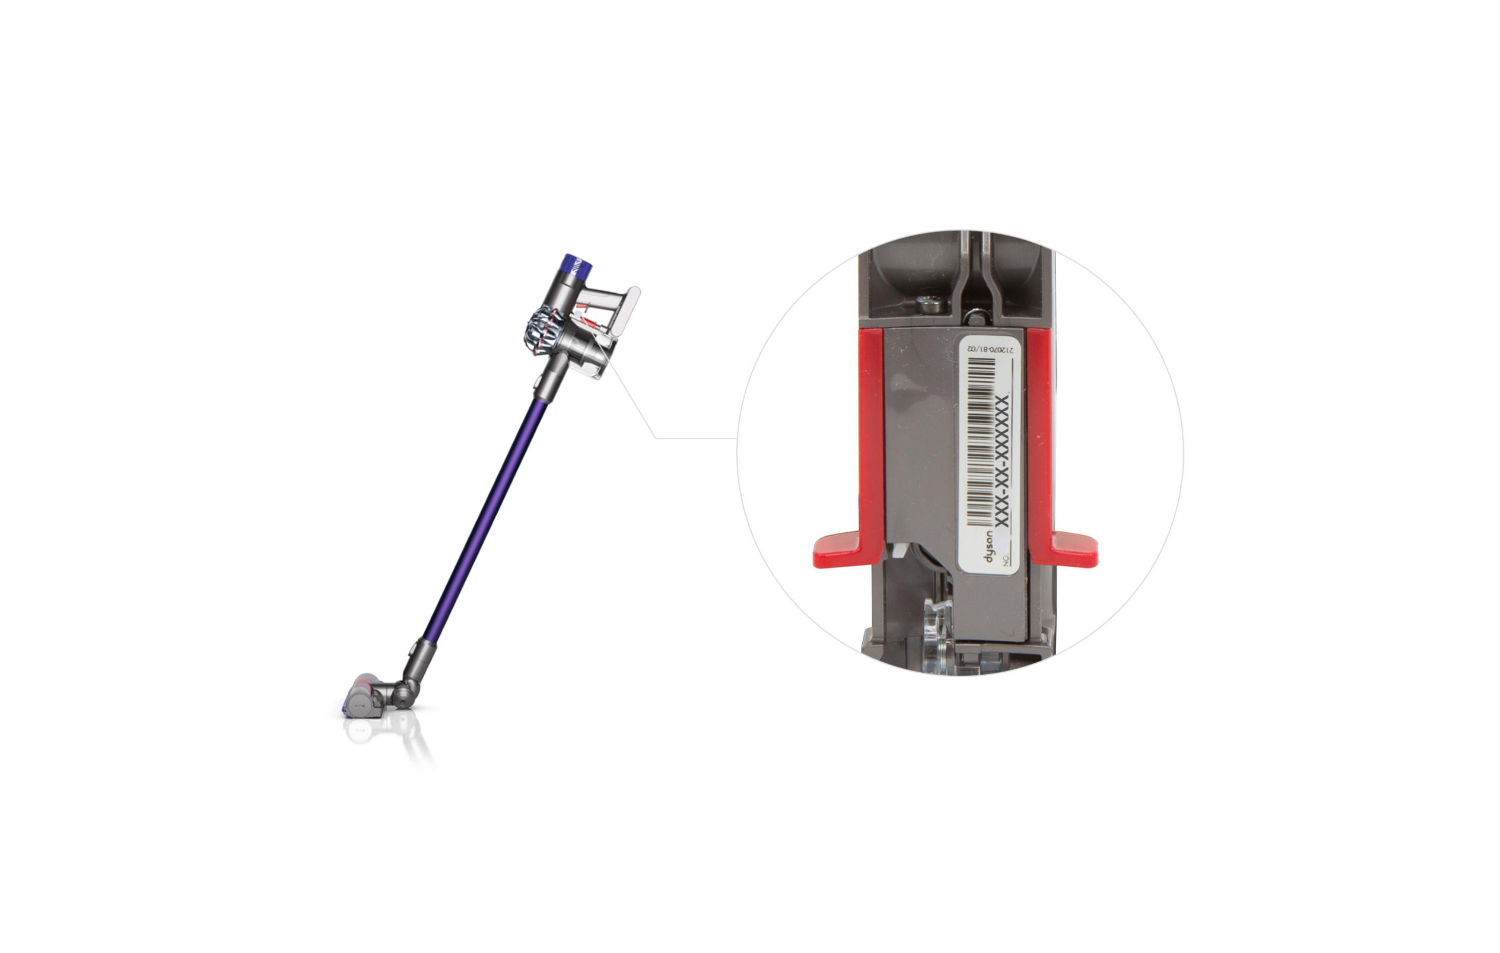
On the underside of the battery pack
The serial number is printed on the back of the battery pack at the base of the handle.
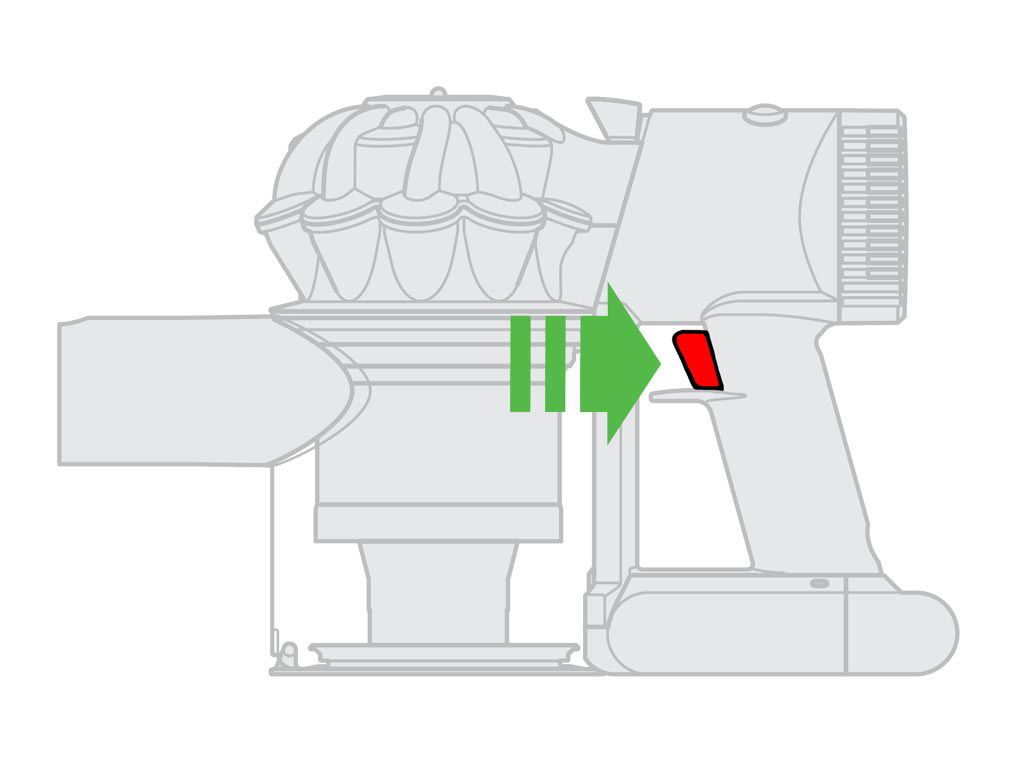
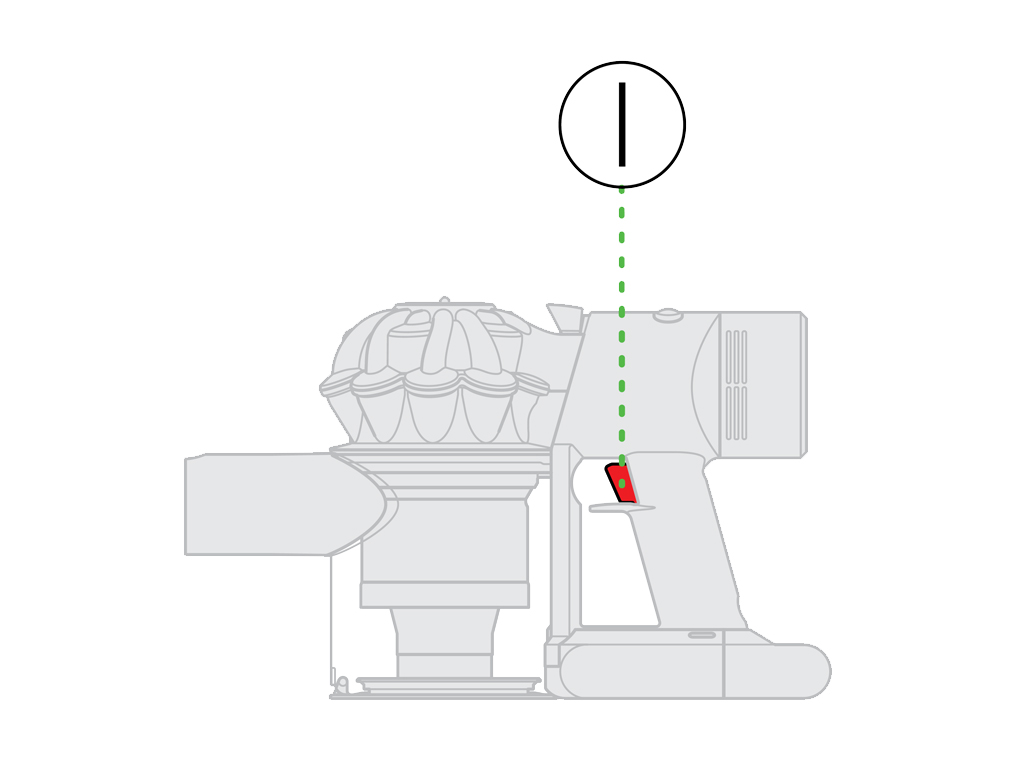
Inside the handle
Remove the battery to reveal the serial number inside the machine’s handle.
Please select the appropriate option
How to buy and fit parts for your machine
Get original replacement parts direct from Dyson and learn how to fit them with your machine.
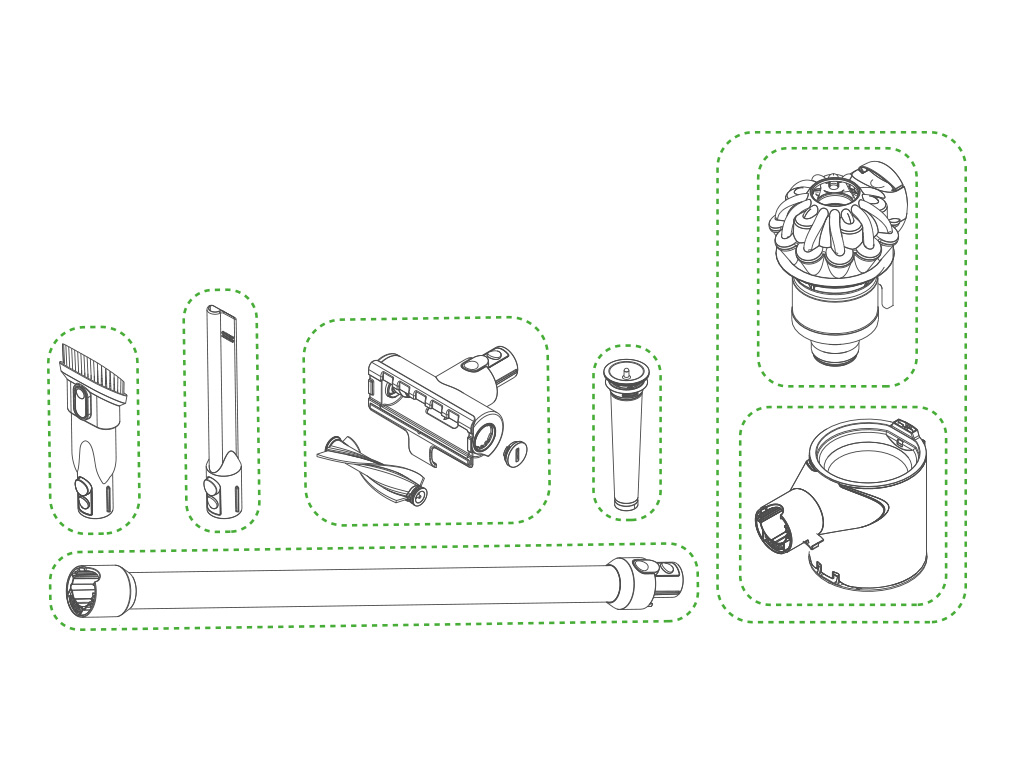
Main body
Choose the part you'd like to replace.
- Docking station
- Main body
- Post-filter
- Battery
- Charger

Cyclone and bin
Choose the part you'd like to replace.
- Combination tool
- Crevice tool
- Quick-release mini Motohead
- Mini motorhead brush bar
- Mini motorised tool end cap
- Pre-filter
- Cyclone
- Bin
- Wand
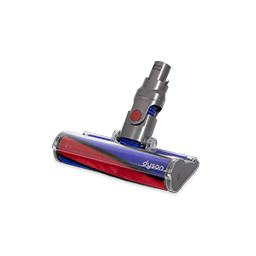
Direct Drive cleaner head
Choose the part you'd like to replace.
- Axle & roller
- V-ball wheel
- Direct Drive cleaner head

Soft roller cleaner head
Choose the part you'd like to replace.
- Soft roller end cap
- Soft roller brush bar
- Soft roller cleaner head
Accessories
Choose the part you'd like to replace.
- Crevice tool
- Quick release adaptor tool
- Quick-release extension hose
- Quick-release stubborn dirt brush
- Quick-release mini soft dusting brush
- Quick-release Mattress tool
- Quick-release up-top adaptor
- In-car charger
- Tool bag
- Quick-release handheld tool kit

Replacement parts
Accessories
Choose the part you'd like to replace.
- Crevice tool
- Quick release adaptor tool
- Quick-release extension hose
- Quick-release stubborn dirt brush
- Quick-release mini soft dusting brush
- Quick-release Mattress tool
- Quick-release up-top adaptor
- In-car charger
- Tool bag
- Quick-release handheld tool kit
Please select the appropriate option

Please select the appropriate option
Plugs into a standard 12V lighter socket for charging in your car, caravan or boat. For use with selected Dyson cordless vacuums.

Please select the appropriate option
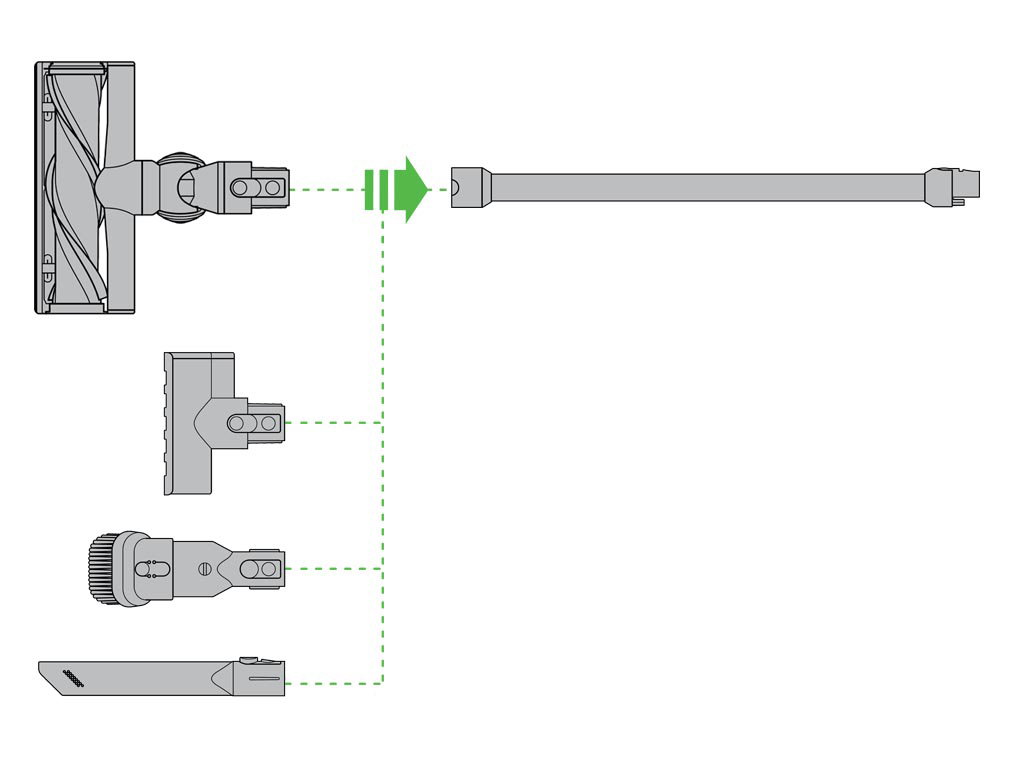
All the tools provided with the machine will fit the wand and the bin inlet.
Attach the tools to the end of the wand, ensuring the connections line up.
Dispose of any old parts in accordance with local codes and regulations.

Cyclone & bin
Choose the part you'd like to replace.
- Combination tool
- Crevice tool
- Quick-release mini Motohead
- Mini motorhead brush bar
- Mini motorised tool end cap
- Pre-filter
- Cyclone
- Bin
- Wand
Please select the appropriate option


Please select the appropriate option
Removing the bin
Remove the clear bin by holding the machine by the handle and pulling the red lever back, and then lift upwards to release the cyclone.
Press the red Bin release catch located to the rear of the clear Bin.
Remove the clear Bin fully.
Replace the bin
To replace the bin, push it up and in to the Main body of the machine until it clicks in to place.

Close the bin base of the machine ensuring it clicks in to place.

Please select the appropriate option
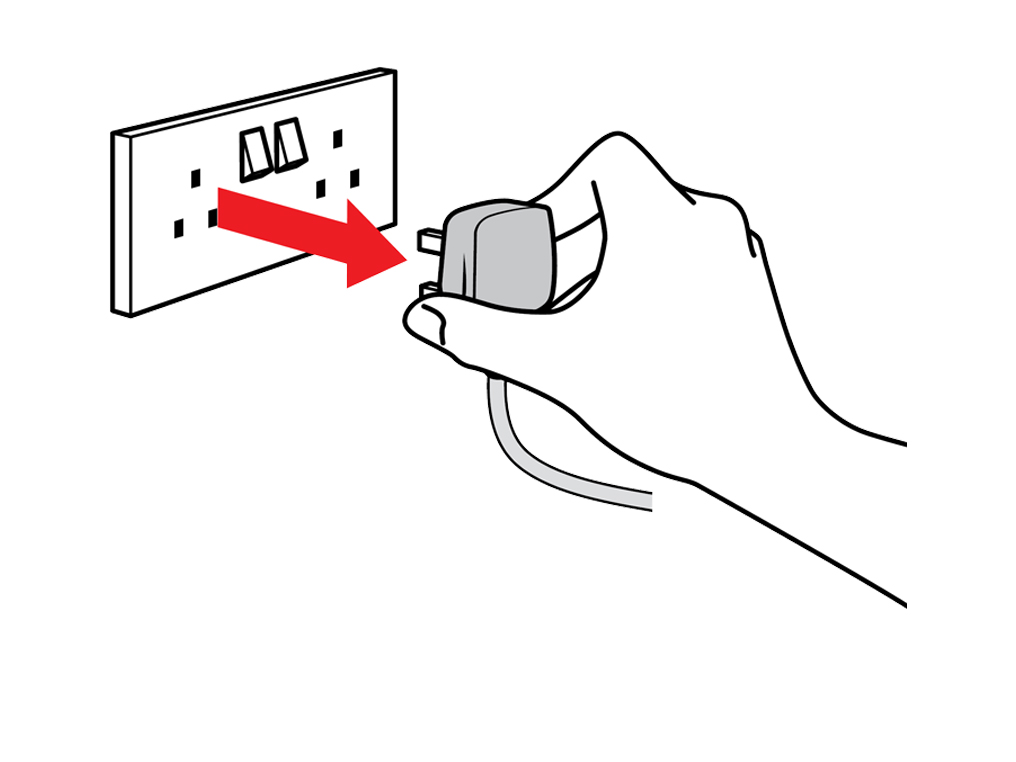
Always ensure that your machine is unplugged from the charger prior to carrying out any maintenance.

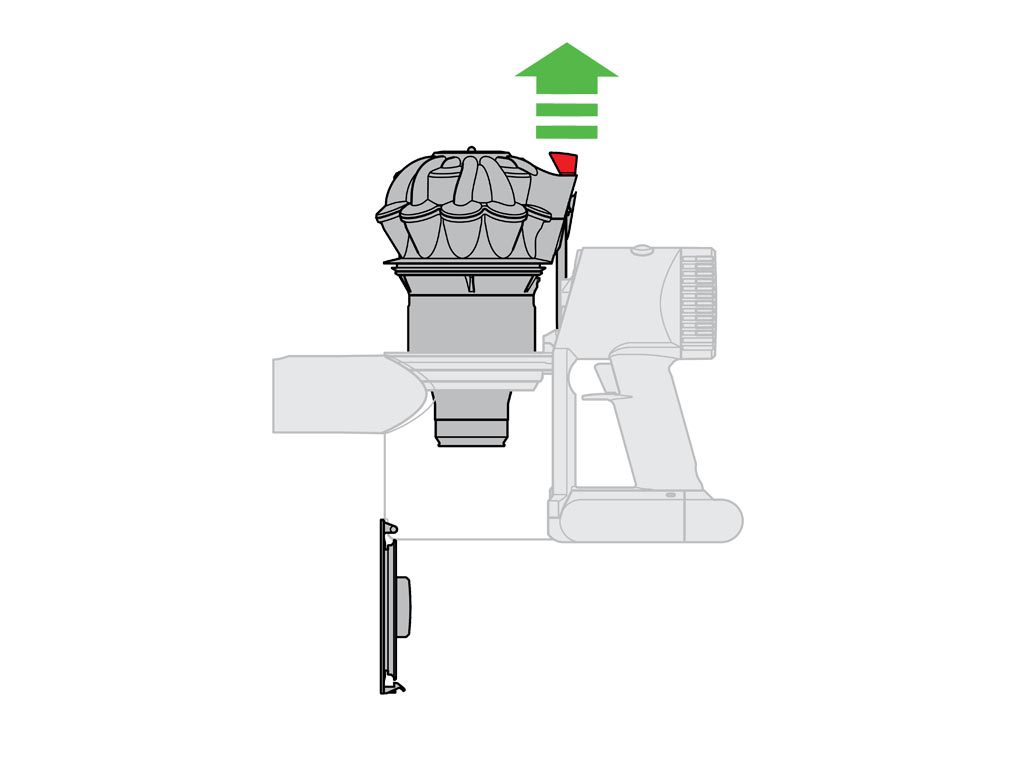
Removing the cyclone
To remove the cyclone, hold the appliance by the handle, pull the red lever towards you and lift upwards until the bin opens, then push in the red button located behind the cyclone and lift the cyclone out.
Replace the cyclone
To attach the replacement cyclone, slide the cyclone into the grooves of the main body and push downwards until it is in its normal position.

Manually close the base of the bin – the base will click when it is securely in place.
Please select the appropriate option
All the tools provided with the machine will fit the wand and the bin inlet.
Attach the tools to the end of the wand, ensuring the connections line up.
The mini motorhead can provide the functionality of the main cleaner head but in hard to reach areas, such as your sofa.
Dispose of any old parts in accordance with local codes and regulations.
Please select the appropriate option
Tools required
A coin is required to replace this part.
Always switch 'OFF' and unplug before carrying out any maintenance.
Remove the brush bar
Using a coin, undo the end cap by rotating anti-clockwise, and remove the brush bar.

Replace the brush bar
Replace the replacement brush bar back into the motorhead, and using a coin lock the end cap by rotating clockwise.

Please select the appropriate option
Tools required
A coin is required to replace this part.
Always unplug before carrying out any maintenance.
Remove the wand from the cleaner head.

Remove end cap
Using a coin, turn the end cap fastener to the unlock position.
Dispose of any parts in accordance with local codes and regulations.

Replace the end cap
Fit the new end cap. Using a coin, turn the end cap fastener to the lock position.
Please select the appropriate option
Always switch 'OFF' and unplug before carrying out any maintenance.
Remove the pre-filter
Lift the pre-filter out of the Cyclone assembly.

Replace the filter
Refit the replacement filter into the Cyclone assembly.

Please select the appropriate option
All the tools provided with the machine will fit the wand and the bin inlet.
Attach the tools to the end of the wand, ensuring the connections line up.
Dispose of any old parts in accordance with local codes and regulations.
Please select the appropriate option
All the tools provided with the machine will fit the wand and the bin inlet.
Attach the tools to the end of the wand, ensuring the connections line up.
Dispose of any old parts in accordance with local codes and regulations.
Please select the appropriate option
All the tools provided with the machine fit directly to the Wand or the bin inlet.
Click the wand to the end of the bin assembly, ensuring the connections line up.
Dispose of any old parts in accordance with local codes and regulations.
Main body
Choose the part you'd like to replace.
- Docking station
- Main body
- Post-filter
- Battery
- Charger
Please select the appropriate option


Please select the appropriate option
Tools required
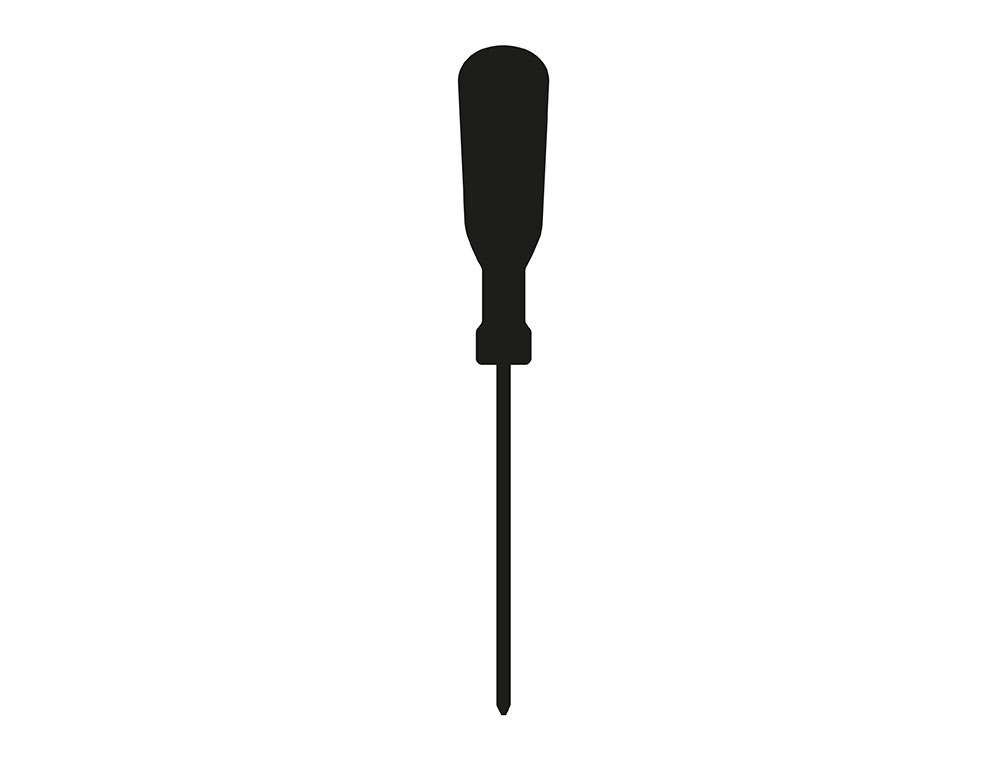
A Phillips head screwdriver is required to replace this part.
Please follow the steps in the video.
Find the text version of the step-by-step guide instead, under "Read the step-by-step guide on replacing the battery".
Were you able to fit your part?
Tools required
A Phillips head screwdriver is required to replace this part.
Always ensure the machine is unplugged from the charger prior to carrying out any maintenance.
Removing the battery
The battery is secured with three Phillips screws. One in the rear of the handle, and two in the underside of the battery.
Remove the three screws.
Dispose of the existing battery as per local codes and regulations.
Replace the battery
Locate the new battery into the handle.
Secure in place with the three existing/supplied screws.

A new battery will only be partially charged, and will require a full charge prior to use.
Please select the appropriate option
Tools required
A Phillips head screwdriver is required to replace this part.
Please follow the steps in the video.
Find the text version of the step-by-step guide instead, under "Read the step-by-step guide on replacing the charger".
Were you able to fit your part?
Tools required
A Phillips head screwdriver is required to replace this part.
Please note that wall fixings are not included with the dock.
Fitting the charger
Feed the charger cable through the rear of the dock, ensuring it is held via the retainer clip as shown in the image.

Clip the end of the charger cable in the small bracket located to the front of the dock until it clicks.

How to replace the dock
When securing the dock to the wall, ensure there is a distance of 1.2m/47¼” from the floor. This is to allow the machine to sit in the dock without touching the floor.

Drill two holes as per the recommended height in the instruction leaflet.

Secure the dock using appropriate fixings for the wall type.

Please select the appropriate option
Tools required
A Phillips head screwdriver is required to replace this part.
Please follow the steps in the video.
Were you able to fit your part?
Tools required
A Phillips head screwdriver is required to replace this part.
Please note that wall fixings are not included with the dock.
Fitting the charger
Feed the charger cable through the rear of the dock, ensuring it is held via the retainer clip as shown in the image.
Clip the end of the charger cable in the small bracket located to the front of the dock until it clicks.
How to replace the dock
When securing the dock to the wall, ensure there is a distance of 1.2m/47¼” from the floor. This is to allow the machine to sit in the dock without touching the floor.
Drill two holes as per the recommended height in the instruction leaflet.
Secure the dock using appropriate fixings for the wall type.
Please select the appropriate option
Tools required
A Phillips head screwdriver is required to replace this part.
Please follow the steps in the video.
Find the text version of the step-by-step guide instead, under "Read the step-by-step guide on replacing the main body".
Were you able to fit your part?
Tools required
A Phillips head screwdriver is required to replace this part.
Always ensure that your machine is unplugged from the charger prior to carrying out any maintenance.
Remove the Cyclone
Lift the red bin base release catch to open the bin base.

Press the red cyclone release catch to release the cyclone and remove from the main body.

Remove the bin
Press the red bin release catch and remove the bin from the main body.

Remove the screw-in battery
The main body is secured to the battery with three Phillips screws. There are two in the underside of the battery. The third screw is located in the rear of the handle.
Remove the main body from the battery.
Remove the filter
Rotate the post filter anti-clockwise until the two solid black dots line up, and pull the post filter off the back of the machine.
Dispose of any old parts in accordance with local codes and regulations
Refit the filter
Refit the replacement post filter onto the machine. First align the two solid black dots, then rotate clockwise until the solid black dot lines up with the empty circle.

Refit the battery
Secure in place with three existing/supplied screws.
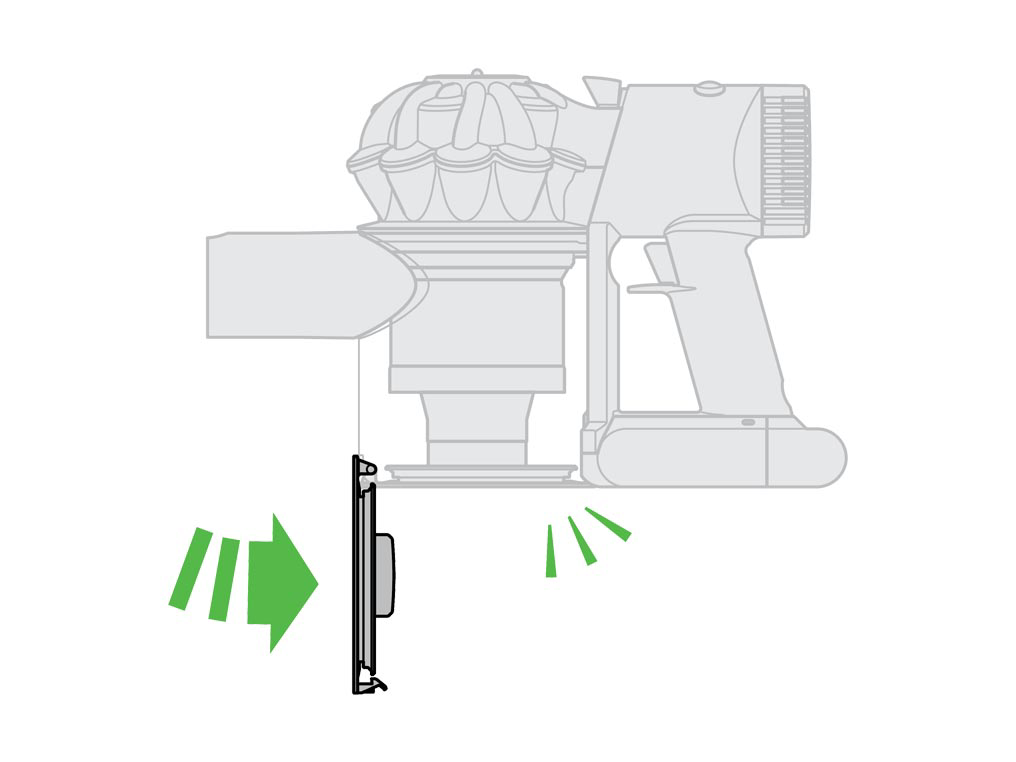
Refit the bin
To refit the bin, locate the tabs at the back of the bin in the main body, push the bin up until it locks in place and the power connectors are fitted.

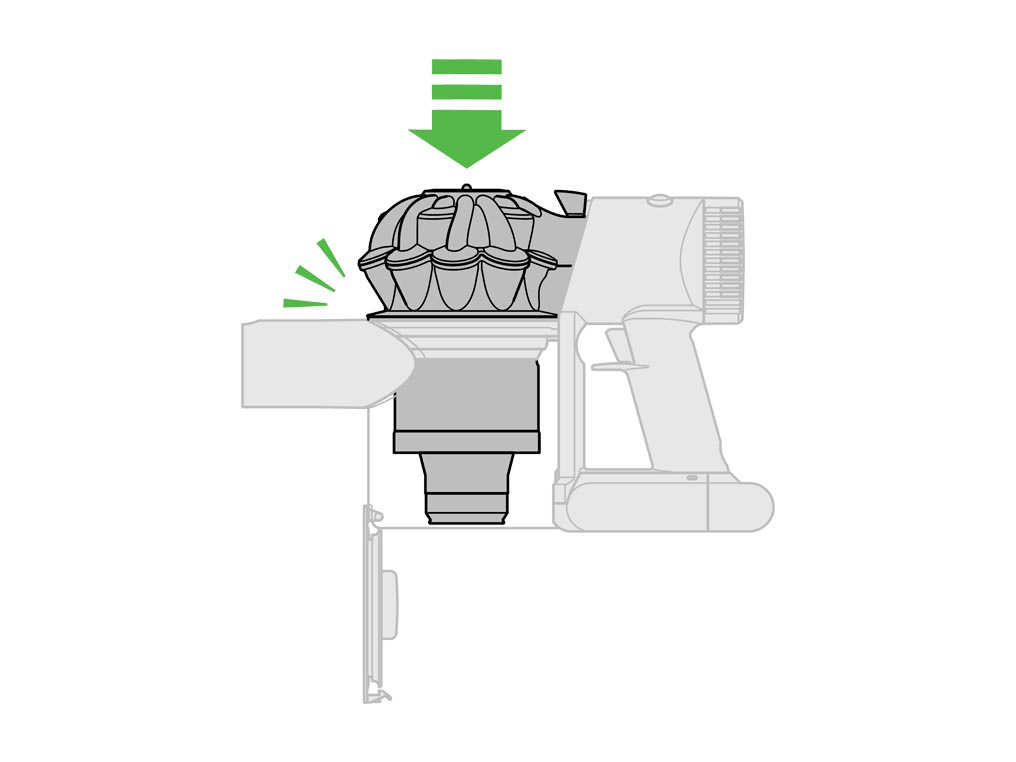
Refit the cyclone
To refit the cyclone align the runners on the cyclone into the slots on the main body, slide the cyclone down until it clicks in place.
When closing the bin, ensure that the base is securely closed and that there is no gap present between the top of the bin and the cyclone.
Please select the appropriate option
Always ensure the machine is unplugged from the charger prior to carrying out any maintenance.
Removing the filter
Rotate the post filter anti-clockwise until the two solid black dots line up, and pull the post filter off the back of the machine.
Replace the filter
Refit the replacement post-filter onto the machine. First align the two solid black dots, then rotate clockwise until the solid black dot lines up with the empty circle.
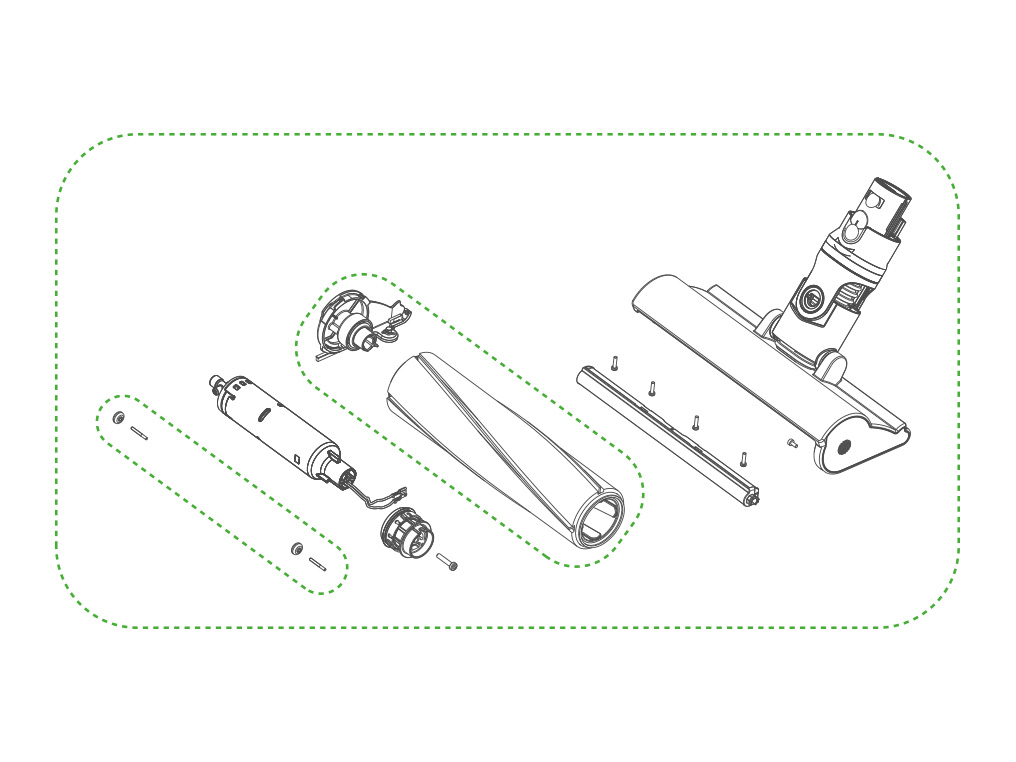
Direct drive cleaner head
Choose the part you'd like to replace.
- Direct drive cleaner head
- Axle & roller
- V-ball wheel
- Brush bar
Please select the appropriate option


Please select the appropriate option
All the tools provided with the machine will fit the wand and the bin inlet.
Attach the tools to the end of the wand, ensuring the connections line up.
Dispose of any old parts in accordance with local codes and regulations.
Please select the appropriate option
Tools required
A coin is required to replace this part.
Always switch 'OFF' and unplug before carrying out any maintenance.
Remove the wand from the cleaner head.
Remove the brush bar
Using a coin, undo the end cap by rotating anti-clockwise

And remove the brush bar

Dispose of any old parts in accordance with local codes and regulations.
Replace the brush bar
Replace the brush bar back into the motorhead, and using a coin lock the end cap by rotating clockwise.

Please select the appropriate option
Tools required
A phillips screwdriver is required to replace this part.
Please follow the steps in the video.
Find the text version of the step-by-step guide instead, under "Read the step-by-step guide on replacing the v-ball wheel".
Were you able to fit your part?
Tools required
A phillips screwdriver is required to replace this part.
Always ensure that your machine is unplugged from the charger prior to carrying out any maintenance.
Remove the v-ball wheel
Using a small Phillips screwdriver, remove the screw from the V-ball wheel.
Next, remove the washer, then lift the V-ball wheel off its spindle.
Dispose of any parts in accordance with local codes and regulations.
Replace the v-ball wheel
Place the new V-ball wheel onto the spindle, fit the washer, and secure with the screw.
Repeat the process to replace the other V-ball wheel.
Soft roller cleaner head
Choose the part you'd like to replace.
- Soft roller end cap
- Soft roller brush bar
- Soft roller cleaner head
Please select the appropriate option


Please select the appropriate option
Tools required
A coin is required to replace this part.
Please follow the steps in the video.
Find the text version of the step-by-step guide instead, under "Read the step-by-step guide on replacing the soft roller brush bar".
Were you able to fit your part?
Tools required
A coin is required to replace this part.
Always switch 'OFF' and unplug before carrying out any maintenance.
Remove the cleaner head
Remove the soft roller head from the wand.
On the base of the cleaner head, undo the brush bar end cap fastener by turning a coin anti clockwise until it clicks.

Lift the end cap up, remove and place to one side.
Remove the brush bar.

Dispose of any old parts in accordance with local codes and regulations.
Refit the end cap
Slide the new brush bar into the cleaner head.
Take care to align the end cap correctly when refitting. The end cap needs to go in at a 45-degree angle otherwise it cannot be pushed down into place.

Tighten the end cap fastener using a coin, ensuring the fastener is fully turned.
Reconnect the soft roller head back to your machine.

Please select the appropriate option
All the tools provided with the machine will fit the wand and the bin inlet.
Attach the tools to the end of the wand, ensuring the connections line up.
Dispose of any old parts in accordance with local codes and regulations.

Please select the appropriate option
Tools required
A coin is required to replace this part.
Always unplug before carrying out any maintenance.
Remove the cleaner head
Remove the soft roller head from the wand.
On the base of the cleaner head, undo the brush bar end cap fastener by turning a coin anti clockwise until it clicks.

Remove the end cap
Remove the end cap and set aside dispose in accordance with local codes and regulations.
Replace the end cap
Reattach the new end cap to the brush bar so that it's in the open position.

Take care to align the end cap correctly. Position at a 45 degree angle, otherwise it cannot be pushed down into place.
Push the end cap until it clips securely back into the closed position.

Tighten the end cap fastener using a coin, ensuring the fastener is fully turned.
Check the floor tool
If the machine is not performing as well as it used to this is typically caused by a partial or full blockage within the openings of the machine.
Which floor tool are you using?


Washing the filter
To remove the filter, lift it out of the top of the machine.
With cold water only, run water over the outside of the filter until the water runs clear.
Turn the filter upside down and shake to remove any excess debris.
Squeeze and twist the filter with both hands to make sure the excess water is removed.
Lay the filter on its side to dry. Leave to dry completely for a minimum of 24 hours.
Do not put the filter in a dishwasher, washing machine, tumble dryer, oven, microwave or near a naked flame.
To refit the filter, place the dry filter back into the top of the machine. Ensure it is fitted properly.
Damp or musty smell still present
Under normal use, any unpleasant smell can only be caused by something the machine has picked up. Please select pick up issues to carry out checks.
If you are able to locate the smell to a part of the machine, replacing the part may help eliminate the smell. For this, please select Part broken.
Please select the appropriate option
Remove the bin
Pull the cyclone release catch upwards until the bin base opens.
Press the red catch once the bin base is open to release the bin.
Clean the bin
Clean the bin with a damp cloth only. Do not use any detergents, polishes or air fresheners to clean the bin. Do not put the bin in the dishwasher.
Refit the bin
Reassemble and test the machine.
Test the floor tool
Please connect the floor tool directly on to the bin.
If the Brush bar on every tool spins when connected to the bin, please select the Wand is damaged.
Which floor tool are you using?
Open the bin
Pull the cyclone release catch upwards until the bin base opens.
Remove the bin
Press the red catch underneath the bin once the bin base is open to release it from the machine.
Check the electrical contacts on the bin
Once the bin has been removed, clean the electrical contact from any dust.
The electrical contacts are located at the top of the bin where it connects to the Main body.
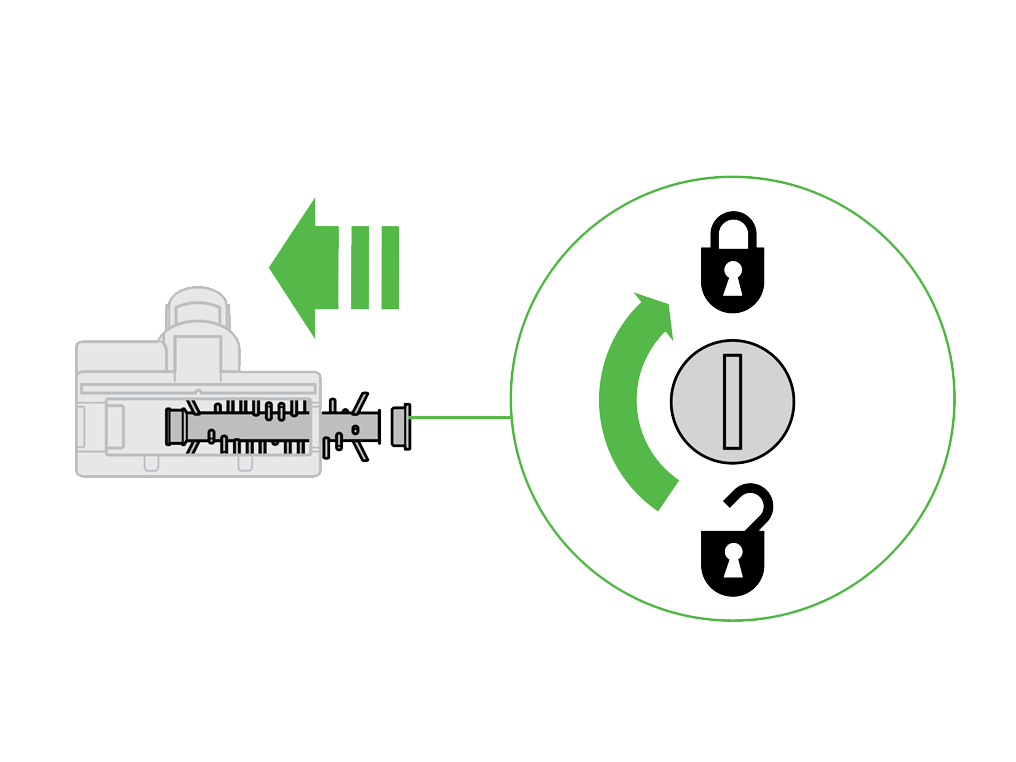
Check the floor tool
On the side of the Direct drive cleaner head, locate the end cap. Using a coin, turn the end cap anticlockwise a quarter of the way to remove it.
Note: There should be a small padlock icon along with directional arrows to help you unlock the end cap.
Remove the Brush bar from the Cleaner head and clear away any hair or fibres.
Check the neck of the Cleaner head (where the Cleaner head connects to the Wand) for any blockages. Ensure there is no build up of dust or debris in the small crevice between where the Brush bar sits and the neck of the Cleaner head.
With the Brush bar clear from any debris, refit it back into the Cleaner head and securely fasten the end cap.
Place the Cleaner head onto the bin and test the machine.
Clear the floor tool
On the side of the Mini motorised head, locate the end cap. Using a coin, turn the end cap anticlockwise a quarter of the way to remove it.
Note: There should be a small padlock icon along with directional arrows to help you unlock the end cap.
Remove the Brush bar from the Cleaner head and clear away any hair or fibres.
Check the neck of the Cleaner head (where the Cleaner head connects to the Wand) for any blockages. Ensure there is no build up of dust or debris in the small crevice between where the Brush bar sits and the neck of the Cleaner head.
With the Brush bar clear from any debris, refit it back into the Cleaner head and securely fasten the end cap.
Place the Cleaner head onto the bin and test the machine.
Check the floor tool
Under the Cleaner head by the Soft roller, locate the fastener. Using a coin, turn the fastener anticlockwise a quarter of the way to remove the end cap.
Note: There should be a small padlock icon along with directional arrows to help you unlock the end cap.
Remove the Brush bar from the Cleaner head and clear away any hair or fibres.
Check the neck of the Cleaner head (where the Cleaner head connects to the Wand) for any blockages. Ensure there is no build up of dust or debris in the small crevice between where the Brush bar sits and the neck of the Cleaner head.
With the Brush bar clear from any debris, refit it back into the Cleaner head and securely fasten the end cap.
Place the Cleaner head onto the bin and test the machine.
Remove the bin
Pull the cyclone release catch upwards until the bin base opens.
Press the red catch underneath the bin once the bin base is open to release it from the machine.
Clear any debris from behind the bin inlet flap.
Reassemble and test the machine.
Remove the bin
Pull the cyclone release catch upwards until the bin base opens.
Press the red catch underneath the bin once the bin base is open to release it from the machine.
The Wand
Check the catch on the bin inlet for blockages or damage.
Make sure that it moves freely and springs back into position when pressed.
Check the end of the Wand for signs of damage.
Remove any dust or debris from the ends of the Wand. Wipe the contacts with a dry cloth.


Assembling your Dyson machine
Attach the Wand to the machine via the bin inlet.

Attach the floor tool to the end of the Wand until it clicks.

Installing the wall dock
Please note that wall fixings are not included with the dock.
Feed the charger cable through the rear of the dock, ensuring it is held via the retainer clip as shown in the image.
Clip the end of the charger cable in the small bracket located to the front of the dock assembly until it clicks.

When securing the dock to the wall, ensure there is a distance of 1.2m/47¼” from the floor. This is to allow the machine to sit in the dock without touching the floor.
Finding the serial number
The serial number can be found underneath the machine on the battery.

How to attach the accessories
All the tools provided with the machine fit directly to the Wand or the bin inlet.

Click the tools to the end of the Wand, ensuring the connections line up.
How to charge the battery
The machine can be charged on the dock or by plugging the charger directly to the machine.
The light on the charger will show when the machine is being charged and will go out when charging is complete.
The battery should be fully charged after 3.5 hours.
Empty the bin
Empty as soon as the dirt reaches the level of the MAX mark - do not overfill. Ensure the machine is disconnected from the charger before emptying the clear bin. Be careful not to pull the 'ON' trigger.

To release the dirt, hold the appliance by the handle, pull the red lever back and lift upwards.

Continue until the bin base automatically opens and releases the dirt.
Once the dirt is released, push the cyclone back down until it clicks.
Close the bin base of the machine ensuring it clicks in to place.
To close, push the cyclone downwards until it is in the normal position and manually close the base of the bin. The base will click when it is securely in place.
How to clean the bin and cyclone
Remove the clear bin by holding the machine by the handle and pulling the red lever back, and then lift upwards to release the cyclone.

Press the red Bin release catch located to the rear of the clear Bin.
Remove the clear Bin fully.

Clean the bin with a damp cloth only. Do not use any detergents, polishes or air fresheners to clean the bin. Do not put the bin in the dishwasher.

Clean the cyclone shroud with the brush on the combination tool to remove lint and dust.
Do not immerse the whole cyclone unit in water or pour water into the cyclones.

Ensure the bin is completely dry before replacing. To replace the bin, push it up and in to the Main body of the machine until it clicks in to place.

Close the bin base so it clicks into place and is secure.
Clear the floor tool
On the side of the Cleaner head, locate the end cap. Using a coin, turn the end cap anticlockwise a quarter of the way to remove it.
Note: There should be a small padlock icon along with directional arrows to help you unlock the end cap.

Remove the Brush bar from the Cleaner head and clear away any hair or fibres.
Check the neck of the Cleaner head (where the Cleaner head connects to the Wand) for any blockages. Ensure there is no build up of dust or debris in the small crevice between where the Brush bar sits and the neck of the Cleaner head.

With the Brush bar clear from any debris, refit it back into the Cleaner head and securely fasten the end cap.
Place the Cleaner head onto the bin and test the machine.
Clean the floor tool
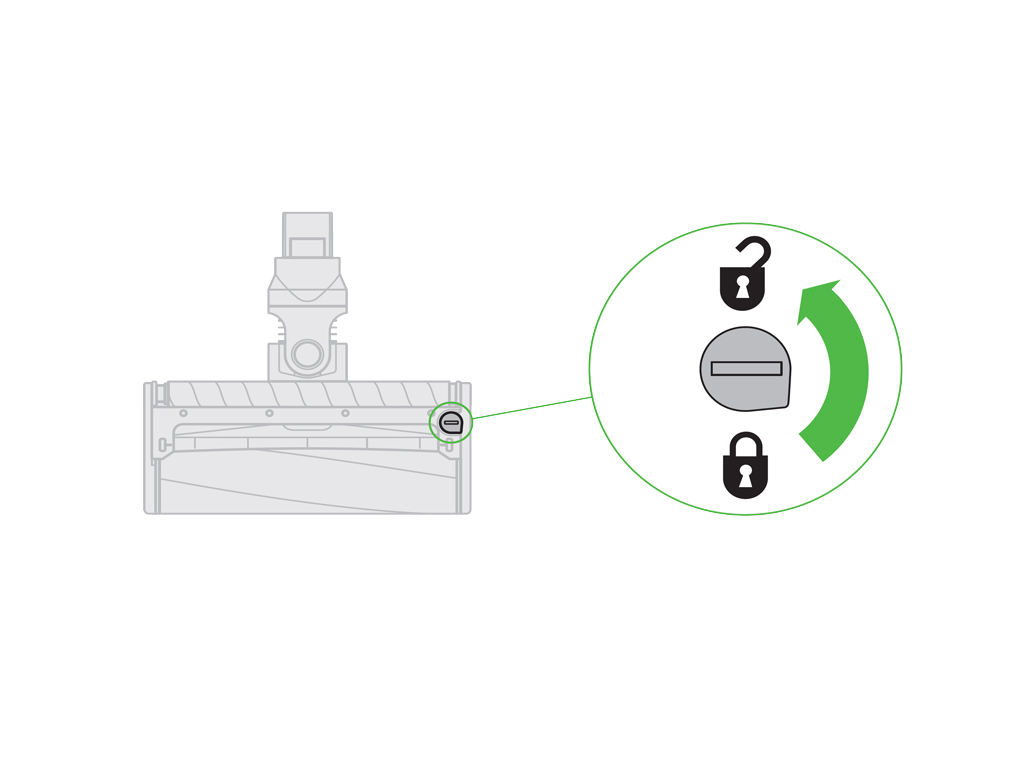
Undo one fastener to remove the Brush bar.
Remove the Brush bar from the Cleaner head and clear away any hair or fibres.
Check the neck of the Cleaner head (where the Cleaner head connects to the Wand) for any blockages. Ensure there is no build up of dust or debris in the small crevice between where the Brush bar sits and the neck of the Cleaner head.
With the Brush bar clear from any debris, refit it back into the Cleaner head and securely fasten the end cap.
Place the Cleaner head onto the bin and test the machine.
Clean the Soft roller cleaner head
With the floor tool removed from the machine, turn over and undo the fastener.
Pull end cap away from the Brush bar.
WARNING: Do not wash the end cap.

Rotate the end cap to unlock and remove.
Wash the Soft roller cleaner head.

Allow the Brush bar to dry for 24hrs.

Reattach the end cap to the large Brush bar.

Refit the Soft roller cleaner head.
Use a coin to lock the fastener.


Further help
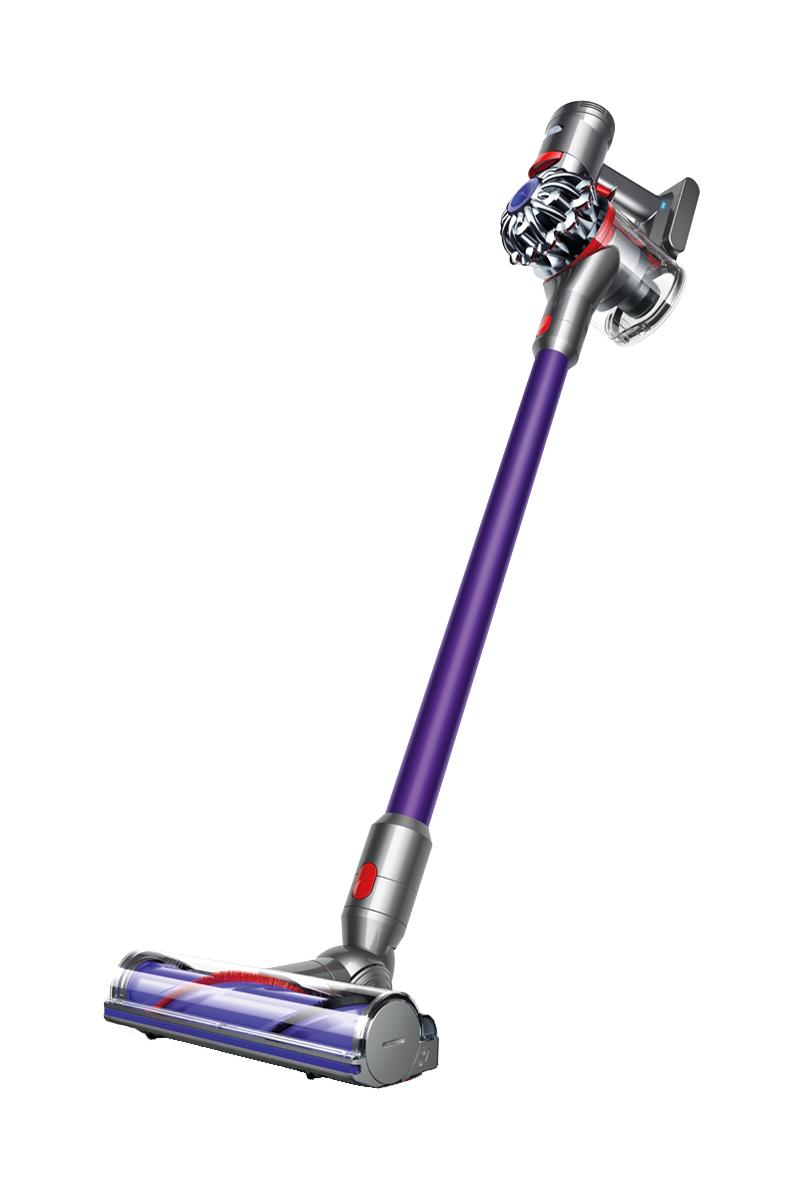
Dyson V7 Vacuum Cleaner Refurbished (Colour may vary)